
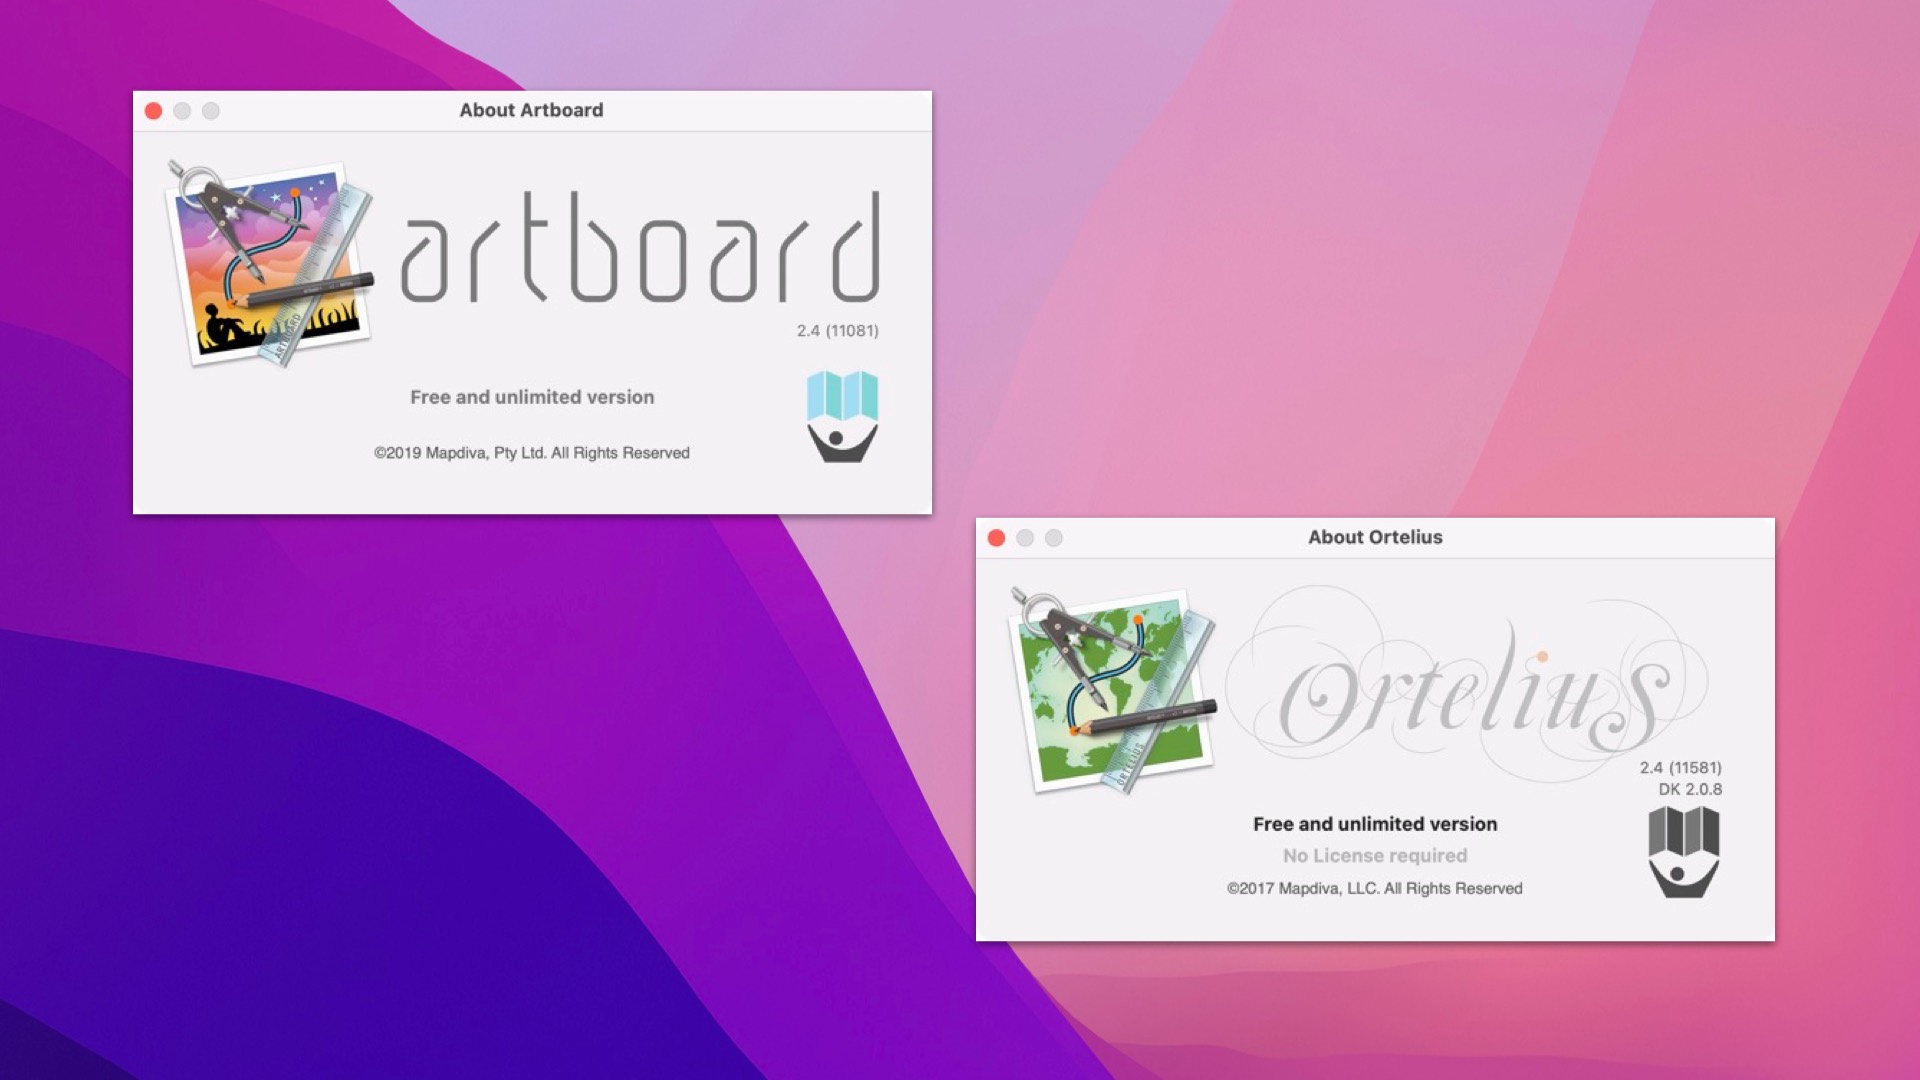
ArtBoard and Ortelius now Free!
MapDiva Closes it doors
In June, MapDiva announced that they are discontinuing supporting the ArtBoard and Ortelius. This is the announcement that they put on their website:
Unfortunately a series of overwhelming external forces and lack of resources has forced this decision, among which was the withdrawal of support for our chosen licensing scheme by Devmate. One effect of this is that existing licenses will become deactivated over time. All subscriptions will end when the current period expires, and no further charges will be made -- customers do not need to cancel their subscriptions manually.
As a courtesy, a fully unlocked, free, and unlimited version of Ortelius (and Artboard) can be downloaded below to allow you to continue to finish projects. There is no longer any support available, however. Note that this is a fully notarized app -- something we were unable to release previously due ironically to problems with the licensing framework. With that removed, the notarization could proceed successfully. This version also supports Big Sur and M1 Macs natively.
Yup, your read that right, you can now download Artboard and Ortelius for free! This is a big deal since Artboard was selling for $39.99 and Ortelius $399.
This is a great way to get your hands on some pretty powerful vector drawing applications.
Purchased in 2016
I purchased ArtBoard in 2016, and for a while wrote a few blog posts. I was really getting into the application for some occasional use. Some of the blog post images in the summer of 2016 were done using ArtBoard. I did consider purchasing an upgrade but didn't think it was worth it as I thought Affinity Designer was more useful for my needs.
Works in macOS Monterey
As for the free versions of ArtBoard and Ortelius, I have verified that they both work on macOS Monterey (12.0.1). Ok so I haven't tried all the functionality but it seems stable.
Five Reasons to Download
Hands-on Exercises - If you haven't use a vector pen before, it can get a bit difficult to use. Both ArtBoard and Ortelius have Hand-On Exercises to learn how to apply curves. They are easy to follow and certainly
Create Your Own Street Map! - Using Ortelius you can create your own personal street map! This is something that will take time to create. There are some Hands-on Exercises that can guide you, but I think it will take some trial and error to create an awesome map.
Templates - In ArtBoard there are Social Media templates to help you plan your social media graphics. While these may seem a bit dated - they are from 2016 - you can update the default template to your image specs. There are business card templates for Moo.com too.
Library Manager - There are 1,961 library items in ArtBoard and 1,809 in Ortelius. These graphics might help add some variation to your images.
Text Effects - In ArtBoard you can easily create text paths with various curves and styles. I find it a lot easier to create text on the circle path in ArtBoard than in Affinity Designer.
Help & Support
MapDiva has removed all support for ArtBoard and Ortelius, there's no help in the application anymore. Hey, it's free - remember! You can download the old PDF manuals as a guide to learn ArtBoard and Ortelius:
- ArtBoard 1.9 User Guide - This is the only versions that I have.
- Ortelius 1.5 User Guide - I don't know if there's a newer version.
Download ArtBoard and Ortelius
You can download ArtBoard and Ortelius from MapDiva's website. I don't know how long they are going to make these downloads available.
PermalinkRemoving Color in Affinity Photo
Quick Tips on removing color in Affinity Photo
This is a question that I get asked frequently in regards to Affinity Photo:
How do you select a color in an image so that I can change it or make it transparent?
The key thing to do is to rasterize the image. When you do this, you get to delete anything you selected and you can create new layers based on your selection. Rasterizing flattens an image to create pixel layers. You have to do this even to some images. (I know it seems weird.)
To rasterize, simply right-click on the layer in the layers pallet and select Rasterize.
Now when you use the "Select Sample Color...", simply click the delete key. Alternatively, you can Copy/Paste the selection. When you do that, a new layer gets created with your selection. Now you can apply various filters to change the color.
If hitting the delete key doesn't erase the selection, it means that you didn't rasterize the layer or you're not editing on the right layer.
What's the best way to select all like colors in an image?
I would recommend using the "Select Sample Color..." in the select menu and adjusting the tolerance that best fits your needs. Remember, you can always add/remove pixels using the selection tool brush.
The "Select Sample Color is a powerful tool and useful when you want to get all those colors in-between spaces.
Once the color is selected, move it to its own layer and have fun making the color adjustments.
Affinity Photo is a pretty powerful photo tool, as there's more than one way to do things.
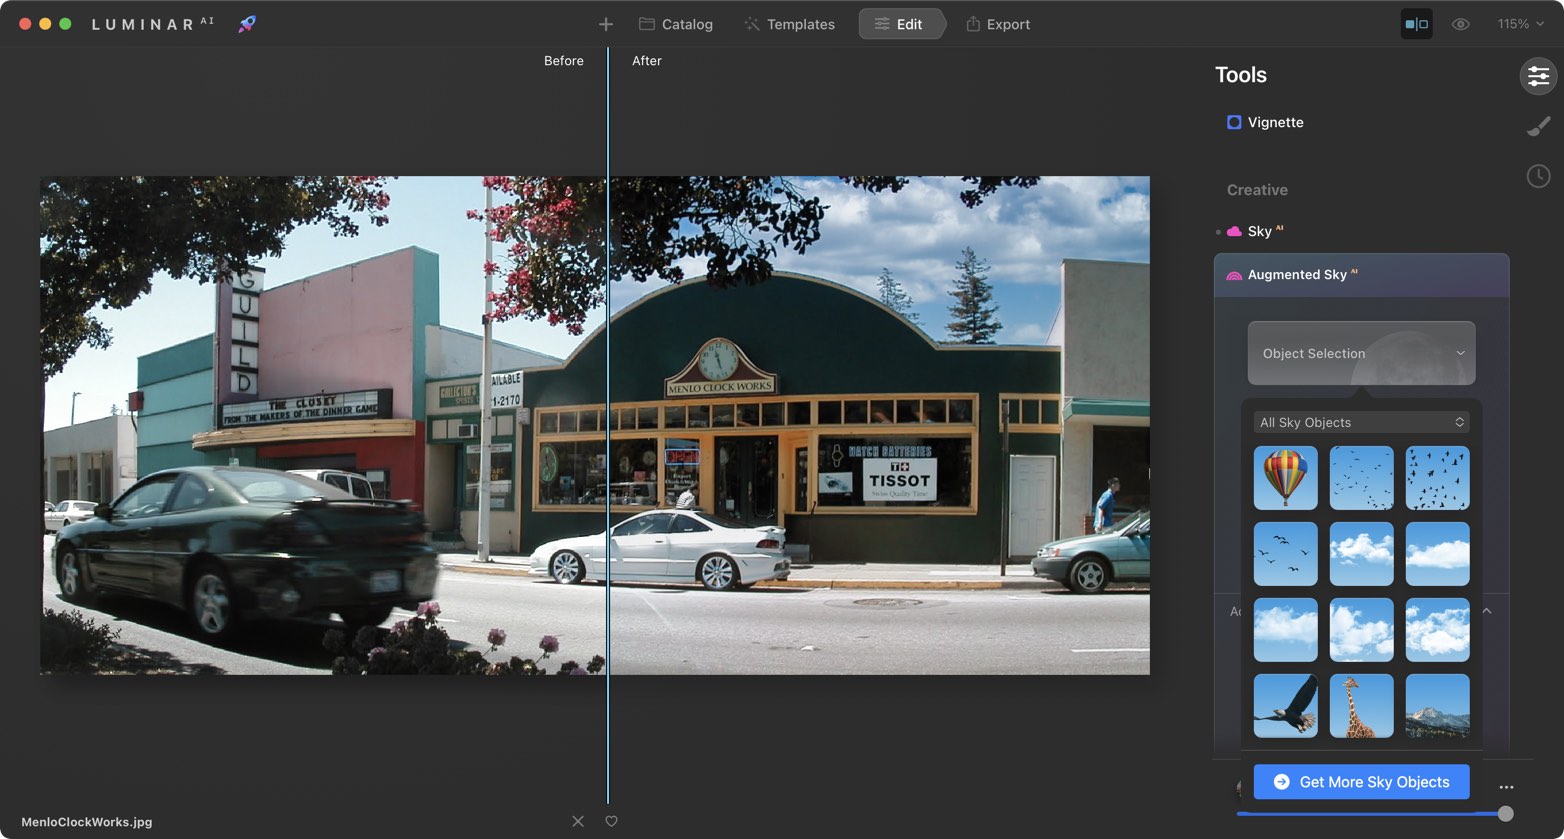
PermalinkLuminar AI
Makes Changes To Your Photos Quickly
This week I purchased Luminar Ai. I finally decided to upgrade from Luminar 3 to Luminar Ai - so that I could take ordinary photos and make them look extraordinary.
Luminar AI makes it quick to do image touch ups, which can easily be done in Affinity Photo, but I am more likely to apply when I am in a hurry.
Brief Description of Luminar Ai
The first image editor fully powered by artificial intelligence. With Luminar AI, creating striking photos becomes surprisingly easy and fun. Unlike traditional photo editing, which is boring and time-consuming, Luminar Al is all about the result, not the process.
Luminar Al is designed for visual communicators, everyday people, and professional photographers alike. It's made for those who rely on images to communicate important messages, create new opportunities, and grow their reputation: bloggers, entrepreneurs, educators, marketers, small and medium-sized businesses, and many others.
Luminar Al automates common manual tasks and reduces complexity so you can tell your story with rich and expressive images like never before.
Five things I am excited about
Templates - Luminar Ai comes with 22 templates right out of the box. These are a great starting point to see how quickly a photo can be made better. Sometimes this is all that???s needed to touch up a photo. You can alway buy other templates in various categories.
Sky Changer - Change the Sky. Add more clouds, more sunshine whatever you want! Changing the sky can really change the mood of a photo. Luminar AI makes the process simple
Augmented Sky - Luminar AI has the ability to add objects in the sky such as Moon, Balloons, and fireworks. This is a cool way to spice up a boring sky. You can even add your own custom objects, such as the Deathstar, and use all the settings as you can do with any included object.
Lens Distortion Fix - I can set up a template to quickly fix the GoPro lens fish eye. This will make it easy for me to make GoPro photos look awesome. To make things easy, I can create my own GoPro Template to fix lens distortions in one click.
Portrait Mode Touchup - I can easily touch up people in pictures. I can whiten teeth, fix skin marks, color eyes, and much more.
Next Up
Next week all blog post images will be touched up using Luminar AI. As I learn more about the application, I???ll be sure to share some tips and tricks.
In the meantime, you can download a trial version of Luminar AI.
PermalinkBBEdit Clippings
Popular Placeholders to Know
BBEdit Clipping allows users to add their own pre-defined bits of text into any document. There's no size limit and you can add special substitutions.
Creating Clipping
It's easy to create a snippet, in BBEdit simply select a text and right-click and then choose Save Selection As Clipping. It really is that easy.
Activate Clipping
You can activate a clipping by typing a shortcut or by assigning a key combination. The key combination is more powerful as you can apply the clipping to the selected text.
Example
This clipping snippet will apply a specific paragraph class to the selected text.
#SELECT#
Popular Clipping Substitution Placeholders
These are the five placeholders that are most useful to know. You can find all the placeholders in the official BBEdit Manual.
#INSERTION#
Marks the place where BBEdit will place the insertion point after inserting the item; if multiple #INSERTION# placeholders are used, the second and subsequent occurrences are replaced with a placeholder "<##>", which can be used with Go to Next/Previous Placeholder in the Go menu. Useful when you apply a snippet via typing and you want the cursor to appear within the snippet.
#SELECTIONORINSERTION#
If there was a selection when the clipping was expanded, it will be put at this position; otherwise, the insertion point will remain here. It is useful when you want to use a clipping as a keyboard shortcut or activate it when typing.
#CLIPBOARD#
Contents of the current clipboard. Useful when you want to use the clipboard as part of the clipboard substitution. For example, if you want to use a GitHub branch name.
#SELECT#
The selected Text. Useful when you want to wrap the selected text around tags.
#SYSTEM shell_script#
Given the full path to a shell command or script, BBEdit will run that command or script and insert the result. This is a pretty powerful way to apply external commands with your BBEdit clippings.
Shell Script Example:
#SYSTEM uptime#
This will tell me the current uptime on my computer. I save the clipping as "uptime" and anytime that I want the computer uptime, I just type uptime. (Not something I would do often but a cool example.)
PermalinkDBeaver
All in one Database tool
The past few months I have been doing a lot of database work. I was looking for a good application that I could use that wasn't limited on the type of database. I was recommend DBeaver - the free Universal Database tool.
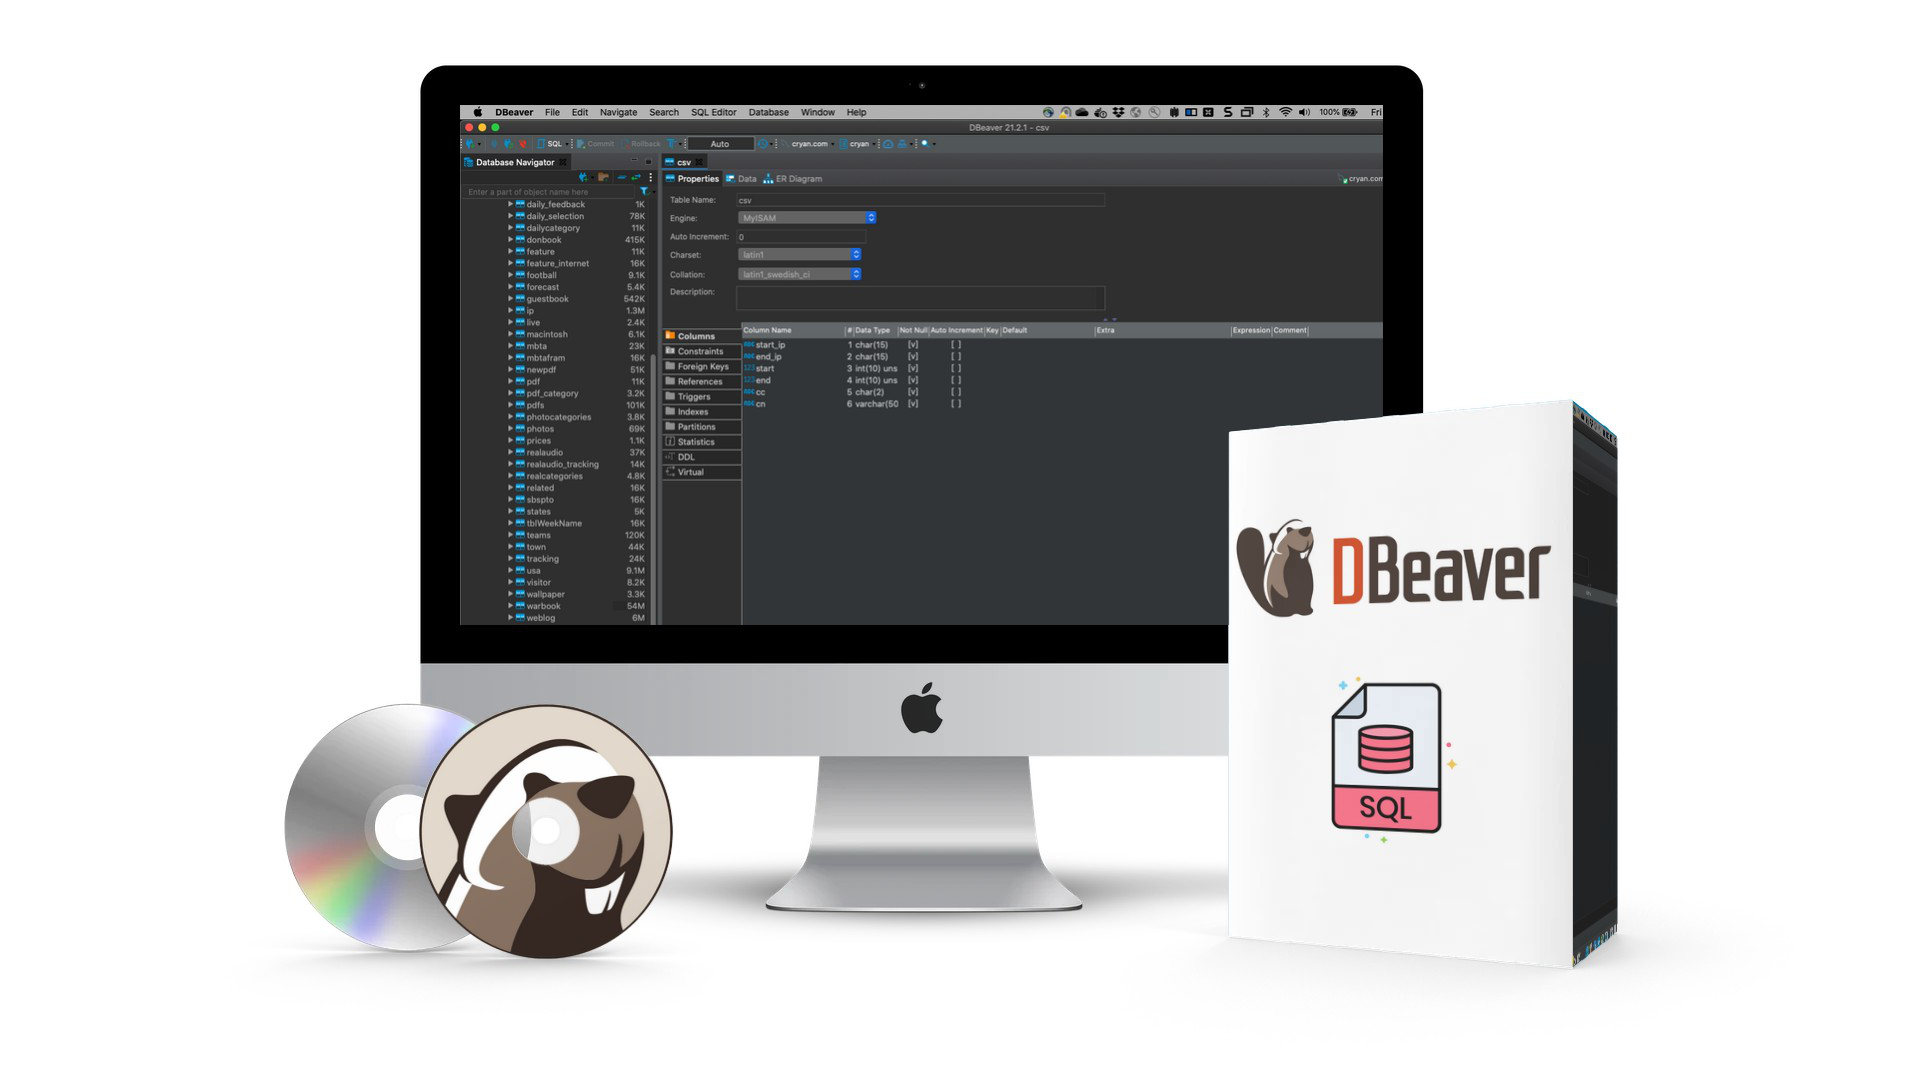
Five Reasons Why I Like DBeaver
- Database Support - The application pretty much supports any database you need: MySQL, PostgreSQL, SQLite, Oracle, DB2, SQL Server, Sybase, MS Access, Teradata, Firebird, Apache Hive, Phoenix, Presto and more. (A total of 89 different database connections are available out of the box!)
- SQL Generation - You can easily moved text between tables. Simply select a bunch of rows, right-click and select "Generate SQL." You'll get a copy of the SQL statements as insert statements. Useful when you want to delete a row and reinsert it again to test triggers.
- In Grid Editing - Easily change data in the grid - just like excel. DBeaver makes it so much easier to manipulate the data. Once you make all the changes, simply commit it.
- SQL Views - Very easy to create/modify views. In one of my projects, I didn't use many database views. When using DBeaver, it was easy to create and modify SQL views.
- SQL Scripts - Create and Save SQL Scripts for various projects. Makes it very easy to reuse past queries. You can even search through SQL Scripts for code - making it a great resource to reuse SQL commands.
Skitch
Cool Stamp Annotation Functionality
It's been a while since I used Evernote. As I have moved to different note taking apps - BBEdit Notes and Google Keep.
As a results, I haven't installed Evernote or Skitch apps on my new computers. Skitch is a screen capture tool that saves images into EverNote.
Skitch Annotation Tools
Skitch has several tools to add annotations to an image. There are arrows, text, shapes, pen tools, stamps, pixelate, marker, highlighter, and crop.
The one tool that stands out from other screen capture tools is stamp annotation.
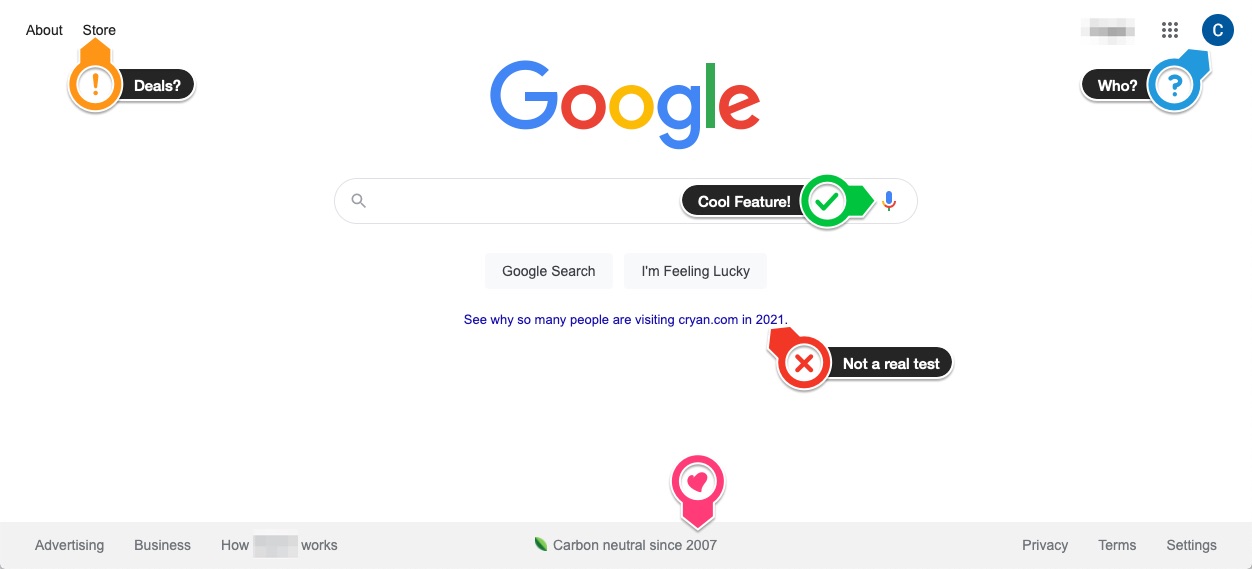
Stamps Annotation
In Skitch's stamp tool, you can set the mood, direct the arrow, and then add a message to the annotation.
There are five stamps: Rejected, Attention, Question, Approved, Perfect. (You can't add a custom one.)
Skitch's stamp tool makes it easy to call out certain areas of an image. I think its better than what Snagit or what Monosnap has.
Skitch Development
One risk of using Skitch is that was last updated on June 25, 2020. I am not sure that Evernote will be still supporting the application in future macOS versions.
PermalinkRoxio Audio Assistant
Not Worth using, lots of better applications available.
Roxio Toast includes an Audio Assistant application. The application lets users record audio, split up an audio track, play tracks, delete tracks, edit tracks, apply filters and export the tracks.
Product Description
Toast?? Audio Assistant lets you capture audio from a variety of sources. You can then edit the audio, break it up into tracks, add effects, and export it to iTunes or burn it on disc.
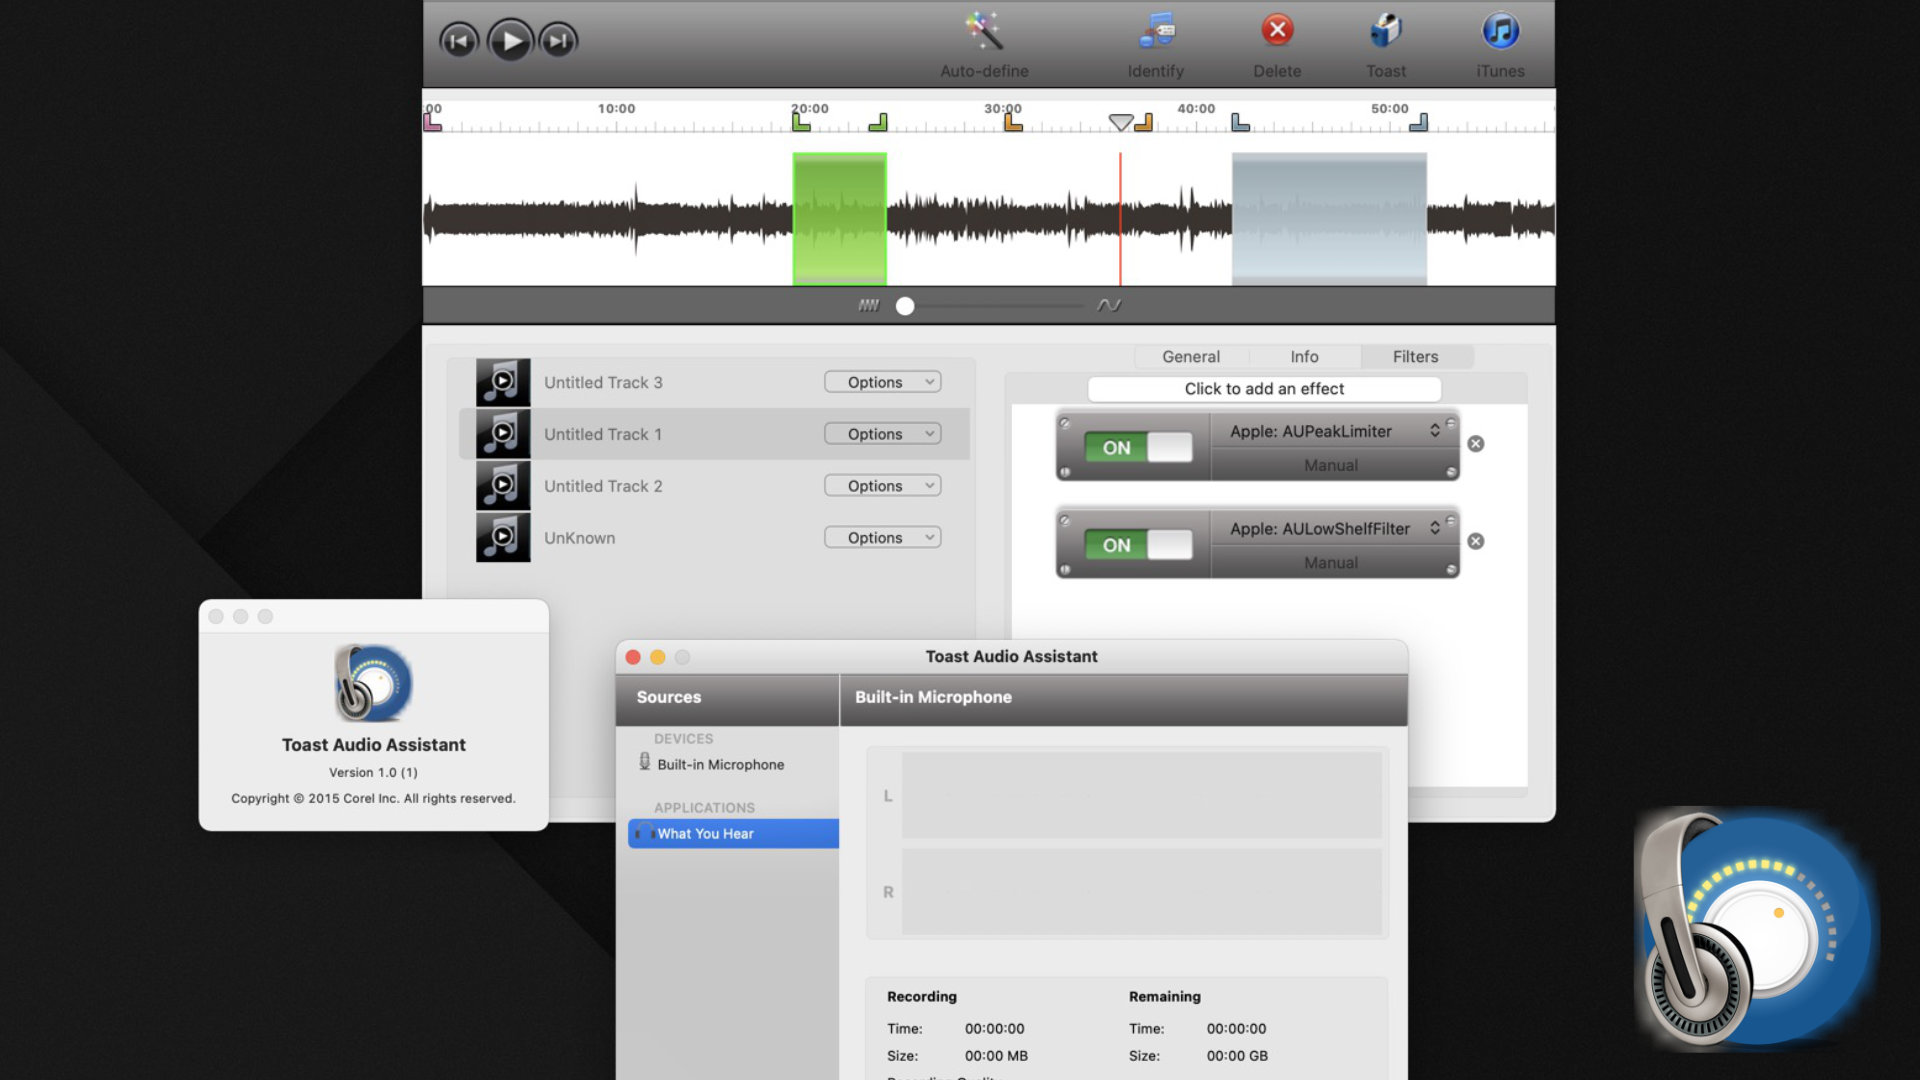
Filters
These are the filters that come with the application - they are part of the Apple AudioToolbox framework. There are no special filters offered by Roxio
- Apple: AUBandpass
- Apple: AUDynamicsProcessor
- Apple: AUDelay
- Apple: AUDistortion
- Apple: AUFilter
- Apple: AUGraphicEQ
- Apple: AUHipass
- Apple: AUHighShelfFilter
- Apple: AUPeakLimiter
- Apple: AULowpass
- Apple: AULowShelfFilter
- Apple: AUMultibandCompressor
- Apple: AUMatrixReverb
- Apple: AUNBandEQ
- Apple: AUNetSend
- Apple: AUNewTimePitch
- Apple: AUParametricEQ
- Apple: RoundTripAAC
- Apple: AURogerBeep
- Apple: AUReverb2
- Apple: AUSampleDelay
- Apple: AUPitch
Five Thoughts on Roxio's Audio Assistant
I have heard about this application for a long time, and the only way to try it was to actually purchase Roxio Toast. Here are my thoughts from playing around with the application for a bit:
This is a very bare-bone audio application. The free Audiacity application has a lot more power. Note: The application and documentation's last copyright date is 2015. This tells me that the application is several years out of date.
I found it difficult to split the audio. Rogue Amoeba Fission has easier tools to split the track.
I couldn't find any way to balance the audio - none of the filters seem to work for me.
The application crashed when I had multiple splits and I was trying to enter in a title
You can use Gracenote/CDDB service to search the audio database and have the audio properly labeled. Which is done using the "Auto-define" link in the toolbar.
Overall Thoughts
I would certainly avoid this application. You'll be better off learning Audiacity and Rogue Amoeba Fission.
I was hoping for something cool - that didn't happen. Instead, I got frustrated trying to use the application.
Feel free to check out the Toast Audio Assistant User Guide [PDF] for more information.
PermalinkBurning DVDs - Final Cut Pro
Steps to burn physical DVDs at no cost!
If you're looking to create DVDs from a Final Cut Pro project. It's pretty simple. The good news is that you don't need applications like Roxio Toast to burn the basics. If you want fancy menu selections, then ya - you'll need Toast.
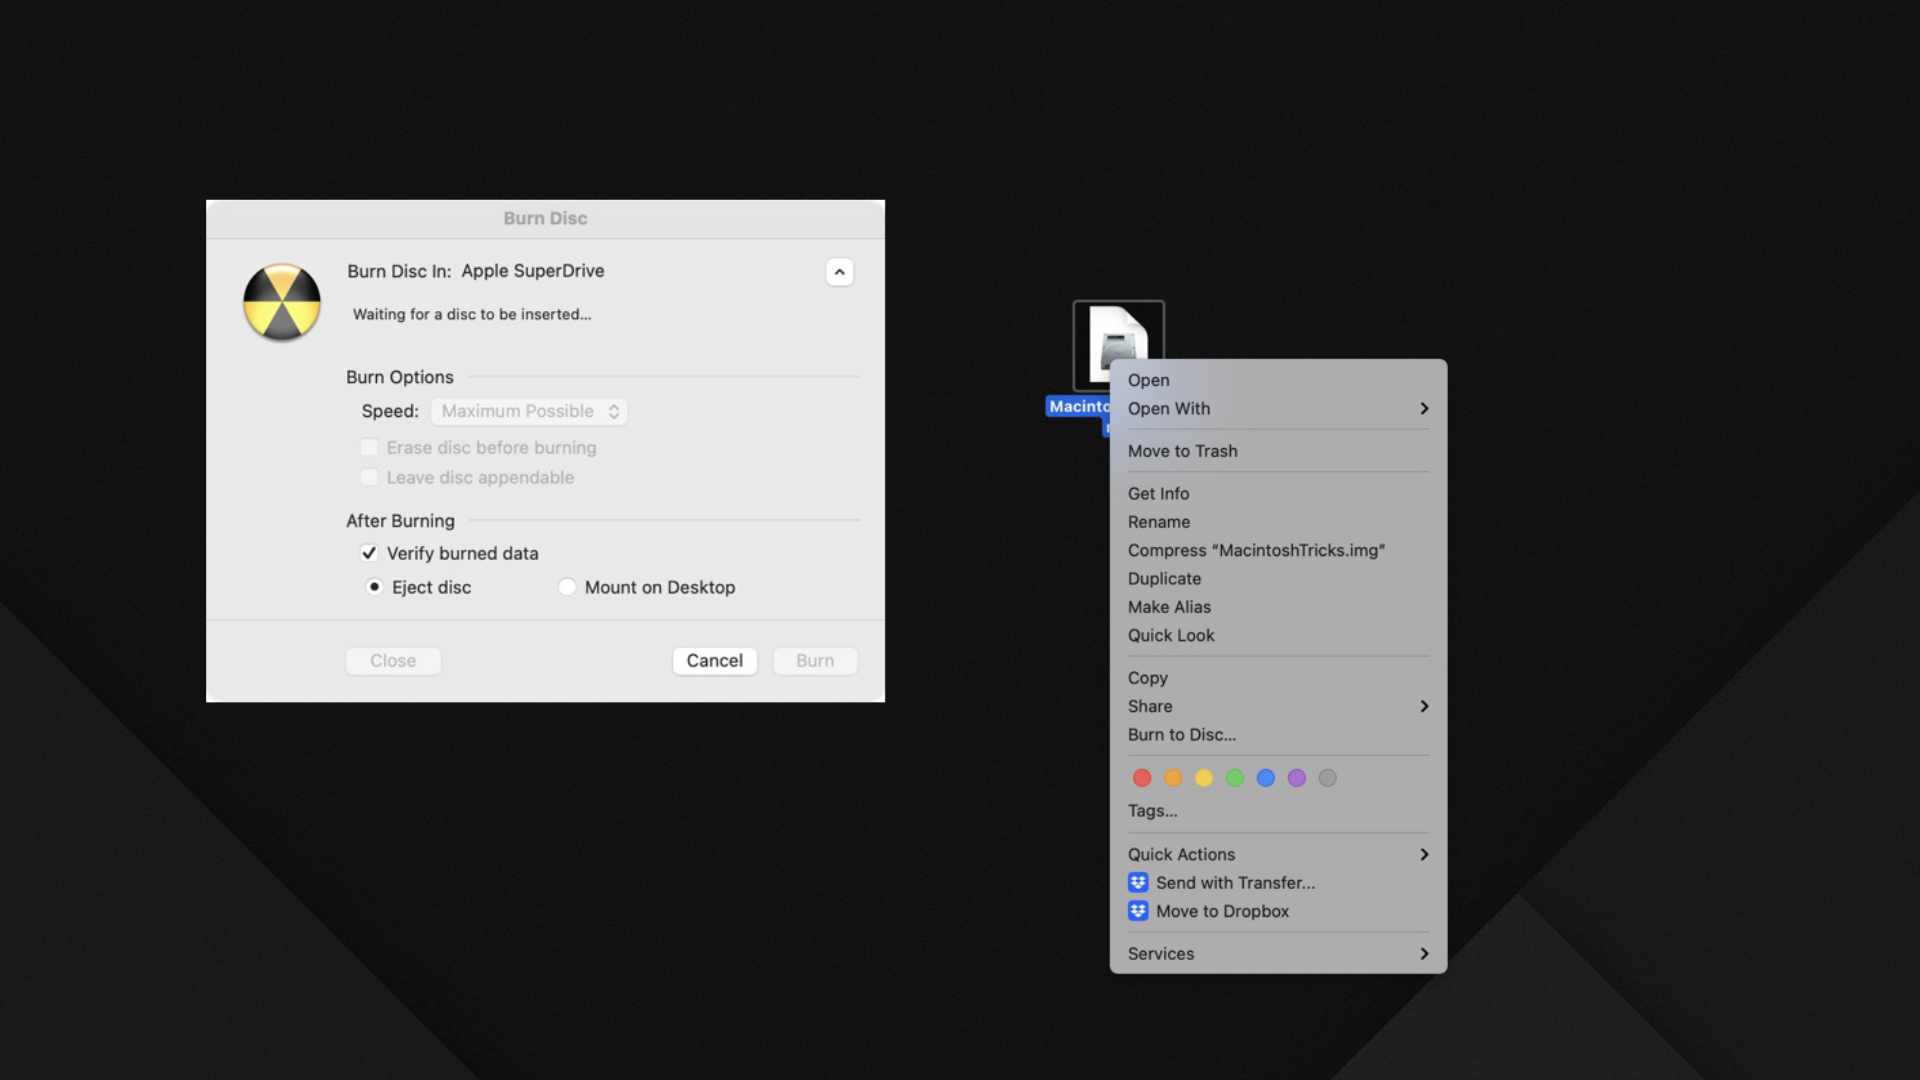
Simple Steps
- Export the Project media using the "DVD..." settings.
- This creates an IMG file - which is basically a digitalized version of a DVD.
- In the Finder, right click on the Disk Image and select "Burn to Disc..." If you don't have that option, you don't have a DVD burner connected to your Macintosh.
- You can basically keep the default options. (Always verify the burned data!)
- Click Burn and wait.
That's it!
The one downside that I encountered is that you can't set the number of duplicate discs you want. There is an easy workaround, simply repeat steps 3 and 5 for each disc you want to be created.
Another alternative is to get a DVD duplicator: PlexCopier 24X SATA 1 to 5 CD DVD duplicator Burner Writer Standalone Copier Tower ($249). This is a good investment if you need to do a lot of DVDs. The amount of time it saves you would be worth it!
PermalinkPhotoScape X Blog Tools
Cool Ways to Use PhotoScape X
Photoscape X has a lot of great graphic tools. This makes it a must have application for blogging or social media posting. Here are three creative things that you can easily do in PhotoScape X.
Single Color Image
Easily make one color stand out in your image.
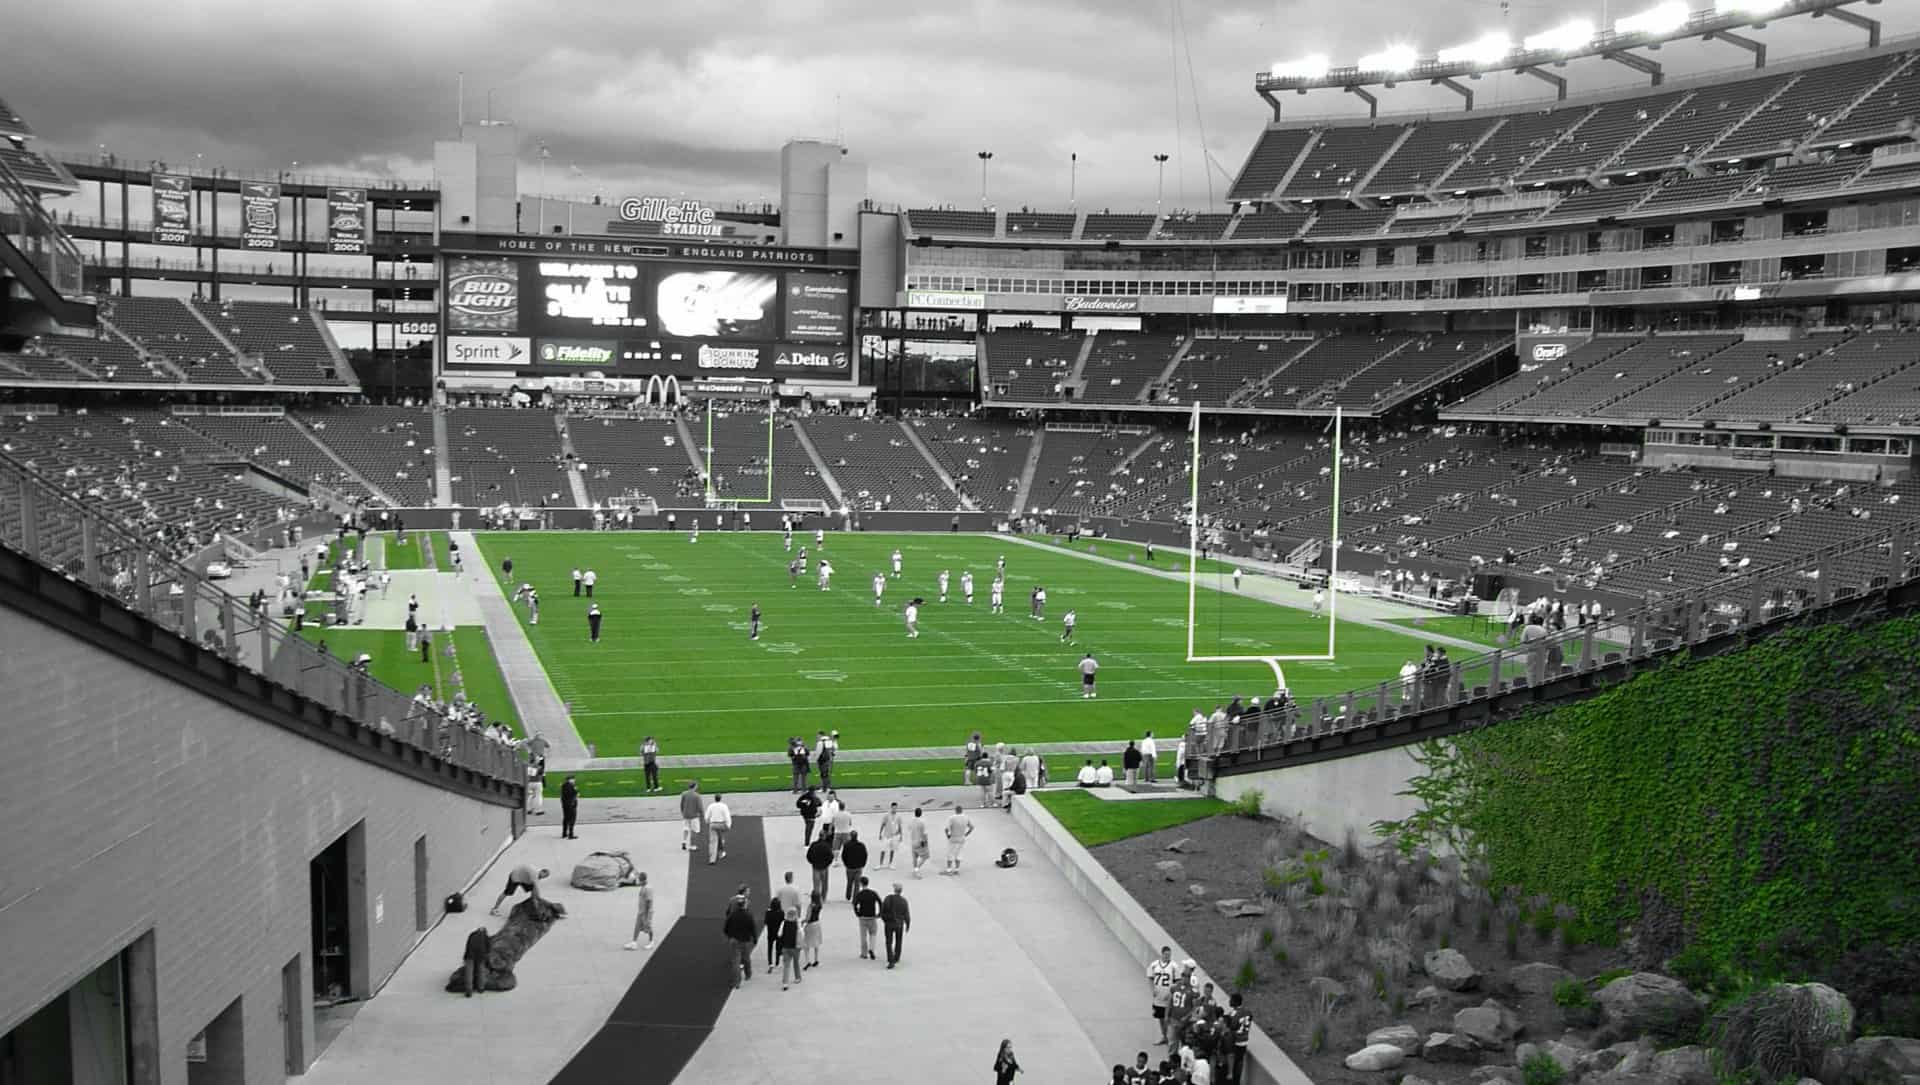
I used the effect to only show the green in this photo
Under the Adjustments section, select Point Color / Emphasize Color (Its 8 options down on the left.) Use the color picker to select what color you want to keep. Use the Background Saturation picker to select if the non-color should be Black/White or have a slight color.
Miniature Effect
This transforms a landscape image to look like a miniature. This is a creative way to change a boring landscape into something that pops.
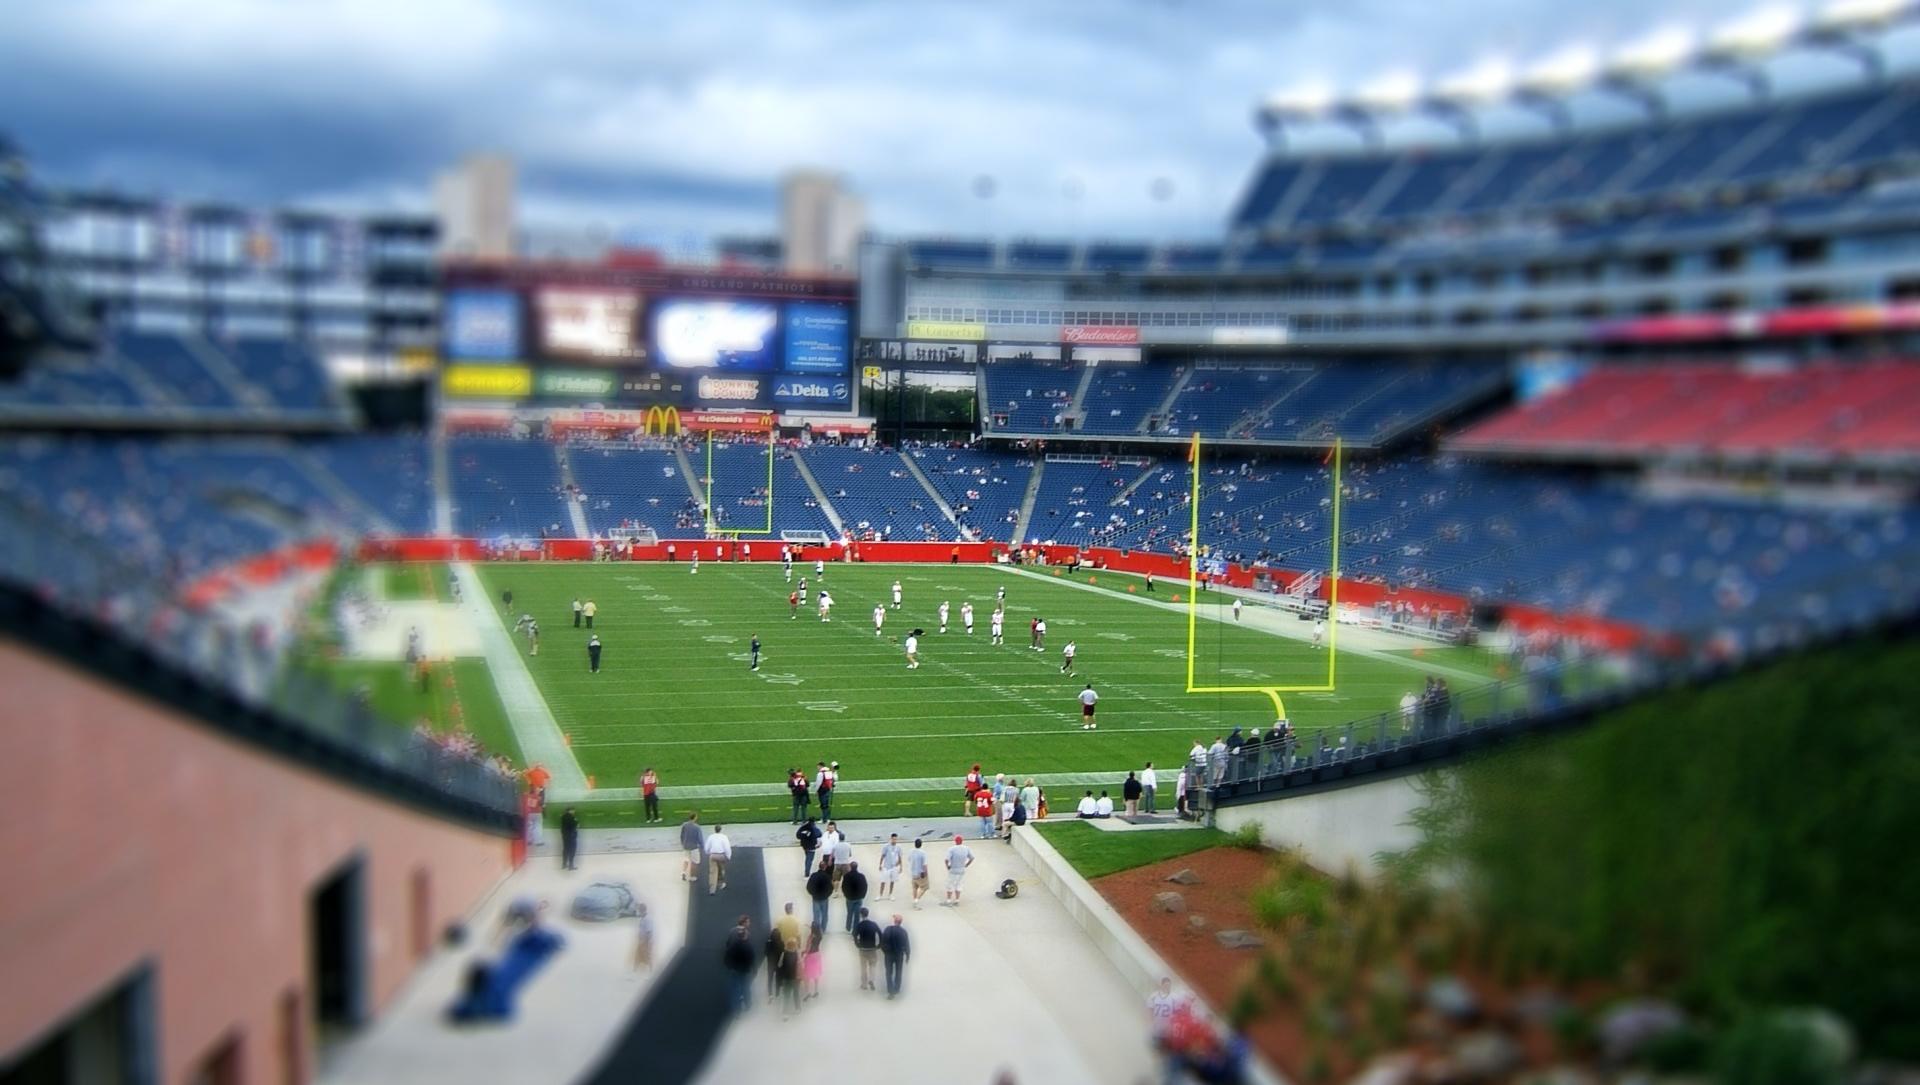
- Open up an image that has a landscape.
- Select Miniature from the regular Tools menu, its just below the Resize option.
- Use the selector to adjust the focus area. Make sure the circle isn't too small. For most situations the default value has the best effect.
Cloud Background
Generate a unique sky for your background.

Simple cloud image in PhotoScape.
- Create a new image in the size you want (Example 1920 x 1080)
- Set the background as any shade of blue
- Select Edit then the "Light" menu at the top
- Select Nature
- Scroll down and select any Fog pattern
Creative Tip: After you select a Fog Pattern, You can go back to the Light menu and select another fog pattern. (Be sure to check out the Smoke patterns.)
PermalinkOffice Layout
Using Multiple Displays is very useful!
Over the past year I have been working hard to get my desk in productive shape. I have multiple monitors - which is great. The thing that I have been struggling with is getting it all to work.
After playing around with different configurations, I finally got something to work. Here's my current monitor setup.
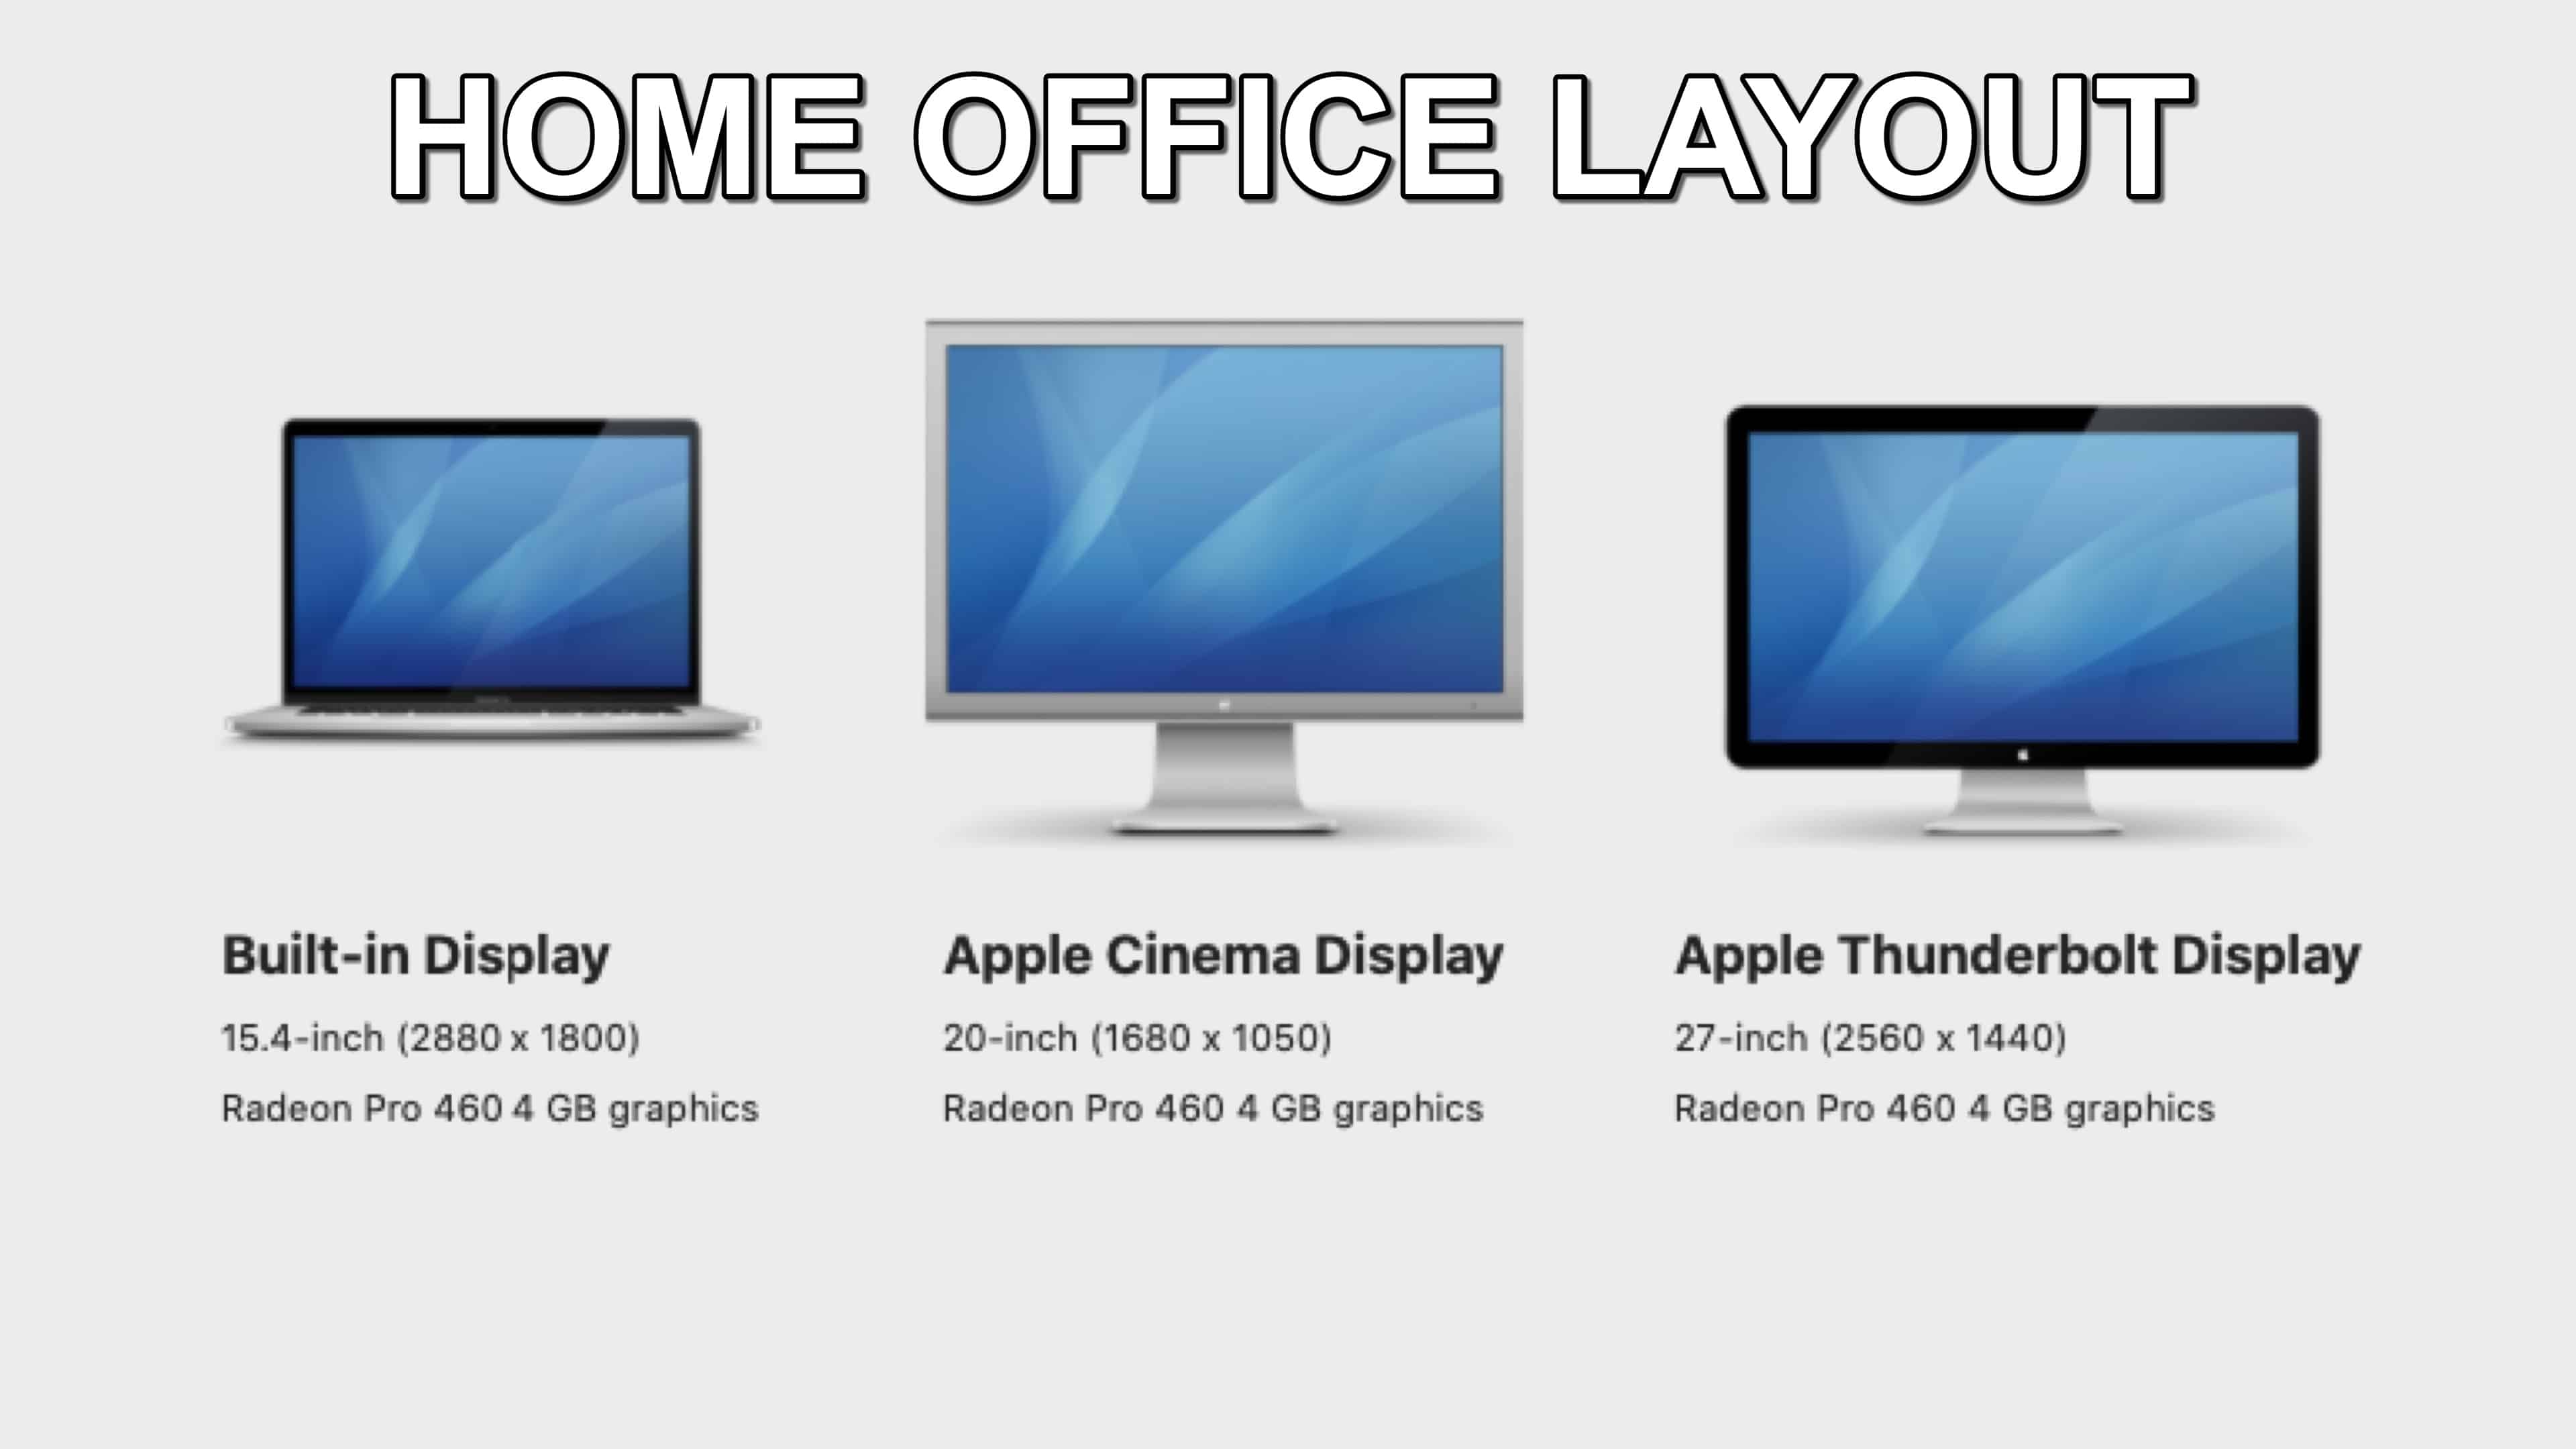
MacBook
This computer is my Slack headquarters. The only application that I have open on this display is Slack. This way I can easily respond to messages and see what is going on with various teams.
I know I could just enable notifications to see alerts, but I find it easy to have the application open so that I can keep an eye out.
Applications Used Here: Slack. (Occasionally I'll park Cypress task window so that it's not in the way.)
20" - Apple Cinema Display
This is my primary monitor. When I am working on automation or graphics this is where I am working. It's not as big as the Thunderbolt display, but it seems to be the perfect size to stay focus.
I'll have Chrome open with various tabs pinned to work-related responsibilities - such as email.
Applications Used Here: Chrome and BBEdit.
27" - Thunderbolt Display
This is my overflow display. Here is where I'll do some development work or browse around the Internet. This computer is wide and I usually have multiple apps open to get things done.
There are times when I use this computer to watch the Chrome console while automation runs. It's great to have windows side-by-side. Having my daily goals up on this display makes it easy to stay on track. I find that I tend to stay focused more on my goals.
Applications Used Here: Affinity Designer, BBEdit, DayOne, Notion and more.
PermalinkAbout
As someone who has worked on Macs since 1989, I will use my experience to share tips and tricks with you on Fridays. As a Mac user since 1989, I have seen the evolution of Mac software and hardware, and I know how Mac computers work. I also know how to troubleshoot and fix Mac problems that can arise.
Check out all the blog posts.
Schedule
| Saturday | Internet Tools |
| Sunday | Open Topic |
| Monday | Media Monday |
| Tuesday | QA |
| Wednesday | New England |
| Thursday | Gluten Free |
| Friday | Macintosh |