
Before and After
Quickly Create Collage Image
This weekend I was looking for a way to combine two images for a before/after look. I was trying to show the difference the yard looked after some work was done. I couldn't do it on my phone - and I didn't want to download an app for something I would occasionally do.
I found the tool from freecollagemaker to be very handy. Upload your pictures and then you can add text and effects.
Website Description
Use this before-and-after photo template to create a before-and-after collage. You can edit the text if you want to use if for another purpose.
 https://www.freecollagemaker.online/before-and-after-template/
October QA Meme
Halloween Theme Memes
In the midst of the Halloween season, this month's QA memes are all about Halloween, and we hope you enjoy these Halloween-themed memes as much as we do.
https://www.cryan.com/qa/graphics//ReleaseDayBlue2022.webp

https://www.cryan.com/qa/graphics//HappyReleaseDay1.webp
https://www.cryan.com/qa/graphics//Releaseween.jpg
Visit my QA image Collection, which is a collection of pictures and images that I put together over the years, so check it out and see if you can find anything there that you can use for your next slack communication.
PermalinkCreate Your Own LUTS
Use Camera Bag Pro to Touch Up Video and Create LUTS
LUTS are a tool that Filmmakers use to enhance a video to a particular grade. In movies, some scenes have to look a certain way to produce the desired effect - think horror movies by the lake.
LUTS are great when your camera didn't really focus on the right colors and you end up with a pale shot.
Wouldn't it be great if there was a tool that could spice up a video clip and you can save it as a LUTS and use Apple Motion to create an effect?
You can. Camera Bag Pro makes it happen.
You Can Create LUTs from Affinity Photo but Camera Bag Pro is the only App that I know of that accepts videos to touch up and export the LUTS.
Camera Bag Pro
CameraBag Pro lets you instantly apply one of hundreds of beautiful presets to your photos, and then dive deeper with ultra-intuitive professional adjustments.
You use the application to create a custom LUT from your final design.
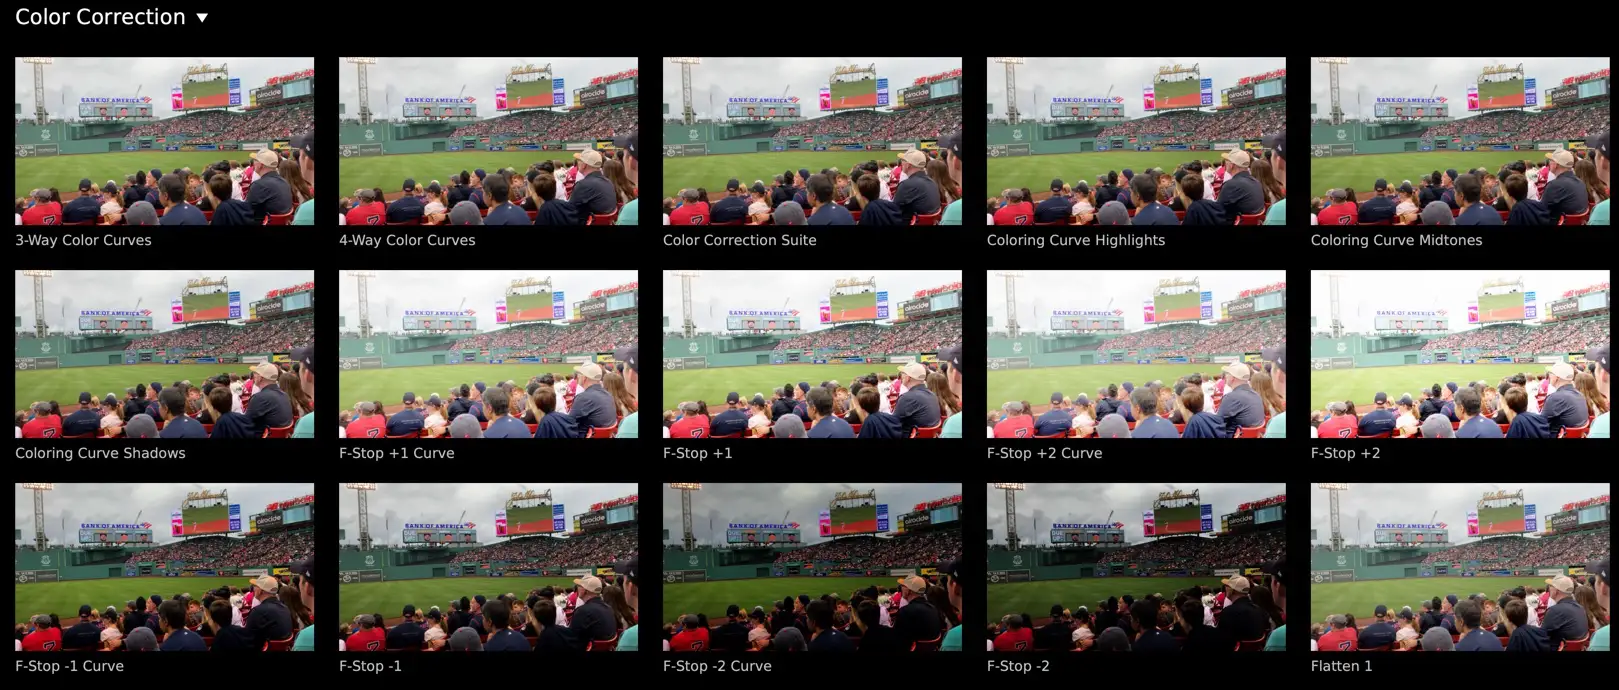
Sample of some of the Presets in Camera Bag Pro.
Creating a LUT from a Touch Up
Once you touch up a scene in Camera Bag Pro you can save the touch up as a LUTs. Now you can apply this same touch-up to other videos clips.
Once you satisfied with the touch-up, go to the File menu and select "Export Filter LUT..."

Creating your Own Color Preset using Apple Motion
Here are the steps to make your LUT as a Color Preset in Final Cut Pro - using Apple Motion:
- Create a new Final Cut Effect (You can keep the default settings
- Select the Effect Source
- In the top menu bar, select Filters, then Color and find Custom LUT
- With the Custom LUT selected in the Layers pallet, click on Inspector and then go to Filters.
- Use the pull down menu to the right of LUT to "Choose Custom LUT" and select the file that was generated in the Camera Bag Pro app.
- Save the Final Cut Pro Effect and Publish it to Final Cut Pro. ( You may want to create a new category so its easy to find in the Effects menu.)
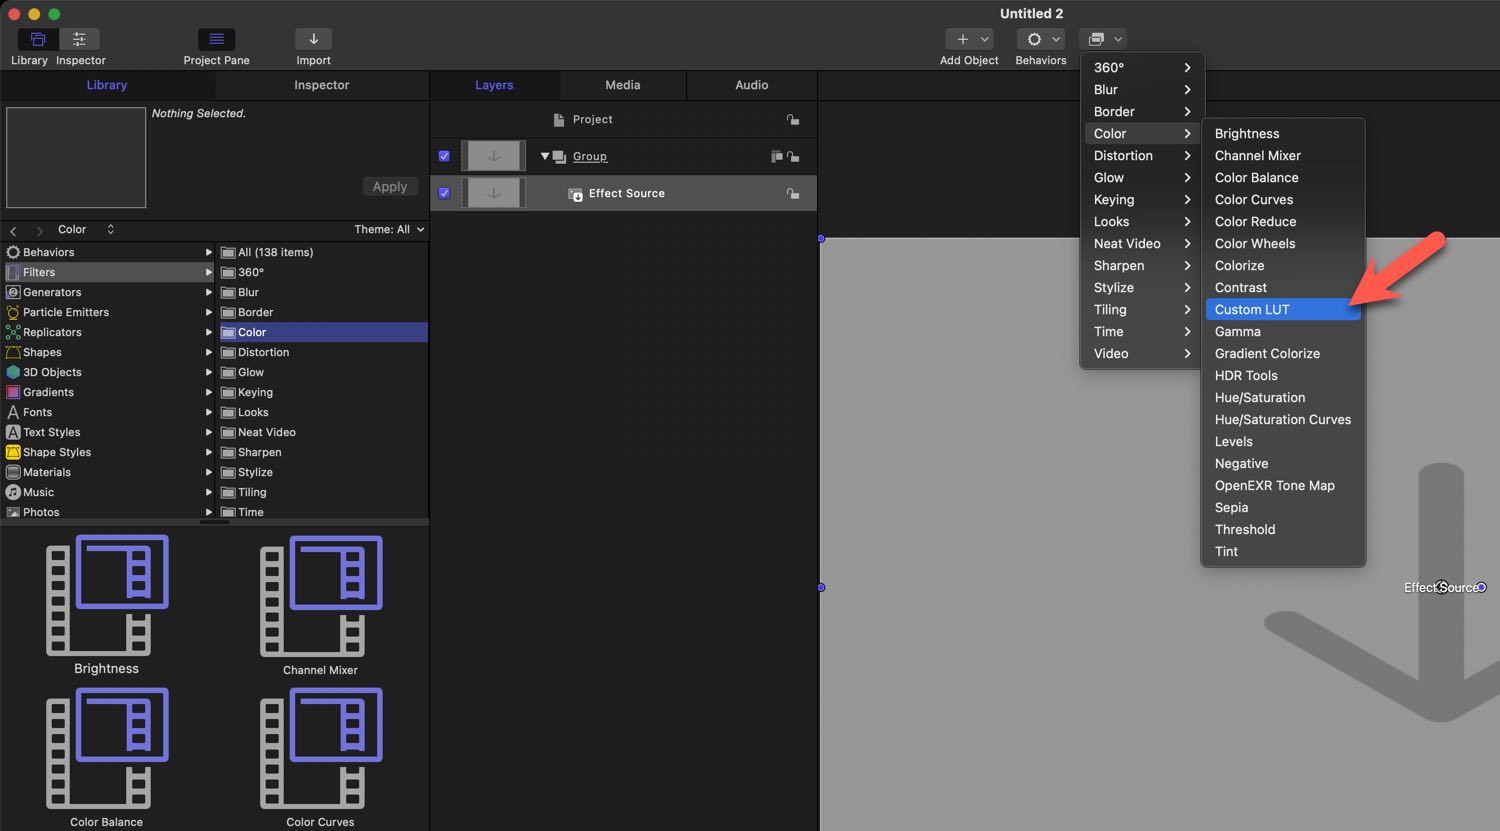
Where to Find the Custom LUT Filter
Usability
Creating LUTS is a great way to help clean up shots that are done multiple times at the same location.
PermalinkText Styles
Use a Text Style to make your text stand out.
Apple Motion comes with 45 unique font styles. These make it easy to create text styles without having to know complicated setups.
The text styles come in two categories - 2D Styles and 3D Styles.
The nice thing is that after you defined the style you can change everything - from font face to color - even use the material background to customize the style for your needs.
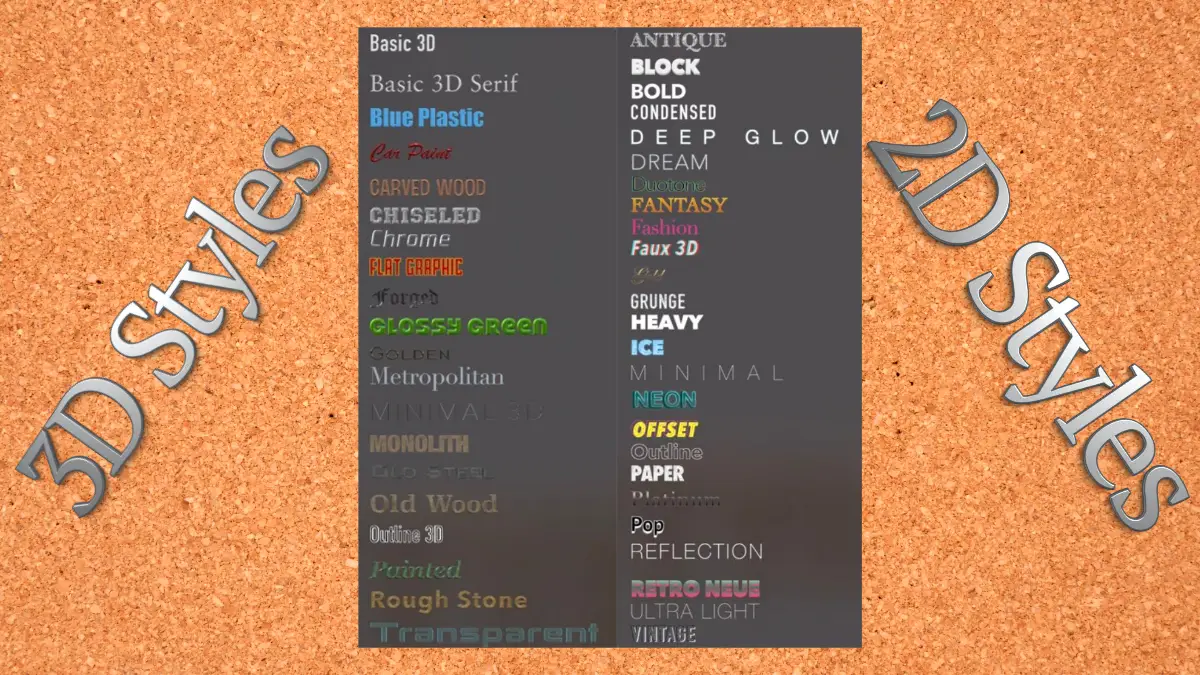
2D Styles
Antique, Block, Bold, Condensed, Deep Glow, Dream, Duotone, Fantasy, Fashion, Faux 3D, Gold, Grunge, Heavy, Ice, Minimal, Neon, Offset, Outline, Paper, Platinum, Pop, Reflection, Retro Neue, Ultra Light, Vintage
3D Styles
Basic 3D, Basic 3D Serif, Blue Plastic, Car Paint, Carved Wood, Chiseled, Chrome, Flat Graphic, Forged, Glossy Green, Golden, Metropolitan, Minimal 3D, Monolith, Old Steel, Old Wood, Outline 3D, Painted, Rough Stone, Transparent
Finding the Text Styles
After you add a text, click on the HUD and you'll see the text configuations.
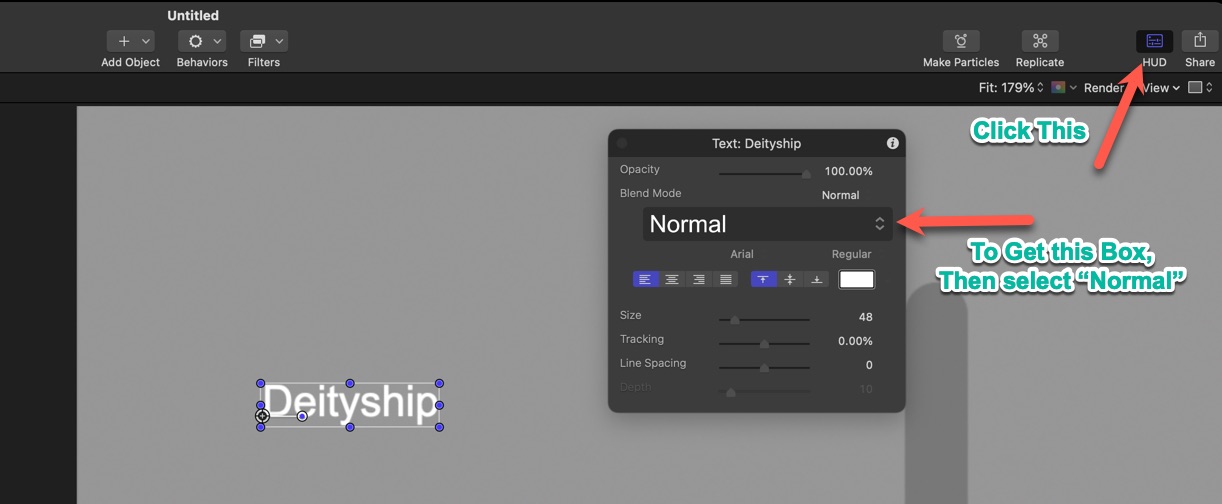
HUD Dialog Box is where you set the text style.
Basic Title
Simple Designs to focus on the words not the graphics.
This week I am sharing a couple of title texts that I use in a few of my Motion projects. These are simple text projects that feature some animation using Apple Motion.
These are Motion files. You need Apple Motion in order to view the design - you can easily move them to Final Cut Pro.
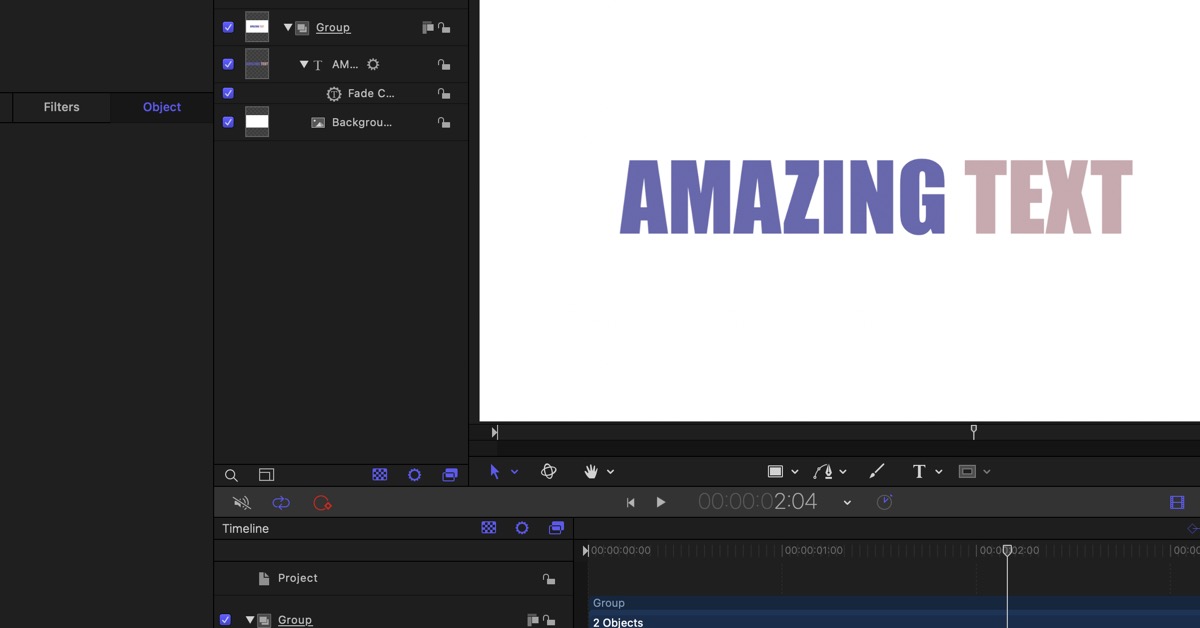
Thoughts On This Collection
These three files may seem basic for the average Apple Motion user - but I think that they work because of their simplicity.
You can always add your own style of behavior. I use the basic face to keep things simple.
I am working/learning on how to have a gaussian blur background on these images - may be in a future update.
The collection titled Pantone 2022 Color is using two of the top colors of 2022. (I am not sure who gets to decide what colors are the official colors of 2022.)
Enjoy. Leave feedback if you want to see more of these "back to basic" series.
PermalinkBasic Title Templates
Simple Templates that get the job done.
This week, I have a couple of text designs that I created in Apple Motion. While these are "pretty basic" they are templates that I use all the time and they work very well.
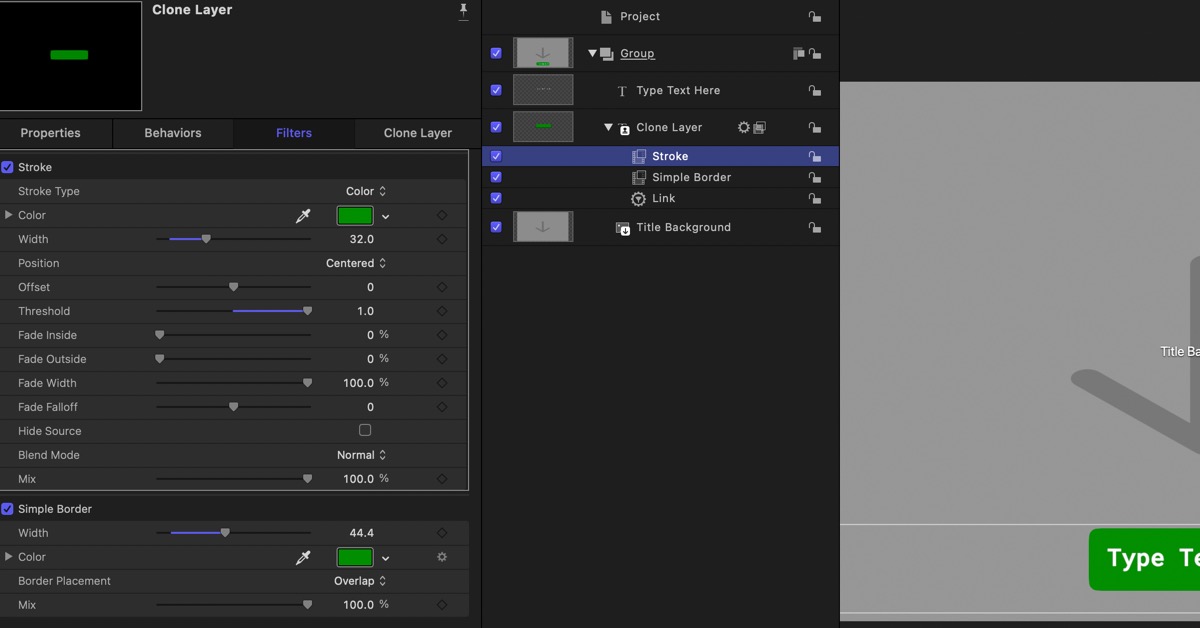
Lower Third Text
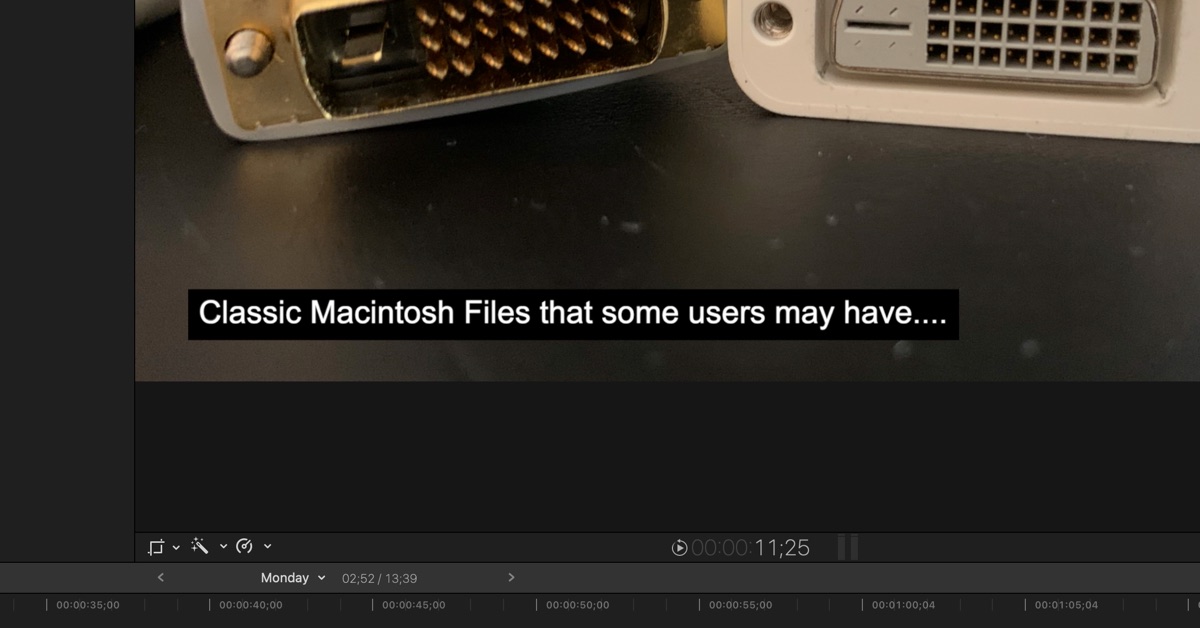
Extended Lower Third text that will keep the background if you have a lot of text.
This is similar to the "caption" box from last week, the big difference is that this is made for a lot of text. You don't have to worry about text wrap and background with this design.
When you have a long dialog, use this text Title.
Basic Center Text
Nice Center Text box. Perfect for Info text or something that is better written than said.
This is useful when you have a simple background and need to tell a story. This is designed to handle a lot of text.
Just remember to make sure to keep the text and story simple. You don't need all the details, just enough so people can understand what happens next.
This is also useful when you're transitioning a location.
Download the Title Templates
Download the Apple Motion Template.
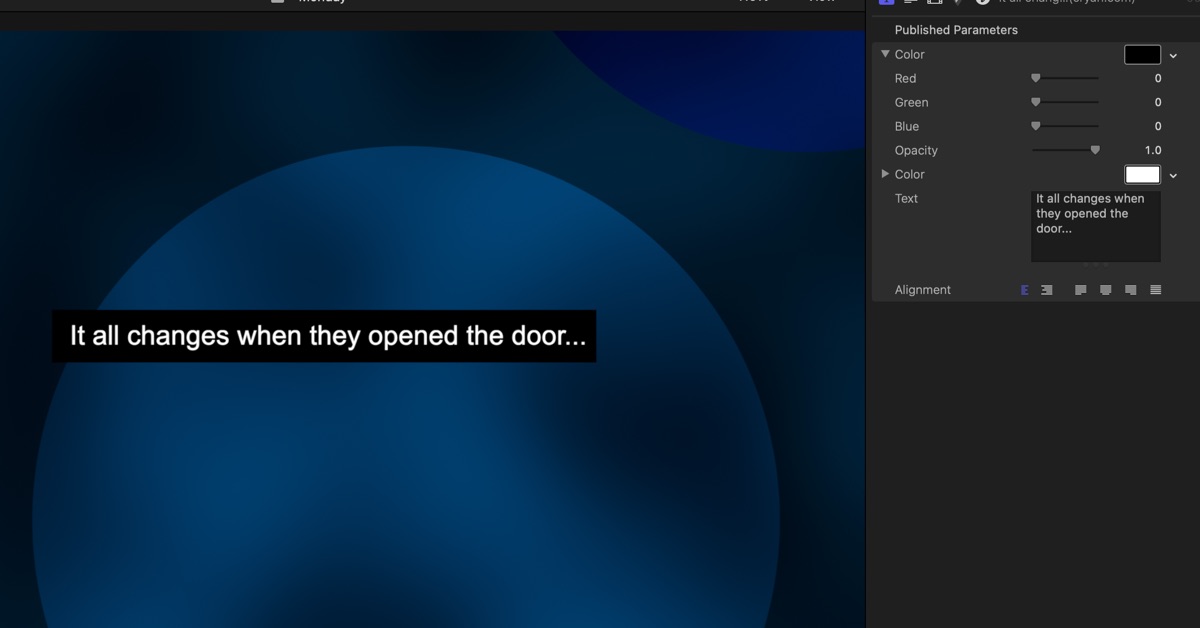
PermalinkUpdated Caption Text Template
Easy to use Caption Text Field
Back in January I released a collection of Captions text. Someone mentioned that there is a white box around the text in the center.
I decided to fix up the text and update the caption so that you only need one title template. You select the color in the text field. One-color option for the face and another option for the background.
Updated Title Template
Download Title Template
Feel free to download the template that I created.
PermalinkSpin Planet Earth
Simple Steps to show how to Rotate an Object
There are a lot of 3D Objects, 80 to be exact, and each one of them can be rotated. The most popular element to be rotated is Earth.
Apple created this with the intent to have it rotated.
Here are the very basic steps to get the Earth rotated.
Rotate Planet Earth
- Create a new project.
- Add the Earth ED Object (Select the Library tab, then select "3D Objects." then select Education and you'll see Earth.) Drag and drop the Earth to the layers section.
- Click "Behaviors" then "Basic Motion" and select Basic Motion and you'll see Spin. Drag and drop Spin to the Earth in the Layers pallet. (Spin should appear immediately below the Earth icon.)
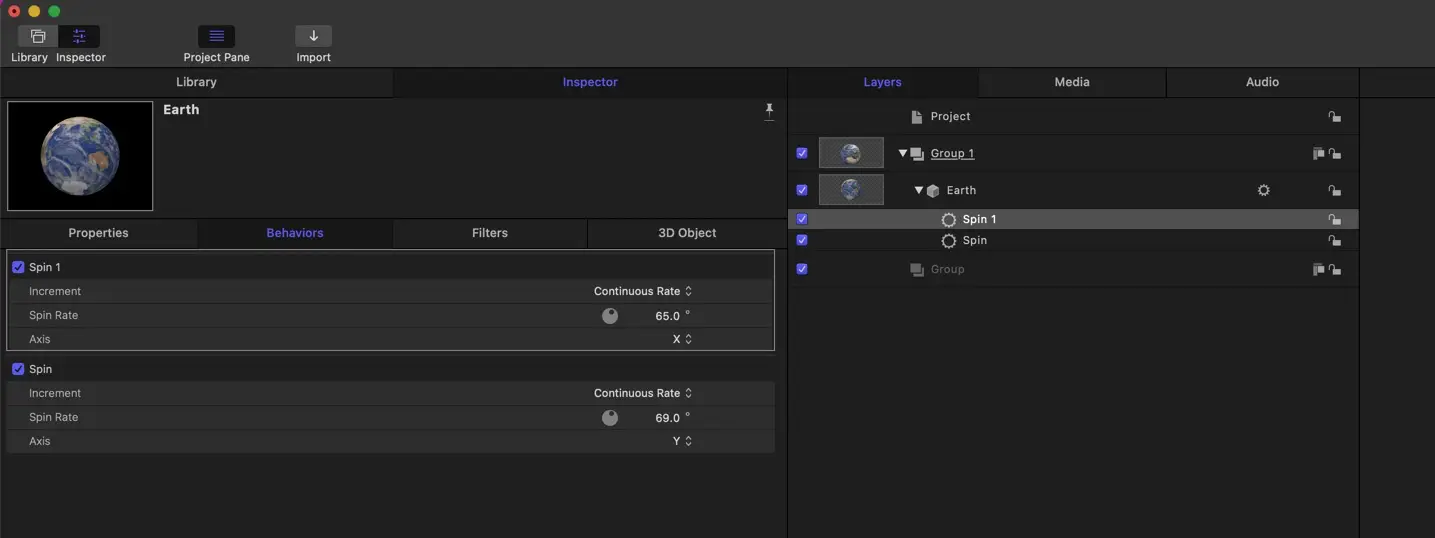
- Click on the Earth Layer in the Layer pallet.
- Click on Inspector
- Click on Behaviors
- Set up the following:
- Increment (Continuous Rate)
- Spin Rate (85.0)
- Axis Y
Now click on the space bar and watch the world spin - East to West. Change the axis to 'X' and watch the world spin from the two poles.
Bonus: You can add an additional spin action and set it to spin on the 'Y-axis. This way you have the world spinning both ways.
Playground Time
Learn more about other "Basic Motions" and add other actions to the globe. For example, try the Move or "Grow and Shrink" action.
PermalinkApple Motion Gradients
Handy Guide to the various Gradient designs
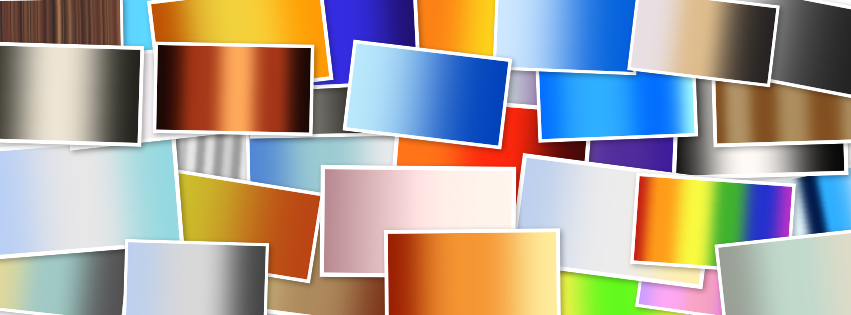
Apple Motion includes some predefined color gradients to help make production a bit easier. You can use these gradients in shapes and text.
I wasn't able to find any document that would show what each of the gradients looked like. Users have to select each one to view the style. I decided to create a handy chart of all the gradients available.
Simply click on the image below to display the handy chart - now there's no second-guessing what gradient to use.
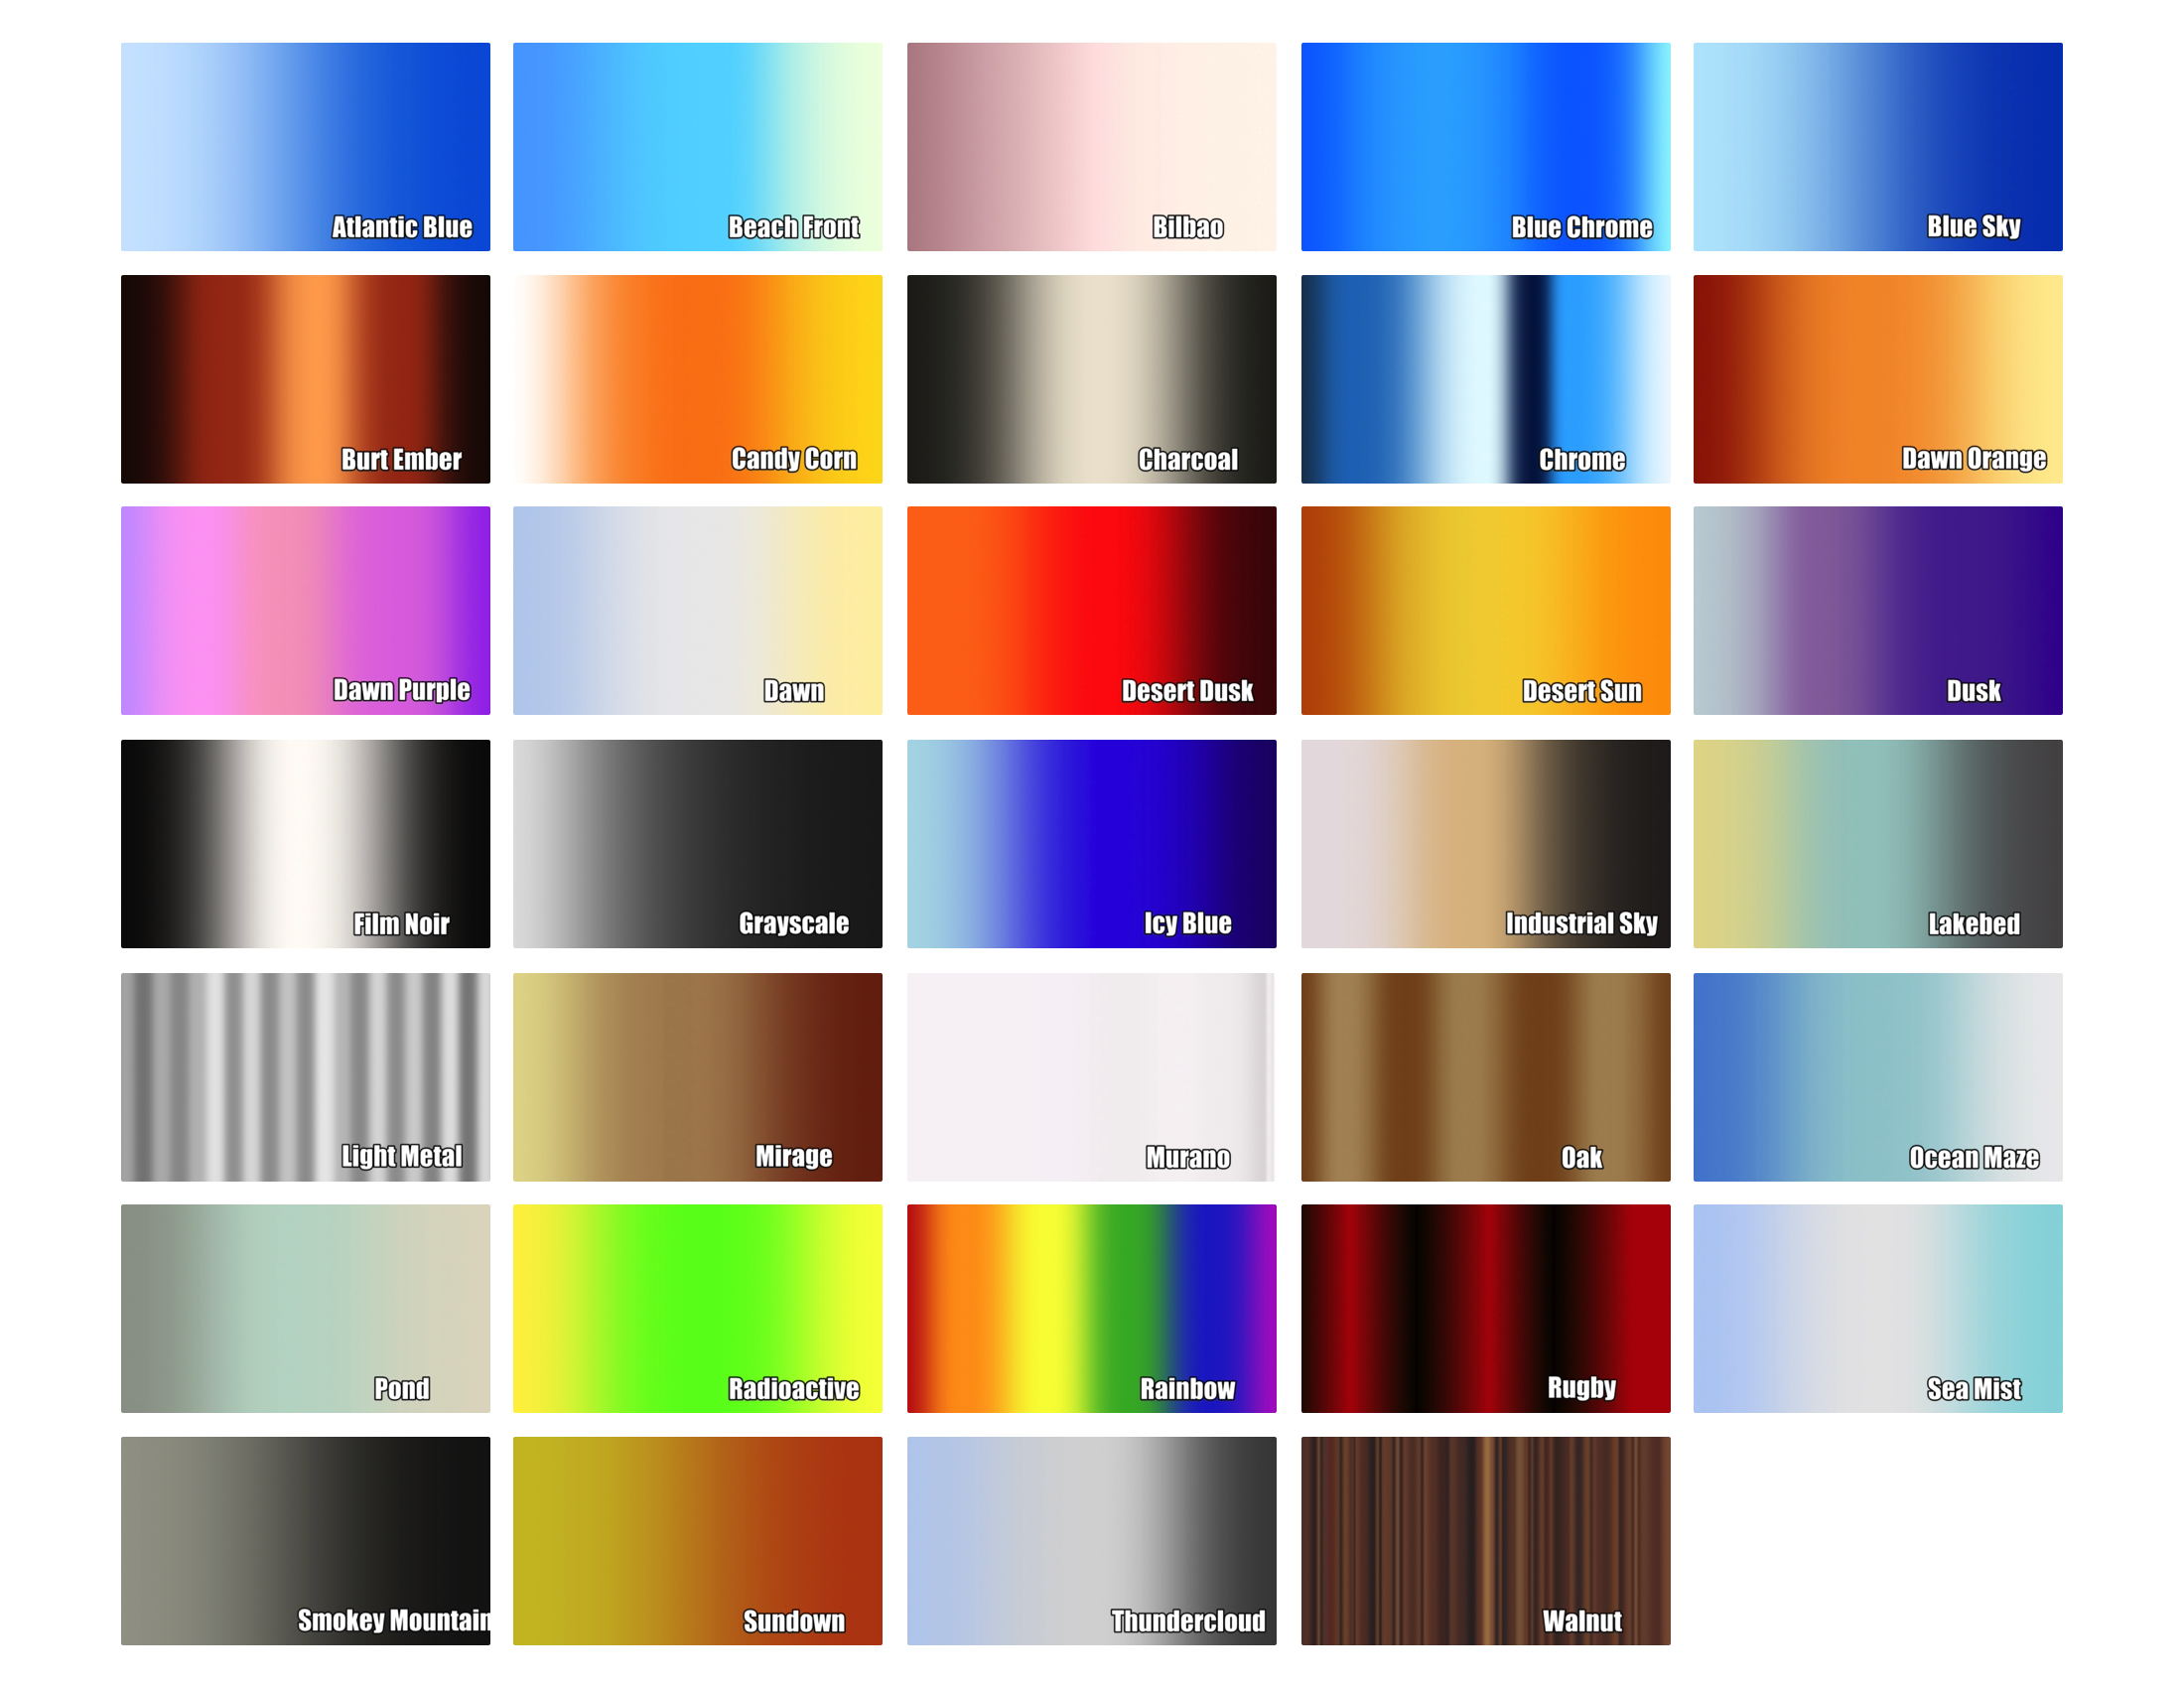
Click on image for single page preview of the Gradients in Apple Motion
34 Motion Gradients
Here are all the names of the gradients:
- Atlantic Blue
- Beach Front
- Bilbao
- Blue Chrome
- Blue Sky
- Burnt Ember
- Candy Corn
- Charcoal
- Chrome
- Dawn
- Dawn Orange
- Dawn Purple
- Desert Dusk
- Desert Sun
- Dusk
- Film Noir
- Grayscale
- Icy Blue
- Industrial Sky
- Lakebed
- Light Metal
- Mirage
- Murano
- Oak
- Ocean Haze
- Pond
- Radioactive
- Rainbow
- Rugby
- Sea Mist
- Smokey Mountains
- Sundown
- Thundercloud
- Walnut
Video Sample
Style Text in Apple Motion
Sample Text Styles in Apple Motion
Here's a sample of all the available text styles in Apple Motion:
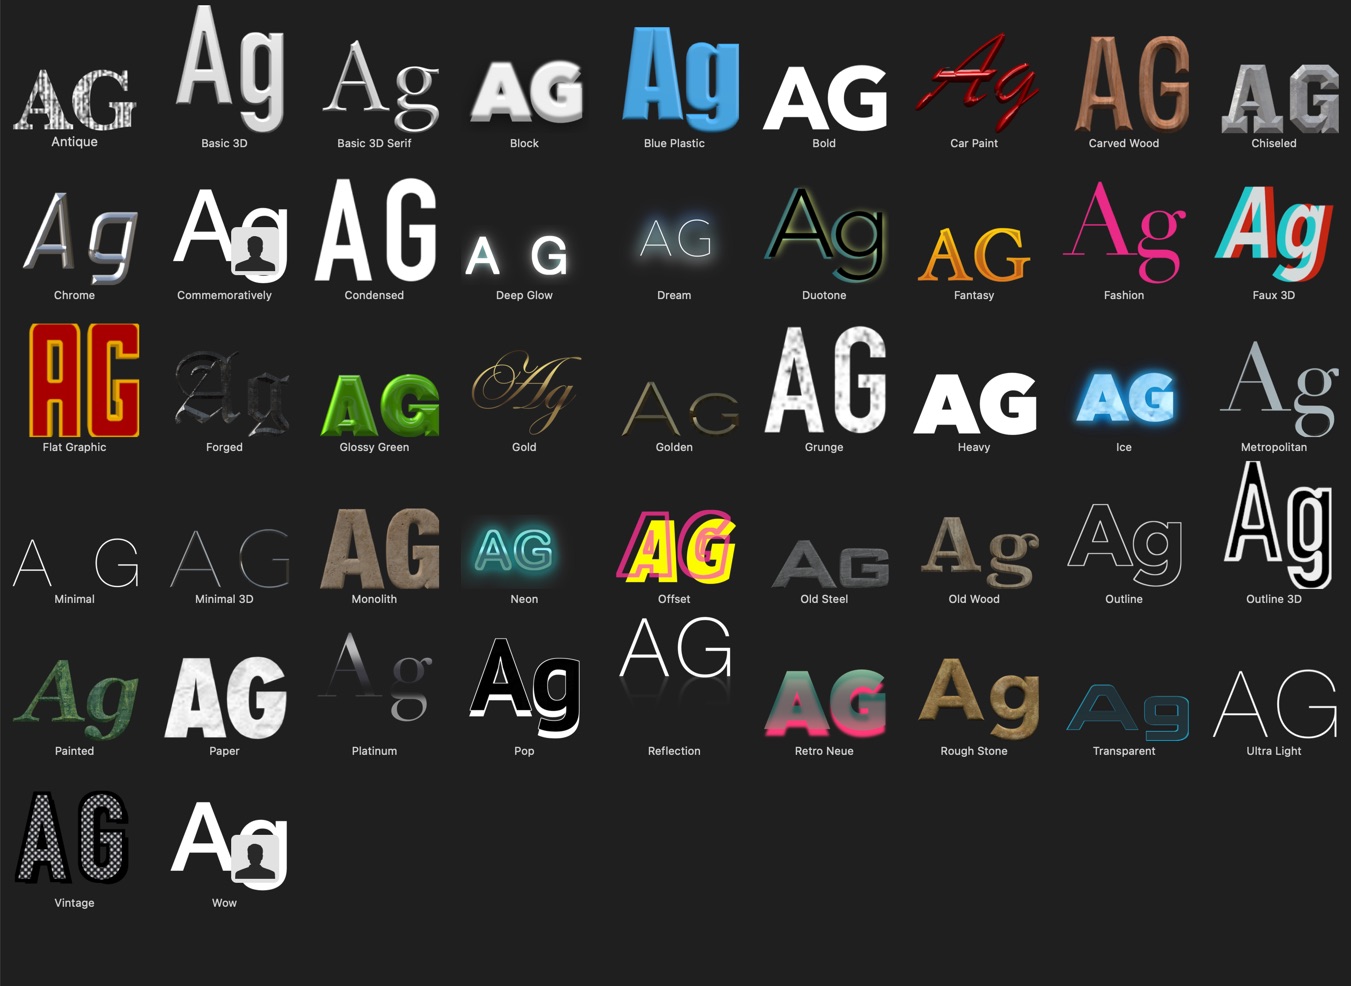
Text Style Names
Antique, Basic 3D, Basic 3D Serif, Block, Blue Plastic, Bold, Car Paint, Carved Wood, Chiseled, Chrome, Commemoratively, Condensed, Deep Glow, Bream, Duotone, Fantasy, Fashion, Faux 3D, Flat Graphic, Forged, Glossy Green, Gold, Golden, Grunge, Heavy, Ice, Metropolitan, Minimal, Minimal 3D, Monolith, Neon, Offset, Old Steel, Old Wood, Outline, Outline 3D, Painted, Paper, Platinum, Pop, Reflection, Retro Neue, Rough Stone, Transparent, Ultra Light, Vintage, Wow.
Note: This list is from Apple Motion 5.6
Apply Style
To apply the style simply drag and drop the style to the text. Use the Inspector on that text to make any changes.
PermalinkSchedule
| Thursday | Gluten Free |
| Friday | Macintosh |
| Saturday | Internet Tools |
| Sunday | Open Topic |
| Monday | Media Monday |
| Tuesday | QA |
| Wednesday | New England |