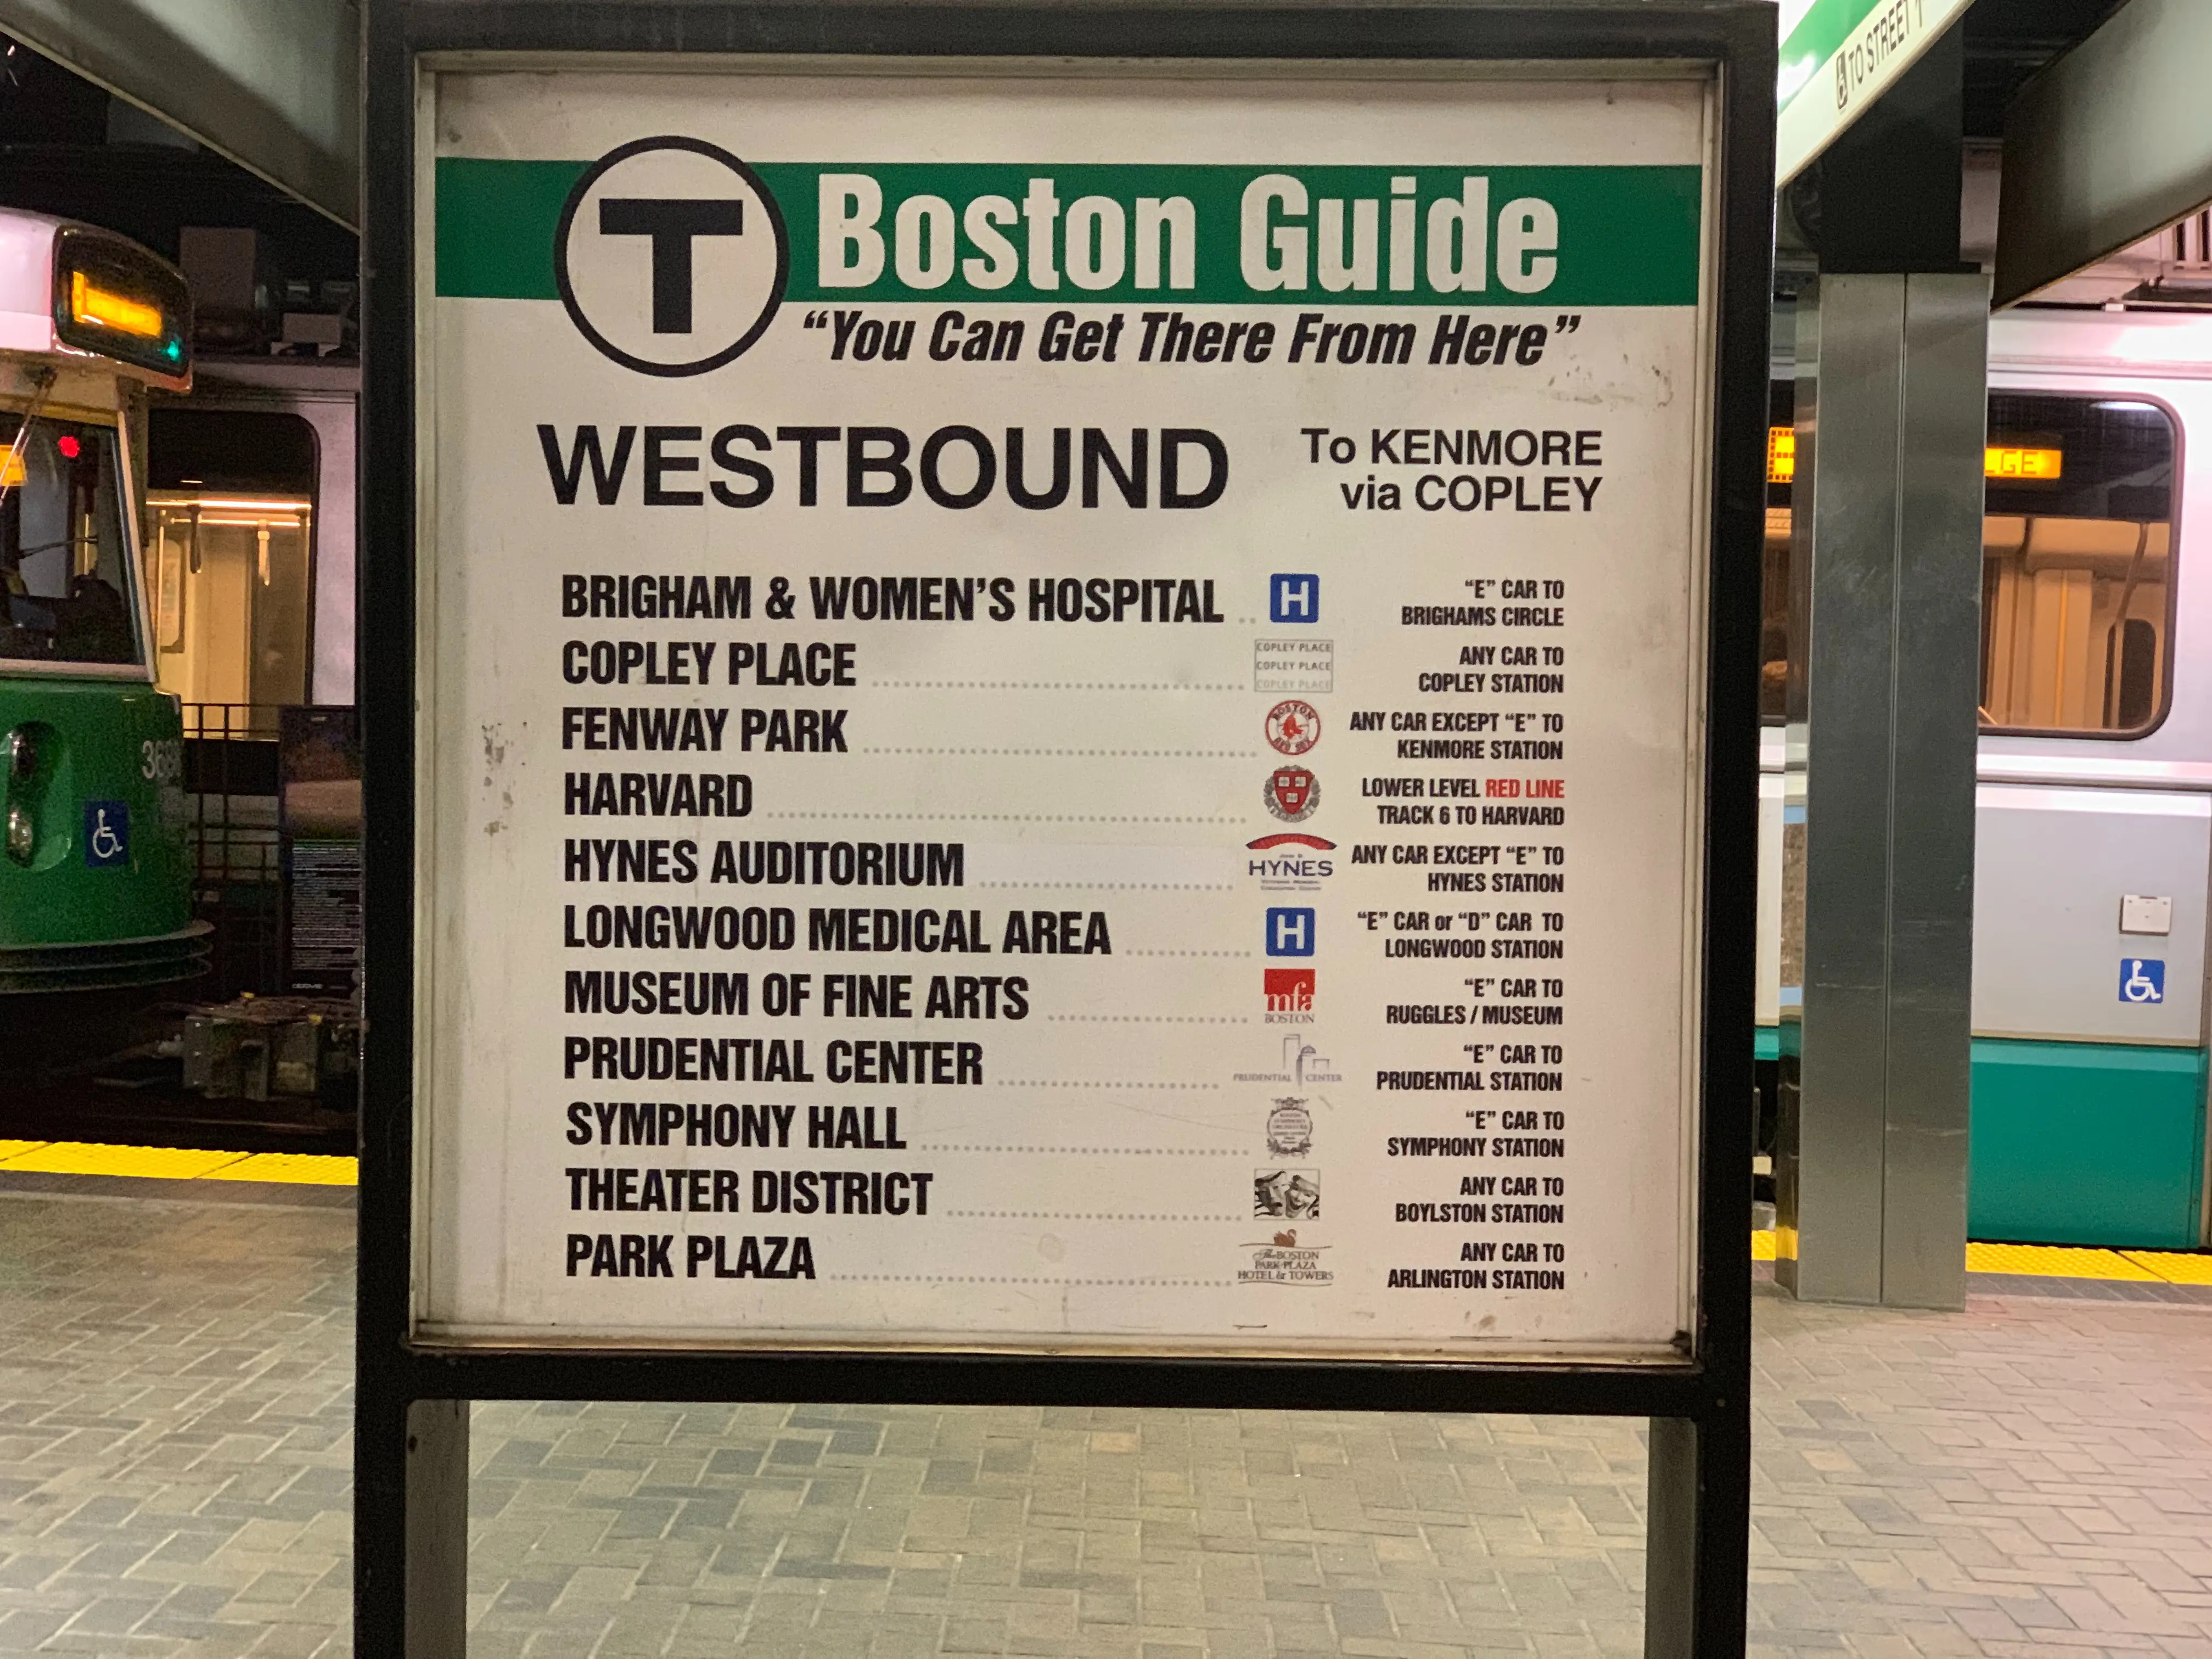
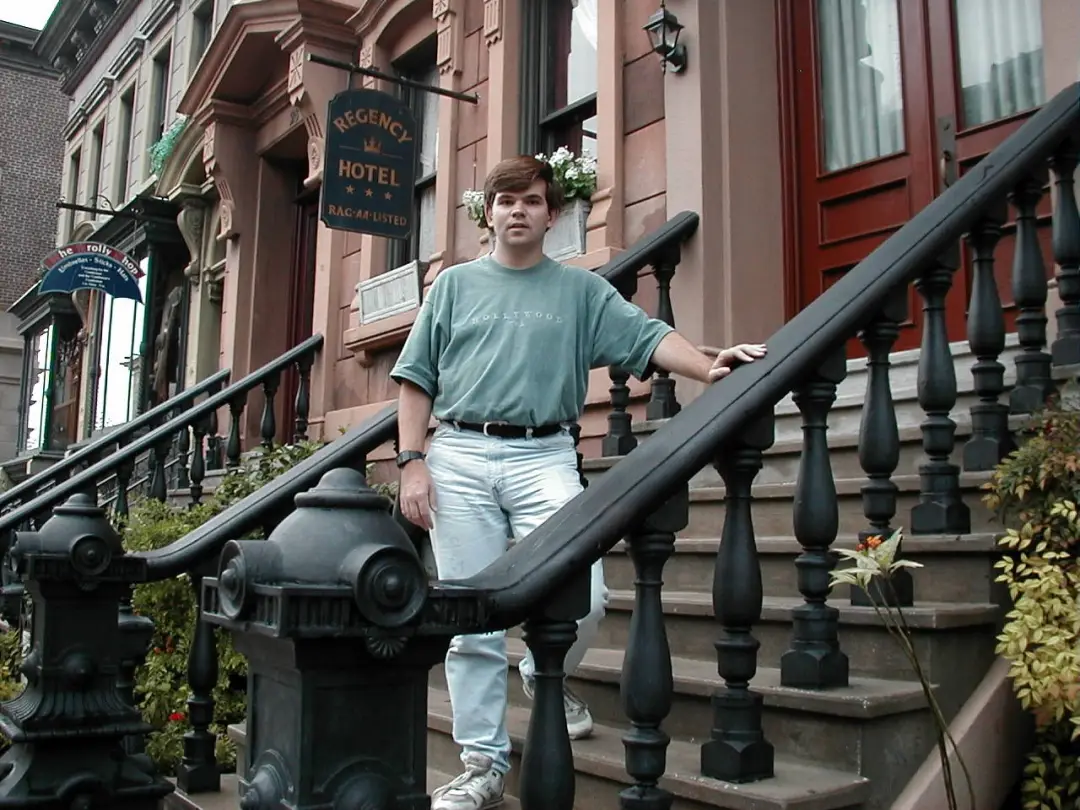
If you've been to Boston's Park Street station, you've probably seen the old sign meant to help tourists find popular spots. Since it's pretty outdated, I decided to ask ChatGPT and Google's Gemini how they would redesign it for the modern commuter.
This is a sample retro American Advertising that you might see in a 1990s newspaper. This is a cool way to promote any top or functionality. Add additional information in the prompt to deliver the message that you want.
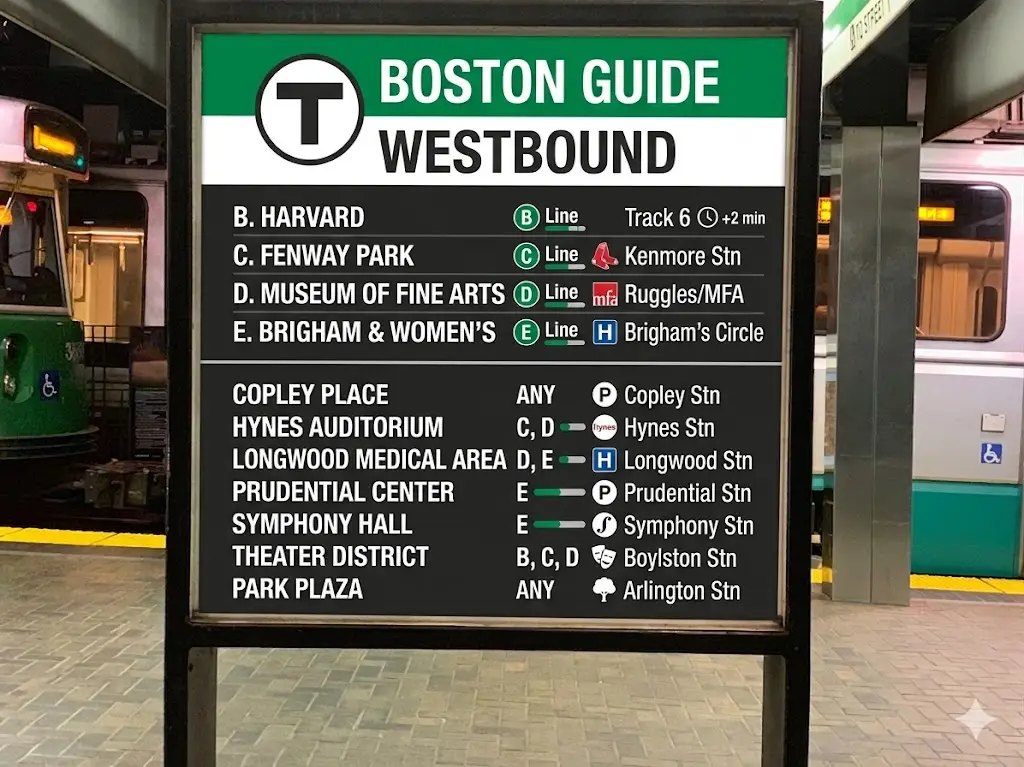
Gemini Sample
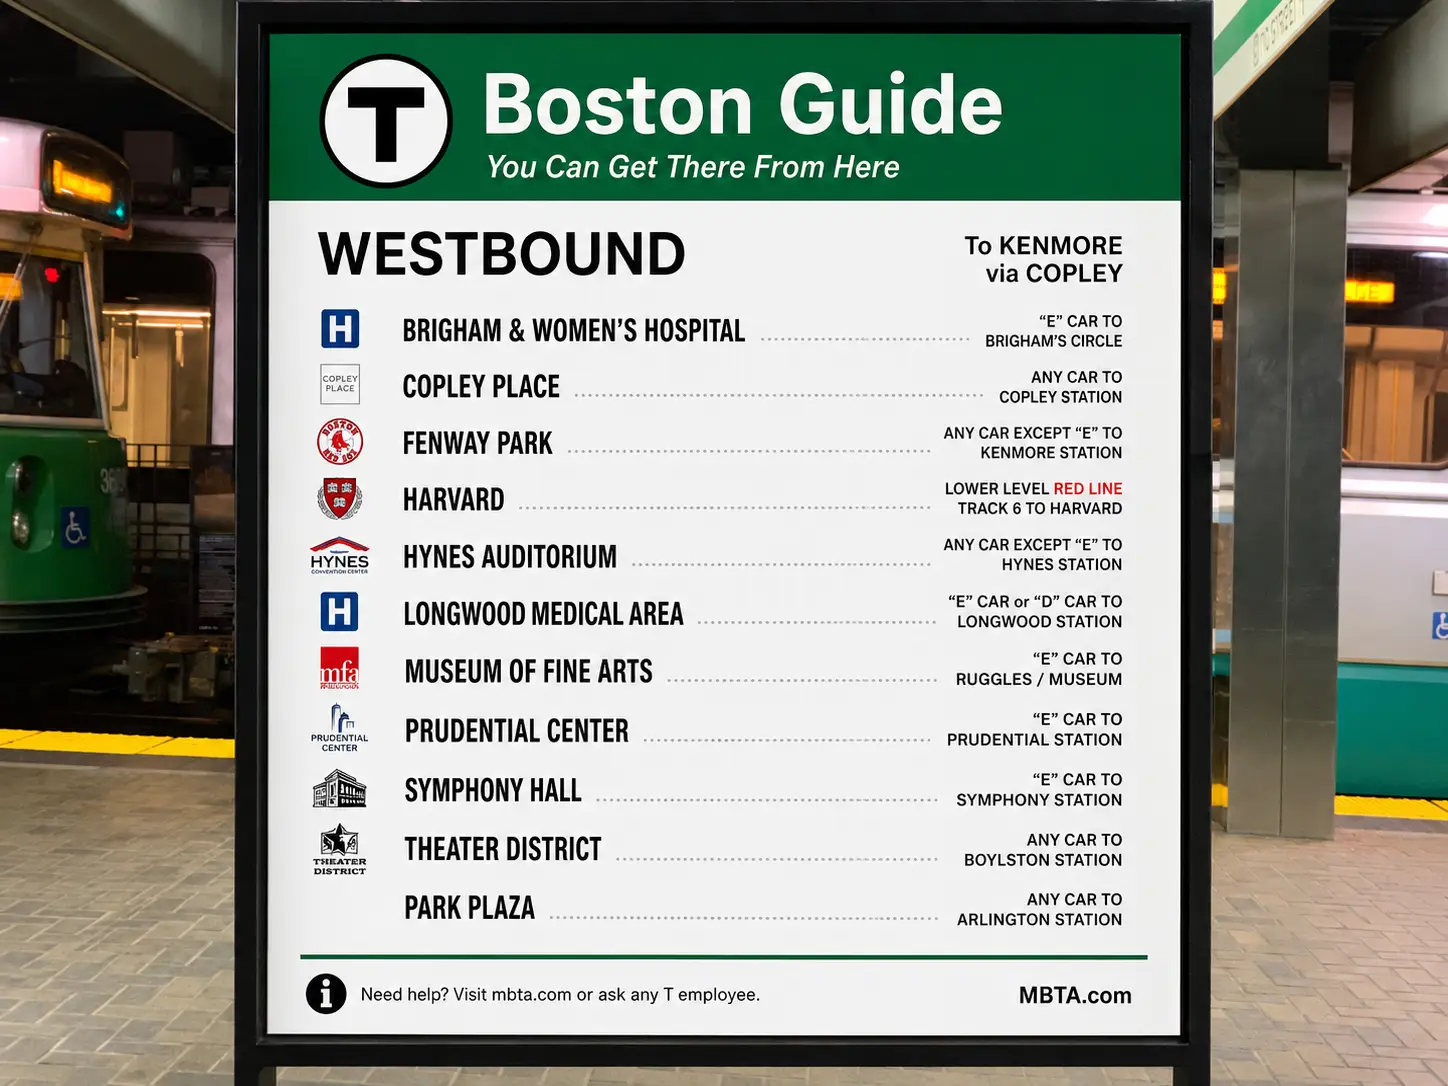
ChatGPT Sample
Prompt
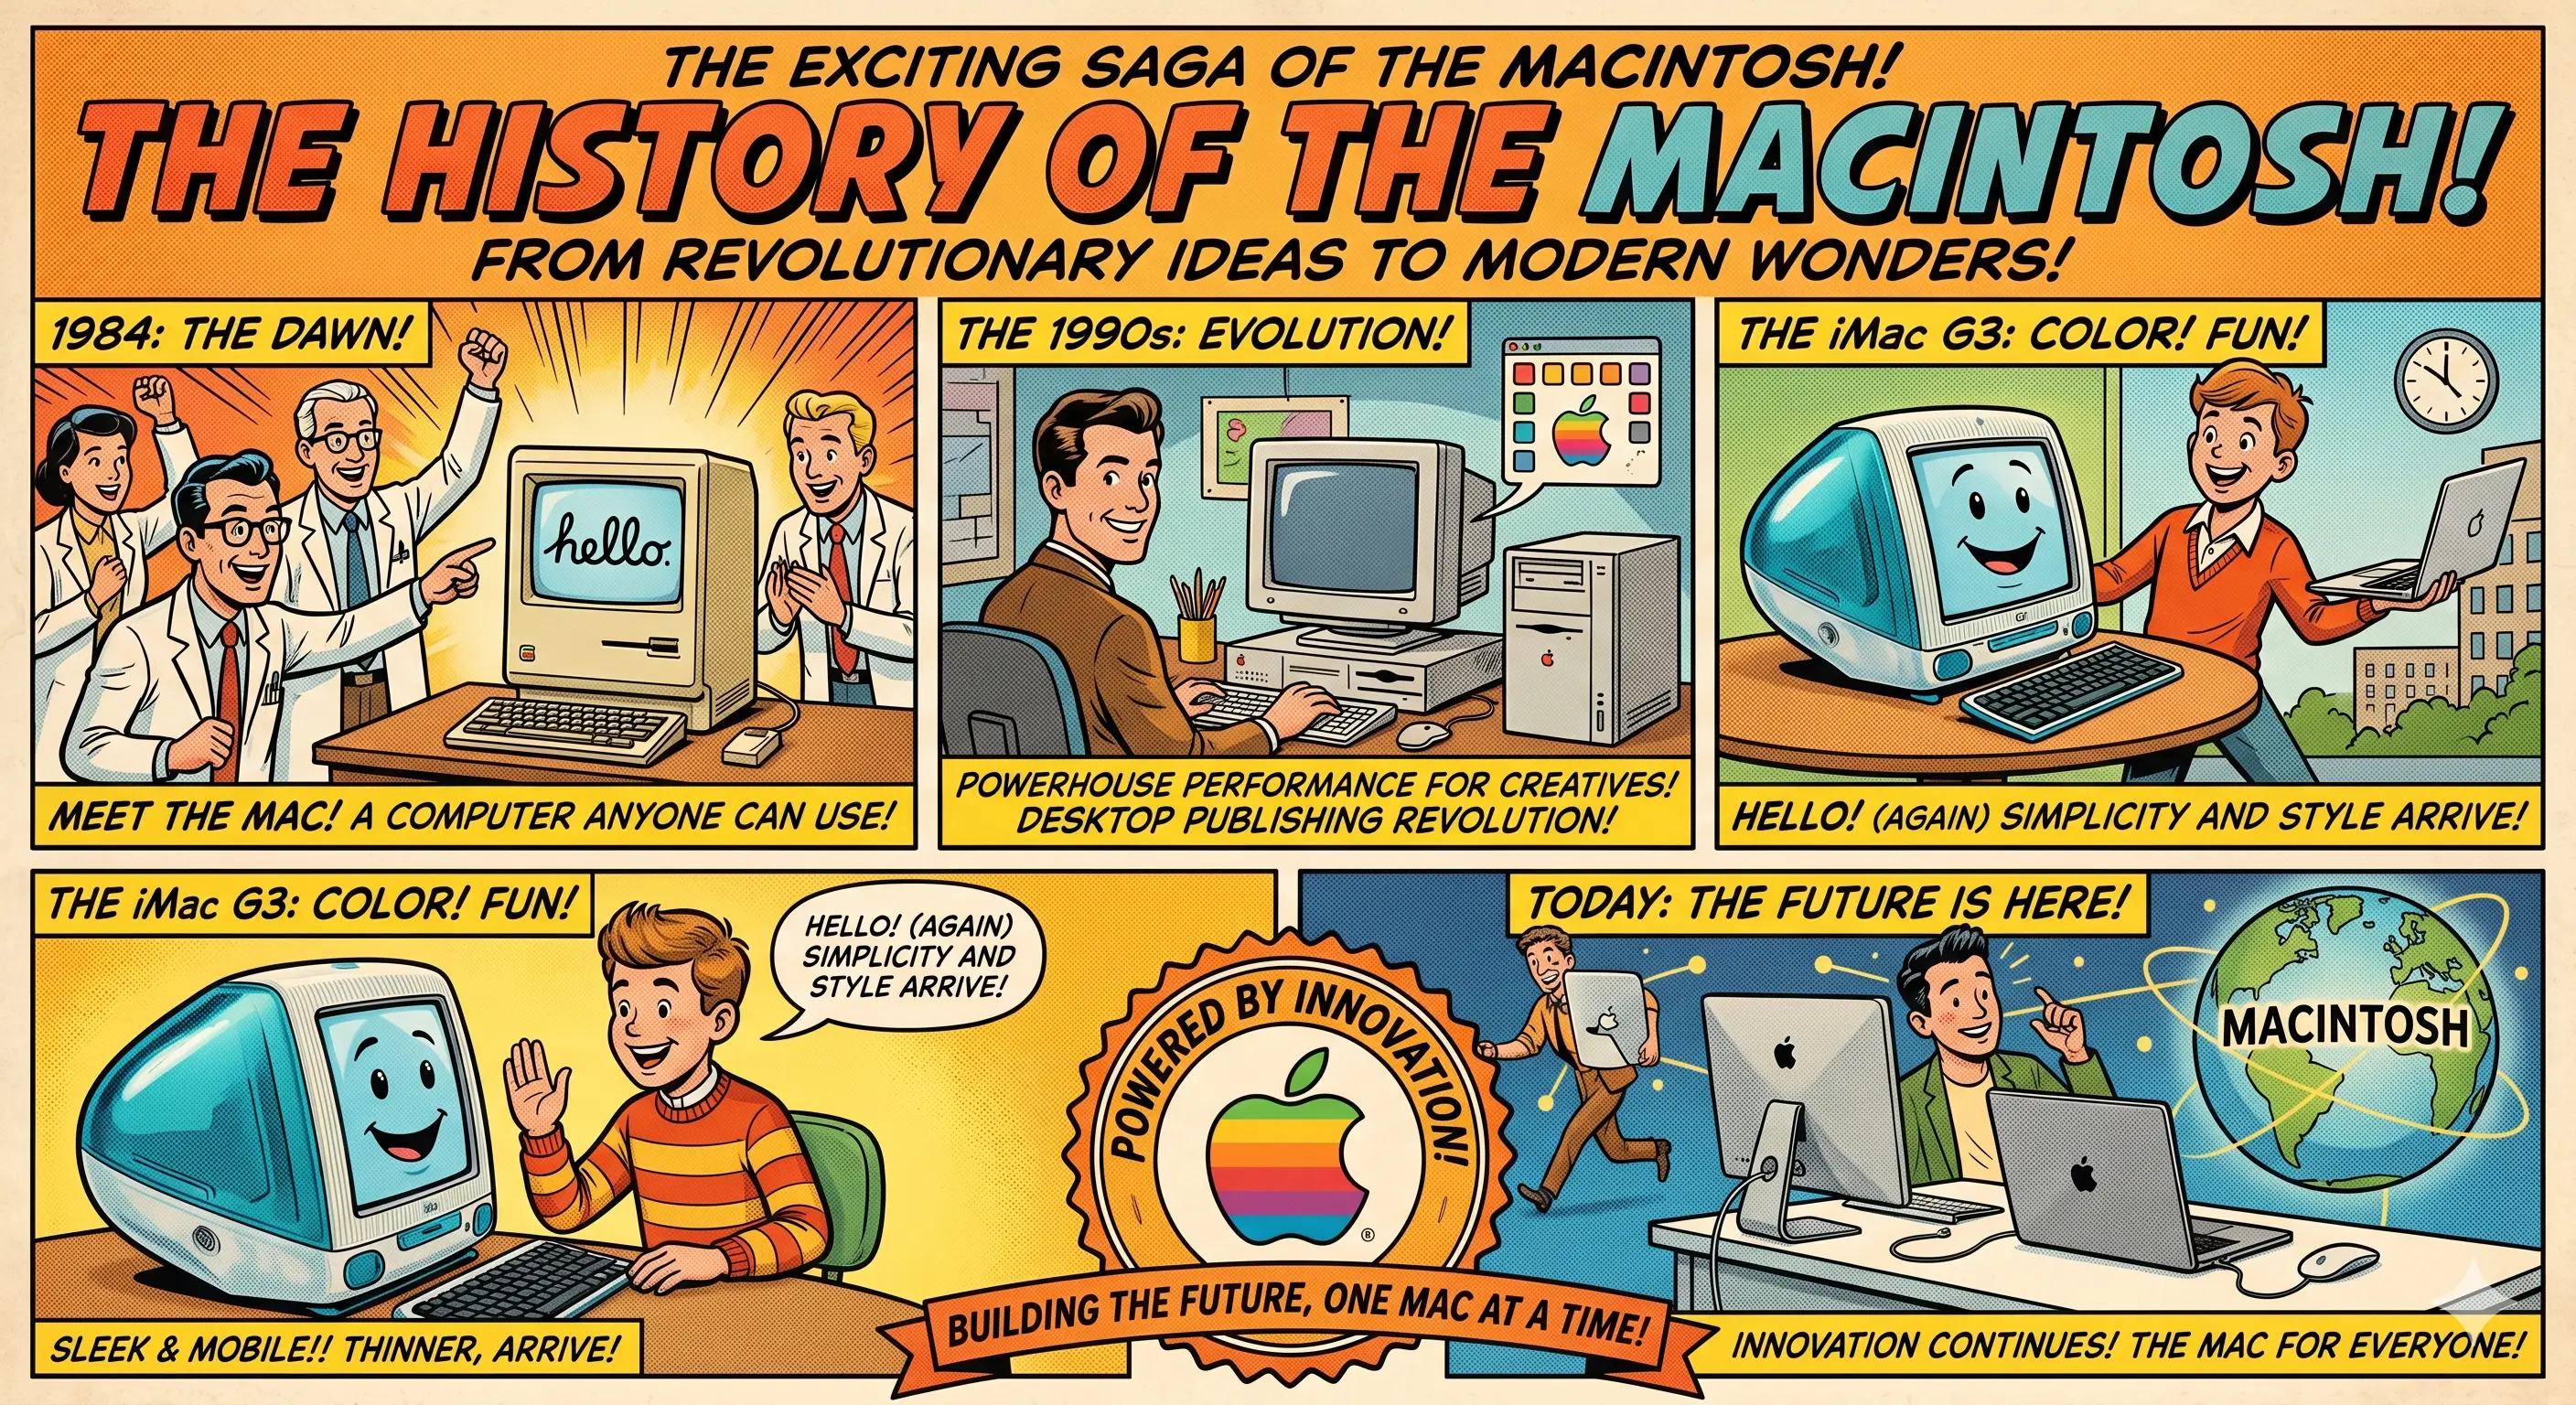
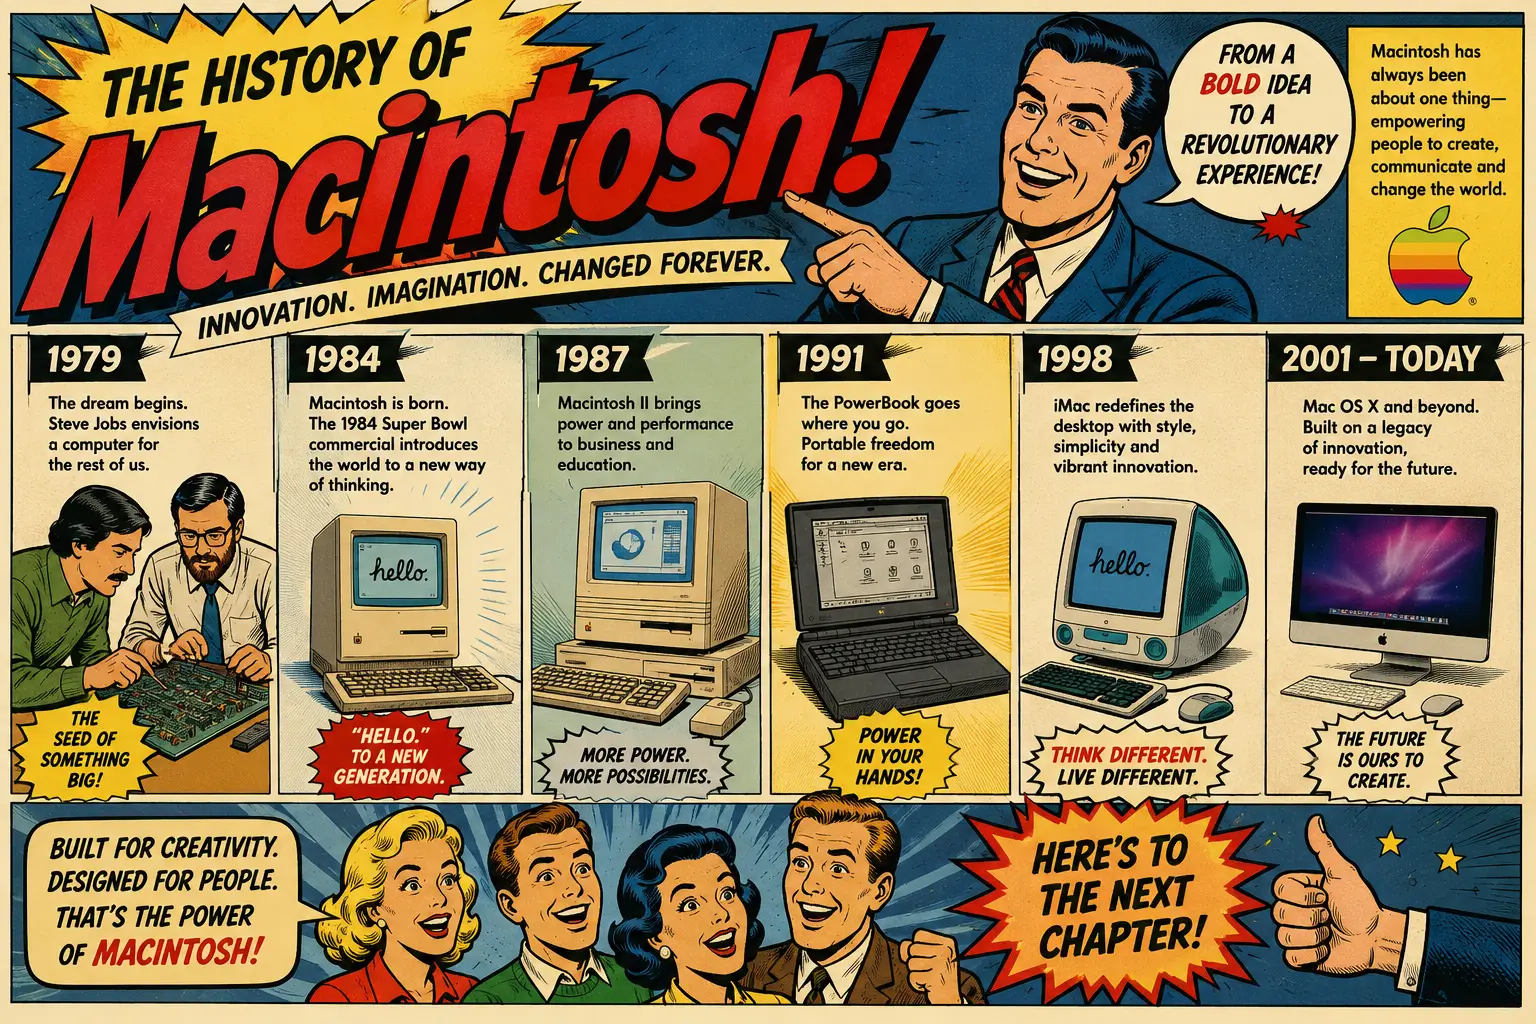
Act as a Macintosh expert, create an image of the history of the Macintosh. The image style is reminiscent of mid-20th-century American advertising, specifically the retro comic book or vintage illustration style popular in the 1950s and 1960s. It features bold outlines, vibrant colors, and stylized, cheerful cartoon characters, often used to promote products or services in a persuasive and eye-catching manner.
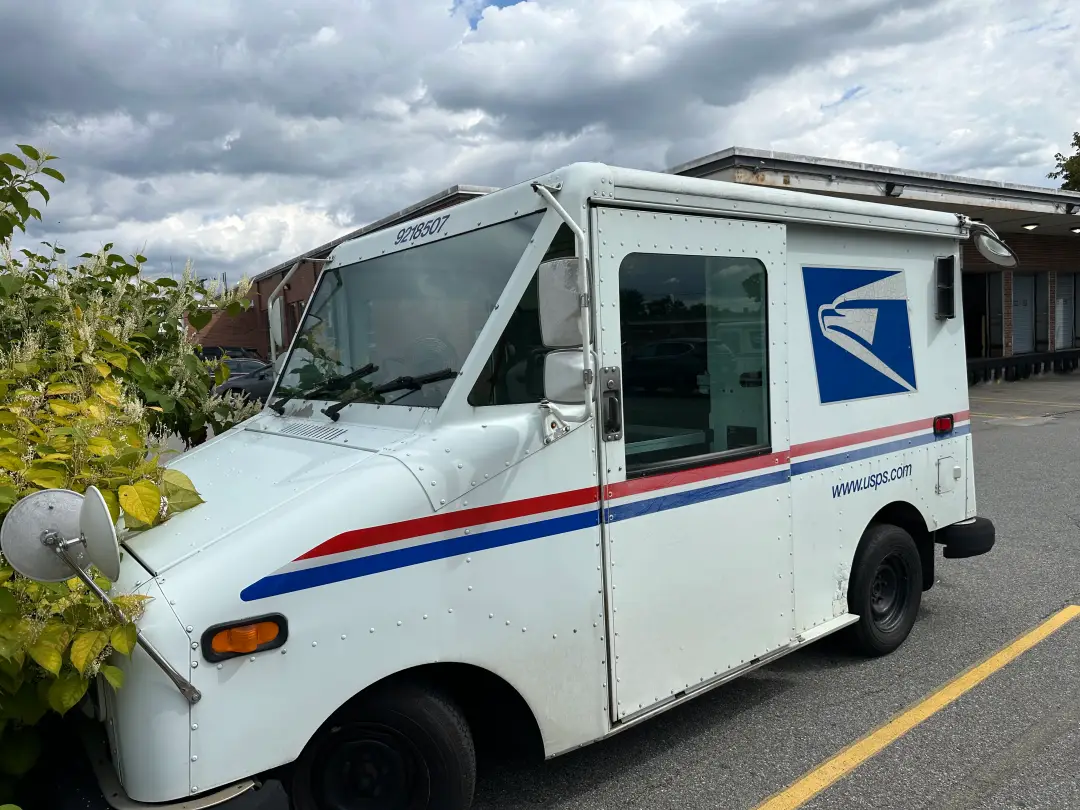
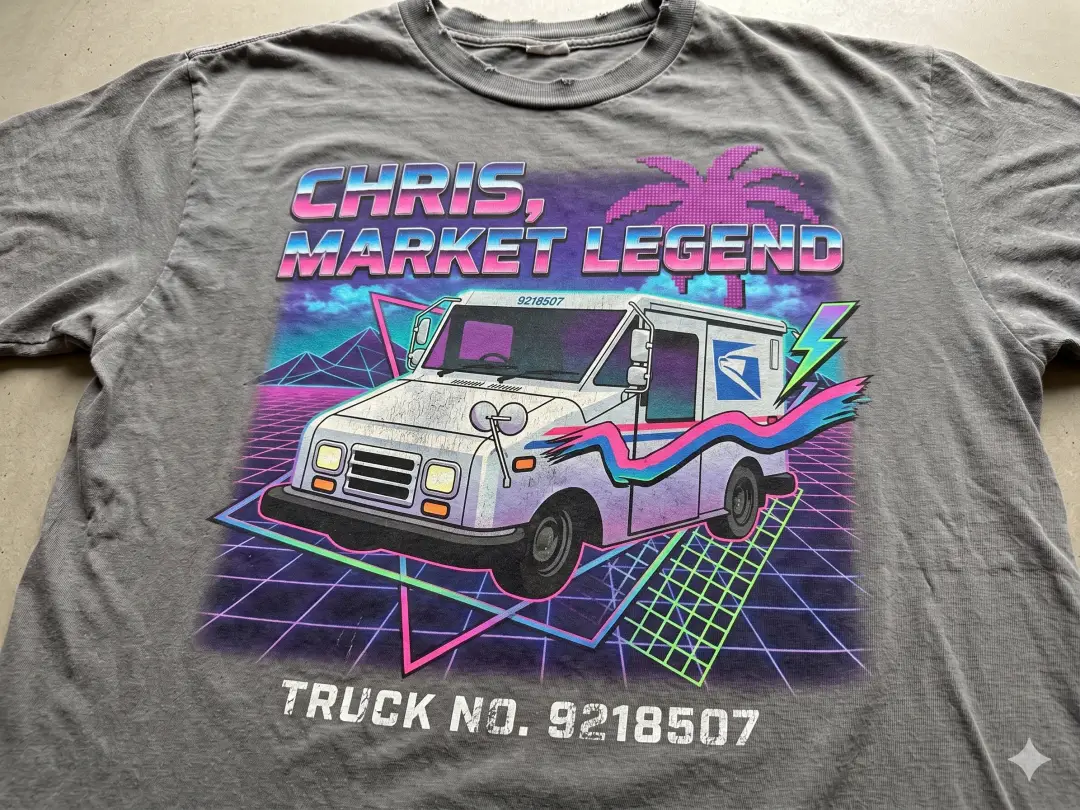
Simple way to create a retro T-Shirt from a photo. No reason to buy shirts from the store when you can make your own pattern.
Before
After
A retro, authentic 1980s screen-printed t-shirt featuring the character from the attached image transformed into a stylized graphic. The design must include a grid pattern, neon geometric shapes, and vaporwave color gradients. Add bold, vintage 80s typography that reads 'CHRIS, MARKET LEGEND.' The image should capture the specific texture of an old, faded screen-print on a distressed, grey cotton tee.
Convert an image in a photo to a Chibi-Style Toy. This is fun to use as a computer folder icon.
Before
After
Prompt
Using the attached image create a high-quality 3D digital render of a Chibi-style vinyl toy character, inspired by Pop Mart and Nendoroid aesthetics. The character features classic Chibi proportions: an oversized, adorable head, large expressive glossy eyes, and a small, stylized body. Crafted with a smooth matte vinyl texture, clean lines, and vibrant, saturated colors. Soft, studio-quality three-point lighting creates gentle highlights and soft shadows, emphasizing the 3D depth and form. The character stands in a cute, playful pose against a clean, minimal, soft-gradient solid background, looking like a premium collectible figurine.
For new business owners who want work that feels rooted and sustainable, starting a local business can be both energizing and intimidating. The core tension is real: local market opportunities are everywhere, yet it's hard to tell which needs are urgent, which ideas will earn trust, and how to build something that lasts beyond opening week. When community entrepreneurship grows, the economic impact of small businesses shows up quickly in everyday life, more convenient services, stronger neighborhoods, and money circulating closer to home. This is about turning a personal ambition into a business your community can actually rely on.
Quick Summary: Starting a Local Business
Clarify your business idea, define your customer, and map a simple plan you can execute.
Register your small business properly so you can operate with confidence and legitimacy.
Choose financing options that fit your stage, budget, and tolerance for risk.
Engage your community intentionally, building trust and relationships that support long term growth.
Use local marketing channels that connect you with nearby customers and keep your visibility steady.
Make Posters Work: Where to Place Them and What to Say
Once you've got your simple launch roadmap in mind, a few well-placed posters can cut through the digital noise and make your business feel real to the people nearby. Posters shine when your community is already out and about, walking, waiting, browsing, so you're showing up in the physical places your first customers actually move through. Put them in high-traffic neighborhood spots where people naturally pause and look: community bulletin boards, local cafés, gyms, libraries, and small shops that welcome flyers.
Keep the message clear and local, what you do, who it's for, and how to find you, so a passerby can "get it" in one glance. If design isn't your thing, you can create custom print posters with an easy app that helps you design, customize, and print high-quality posters using templates and intuitive editing tools.
From Local Research to a Community-Centered Launch
This process helps you turn a business idea into a real, neighborhood-ready opening by connecting research, setup, relationships, and your first big moment of visibility. It matters because most local businesses do not fail from lack of effort, they struggle when the launch feels disconnected from what nearby customers actually want.
Define who you serve and what they need
Start by writing a one-sentence promise (who you help, what you help them do, and the result). A quick primary target group snapshot keeps you from trying to appeal to everyone and guides every decision that follows, from pricing to messaging.
Validate demand with simple local market research
Walk your area at the times people would buy from you and take notes on what is already available, what is always busy, and what seems missing. Then run 10 short conversations with potential customers to confirm what they would pay for, what would stop them from buying, and what would make them choose you.
Set up the basics so you can accept money confidently
Choose your business name, your core offer (1 to 3 services or products), and a simple price list you can explain in 20 seconds. Then handle the essentials like registration, a separate business bank account, and a straightforward way to take payments, because nothing breaks trust faster than a messy checkout.
Build relationships before you ask for attention
Start collecting contacts early by inviting interested locals to a short email or text list, then send one helpful update each week. Anchor your outreach to setting clear goals for the kind of community you want around your business, so your messages feel useful and consistent instead of salesy.
Plan a launch that feels like a neighborhood moment
Pick a date, a small location, and one clear reason to show up (a demo, a free mini-service, a tasting, a first-day deal). Confirm two partners who already have local trust, like a nearby shop or organizer, so your opening starts with warm introductions instead of cold traffic.
Launch → Listen → Improve → Repeat
After you open, your job shifts from "getting ready" to running a steady cadence. This workflow keeps you visible, responsive, and financially grounded, so momentum does not depend on occasional bursts of energy. It also builds a simple feedback habit.
Stage
Action
Goal
Set the weekly scoreboard
Track leads, sales, repeat visits, and top questions
Know what is working and what is stuck
Stay close to customers
Ask five buyers what almost stopped them
Find friction and improve the offer
Refresh local visibility
Post one proof story and one helpful tip
Stay remembered without constant selling
Strengthen community ties
Visit two nearby businesses and propose a simple swap
Earn referrals through trust
Adjust and simplify
Drop one weak task, tighten one promise, update pricing
Make growth feel lighter, not louder
Each stage feeds the next: numbers point to questions, questions shape tweaks, and tweaks create better stories to share. Keep the loop small enough to repeat, and your business becomes a familiar, improving presence.
Build a Local Business People Trust for the Long Term
Starting a local business can feel like a constant tug-of-war between paying today's bills and building tomorrow's reputation. The owners who last aren't the ones who sprint; they're the ones who stay grounded in a long-game mindset, launch, listen, improve, repeat, so motivation turns into steady progress and personal satisfaction from entrepreneurship. Build trust one small improvement at a time, and the community will build with you. Choose one simple feedback loop to run this week and follow through on what it teaches. That consistency creates community economic benefits, strengthens the social impact of local businesses, and leaves a long-term business legacy your neighbors are proud to support.
Simple prompt to convert a person in an image to a balloon.
Before
After
Ai Prompt
Create a surreal ultra-realistic 3D render styled as a collectible art toy balloon, featuring a cartoon face inflated like a shiny balloon with hyper-detailed sculpted skin, subtle pores, exaggerated round chubby cheeks, oversized pouty lips, and playful cartoon proportions. A balloon knot sits at the base of the neck with a thin string hanging naturally, with everything below the neck and the background removed. The expression is comically whimsical, balanced with a surreal glossy finish. Use soft studio lighting on a smooth neutral beige background with cinematic depth of field, Pixar-quality stylization, poster-grade realism, and a polished sculptural finish. Strange yet charming surrealism, rendered with extreme detail and photographic clarity.
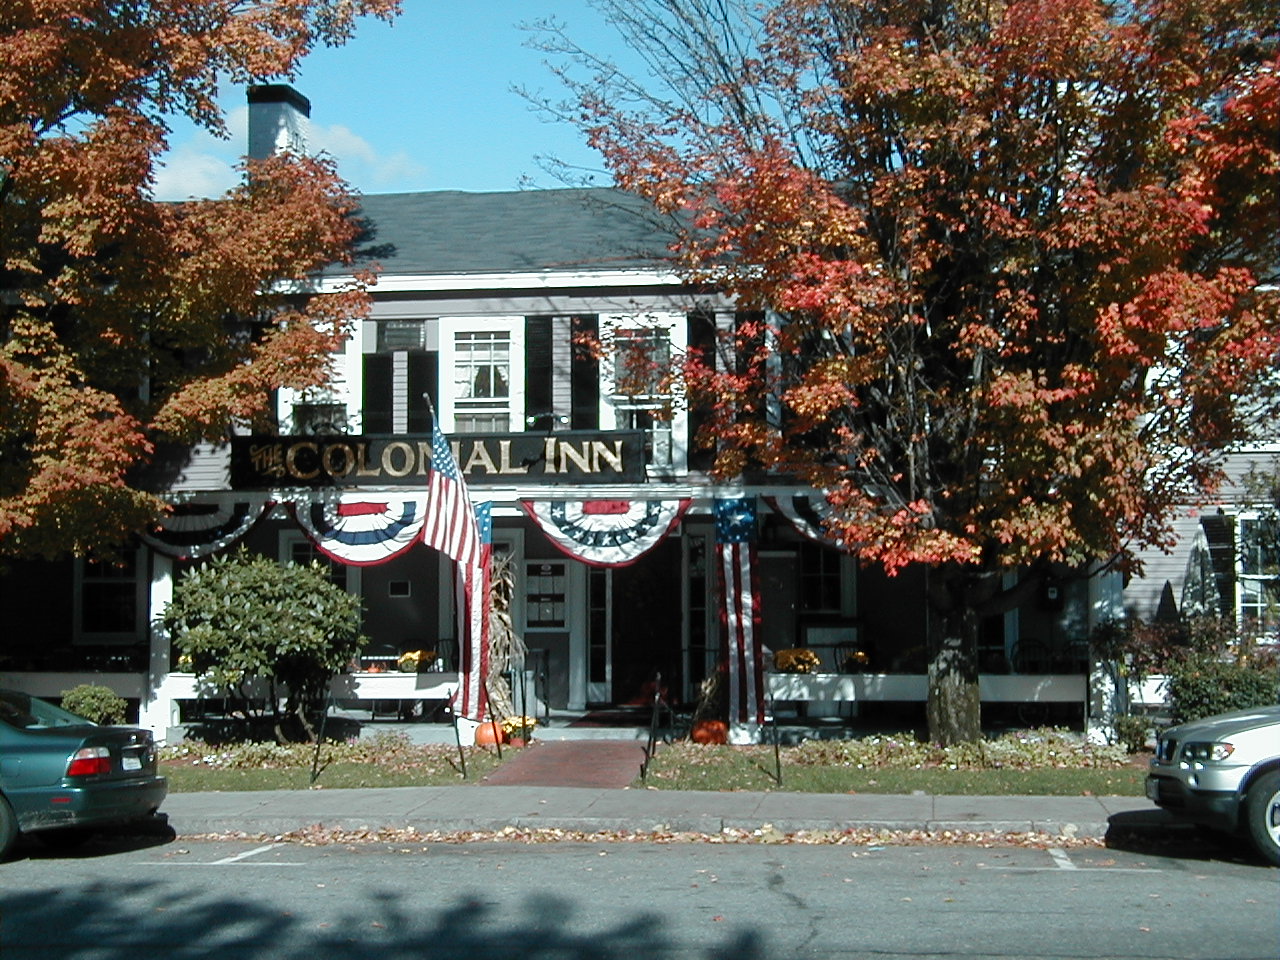
Sample prompt to convert an image of the Colonial Inn in Concord, Massachusetts into a Claymation image:
Before
After
Prompt
Transform this image into a high-quality claymation scene in the style of Wallace & Gromit. Use visible fingerprint textures on the clay characters, soft studio lighting, and a handcrafted feel. Ensure the colors are vibrant but matte, with a slight 'tactile' depth to every object.
Create a Plush Slippers from an image using ChatGPT.
Before
After
create a fully plush, cartoonish novelty slippers from the two people in this image, exaggerated features, fuzzy texture, smooth beige background, velvety fabric, whimsical design, toy-like proportions, playful expression, plush detailing, cozy and exaggerated silhouette
For bootstrapping founders, solo entrepreneurs, and small business owners chasing funding big ideas, the startup financing challenge is painfully simple: money needs to show up fast, but equity ownership feels like the one thing that can’t be replaced. Investors may bring cash, yet the price is often a louder voice in the room and less business ownership control where it matters most. That tension - speed versus control - keeps smart entrepreneurs stuck between stalling growth and selling off future freedom.
There’s a way to think about funding that keeps ownership in the founder’s hands.
Understanding Equity-Free Funding
Equity-free funding is money you raise without handing anyone a slice of your company. Think non-dilutive funding: cash comes in, but your ownership stays put. The big buckets are straightforward: debt (loans, lines of credit), grants or subsidies, crowdfunding and pre-sales, and good old bootstrapping.
Why it matters: Keeping full control means you can move faster, hire when you want, and say no to “helpful” opinions. However, you trade cap-table calm for repayment risk and serious cash-flow discipline. You keep the keys, but you have to hit the numbers.
Equity-Free Funding Options, Side by Side
This table compares the main equity-free ways to fund a big idea and keep 100% ownership intact.
Option
Benefit
Best For
Consideration
Debt financing (loan/LOC)
Fast capital with predictable terms
Inventory, equipment, short payback projects
Monthly payments reduce flexibility if sales dip
Grants and subsidies
Non-repayable money, keeps control
R&D, community programs, specific industries
Competitive, slow timelines, heavy reporting
Crowdfunding and pre-sales
Validates demand while funding production
Consumer products, creative launches, early traction
Delivery deadlines and platform fees; public failure risk
Bootstrapping
Maximum control and discipline
Service businesses, steady growth, low overhead
Slower scaling; founder time and cash get squeezed
Home equity (HELOC/loan)
Flexible pool of capital, often lower rates
Homeowners funding expansion with clear ROI
Home is collateral; rate resets and repayment risk
FAQs on Funding Big Ideas Without Giving Up Equity
Q: What does “alternative finance” actually mean for regular founders?
A: It’s basically funding that isn’t a traditional bank loan and isn’t selling shares. It covers private credit and non-bank capital solutions that can feel more flexible than old-school lending.
Q: Who usually qualifies for equity-free funding if I’m new?
A: You’ll typically need some proof your business can pay: sales, signed contracts, invoices, or solid personal credit. If you’re pre-revenue, grants, pre-sales, and service-based bootstrapping are often friendlier starting points.
Q: How fast can the money land in my account?
A: Fast options exist, but speed usually costs more or requires stronger documentation. Invoice-based funding (factoring) can be quick. If you need “this week” money, have your statements and customer payment history ready upfront.
Q: What fine-print traps should I hunt for before signing?
A: Watch for variable rates, personal guarantees, blanket liens, and stacking fees (origination, draw, maintenance). Always ask for the total payback amount and what happens if revenue dips for 60 days.
Use This 5-Step Plan to Fund Growth (Without Panic)
Match the money to how you make money: Determine if you get paid before or after delivery. If paid upfront, scale with customer-funded growth. If paid later, prioritize options that bridge timing gaps.
Do a 10-minute risk tolerance check: Score your payment predictability and sales steadiness. If sales are "lumpy," lean toward flexible repayment options.
Run a “small test” financing move: Instead of borrowing for a year, borrow for one cycle (e.g., one inventory batch) and measure the results[cite: 51, 52].
Stress-test cash flow like a pessimist: Assume revenue drops 20% and expenses rise 10% for 90 days. Ensure you can still cover must-haves like payroll and taxes[cite: 54, 55].
Stack funding methods on purpose: Use a "combo meal" approach - for example, combining customer deposits with a small line of credit and a grant plan[cite: 57, 58].
Welcome to cryan.com's main blog page! Here you'll find a diverse collection of informative posts covering topics ranging from technology and lifestyle to career advice. There's something here for everyone.
We are committed to delivering the highest quality content, ensuring you have access to the most current and reliable information.