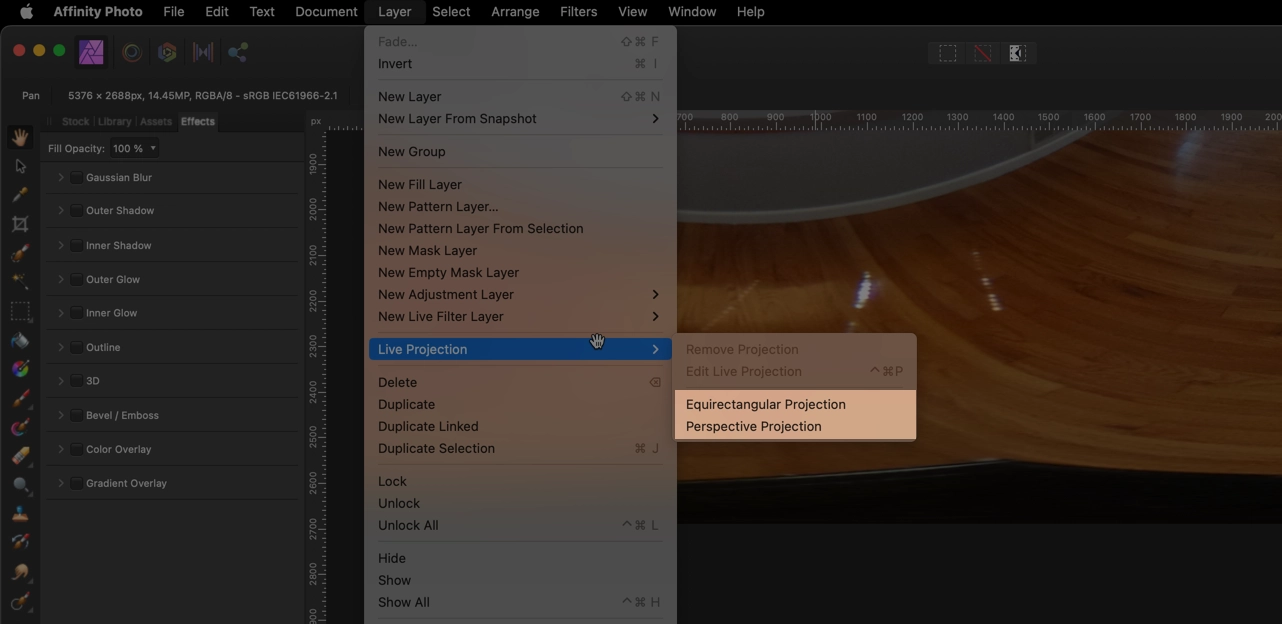
Equirectangular projection
View and Modify 360 Photos in Affinity Photo
If you have some 360 photos and would like to use parts of the images, you can do that in Affinity Photo. You can zoom in and out and "fly around" to find the perfect place to export as a picture. In addition, you can use Affinity's powerful touch-up features to clean up your 360-degree photo.
In Affinity Photo, the tool you use to navigate a 360-degree image is called the Equirectangular projection. This tool allows you to explore an image as if it were a globe; spinning it around until you find the perfect spot for your needs. Once you've found what you're looking for, simply exporting it as a regular 2D image will give great results thanks to Affinity's excellent editing capabilities.

Five Things I Learned
The Equirectangular projection tool is only available in Affinity Photo and not Affinity Designer.
You can simply drag and drop a spherical image onto the Affinity Photo icon. Once open, go to Layers -> Live Projection -> Equirectangular projection. Now you can click and drag around the image.
To zoom in and out in Live Projection, use the "Field of View" in the menu just above the photo. When you first enable the Equirectangular projection tool the Field of View is set to 75% zoom of the image.

Live Projection menu options.
You can import the image into an Affinity Photo file, to use the Equirectangular projection tool you need to Rasterize the image. Simply right-click on the image and select Rasterize. Then the Equirectangular projection tool will be available in the Layers menu.
If you switch tools while in the "Equirectangular projection tool" mode, you can get the "Live View Pointer" back by typing the following shortcut: Command - Control - P
