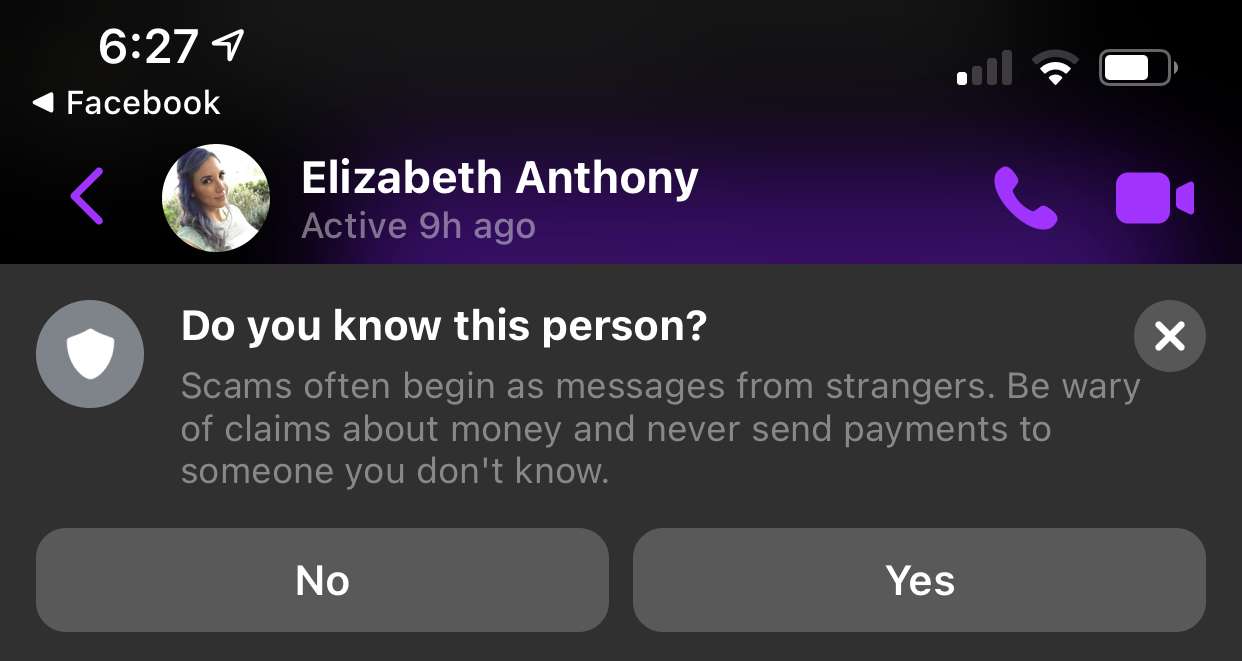
On Facebook, have you ever gotten a friend request from someone strange. Almost immediately after accepting the friend request, you get an instant message contact.
You may get an alert from Facebook, something like this:
Ya. This person is a scammer. Probably looking to get some money.
Five Signs You Are Being Scammed
Someone recently signed up to Facebook and immediately decided to friend you. There's no post and their profile is pretty vague.
They are someone you don't know. How did they find you? Why did they find you?
They communicate via chat and they ask a lot of questions about you. Seems like they are phishing. For someone new, they certainly know their way around Facebook instant messenger pretty quickly.
Sometimes when you talk to them it seems you are talking to a bot. Hard to explain this, but some conversations are just weird and seem very odd. Almost if the questions were going through some loop statement looking for the proper flow.
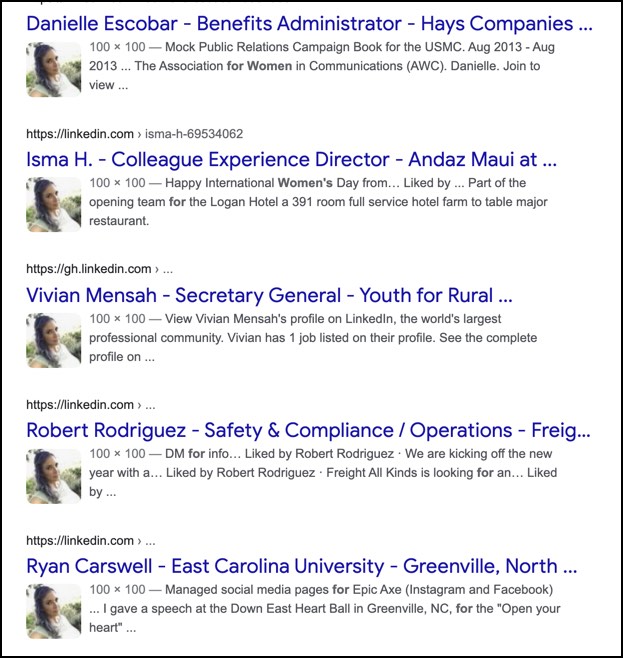
If the account only has one photo of the person, they probably stole the photo from someone else. You should do a "reverse" image search on google to see if the profile picture matched anyone else.
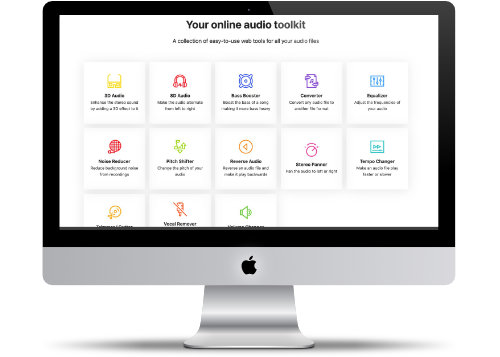
One of the popular tools is the "8D Audio" creator. What is that? Here's information from the website:
"8D Audio" is an effect that you can apply to your songs to make it sound like the audio is moving in circles around your head. This is achieved by adding an automated panning effect alternating from left to right. To maximize your listening pleasure, a reverb effect is also added to make it seem like the audio is coming from a live concert.
Available Tools
This is a list of all the tools available on the website:
3D Audio - Enhance the stereo sound by adding a 3D effect to it
8D Audio - Make the audio alternate from left to right
Bass Booster - Boost the bass of a song making it more bass heavy
Converter - Convert any audio file to another file format
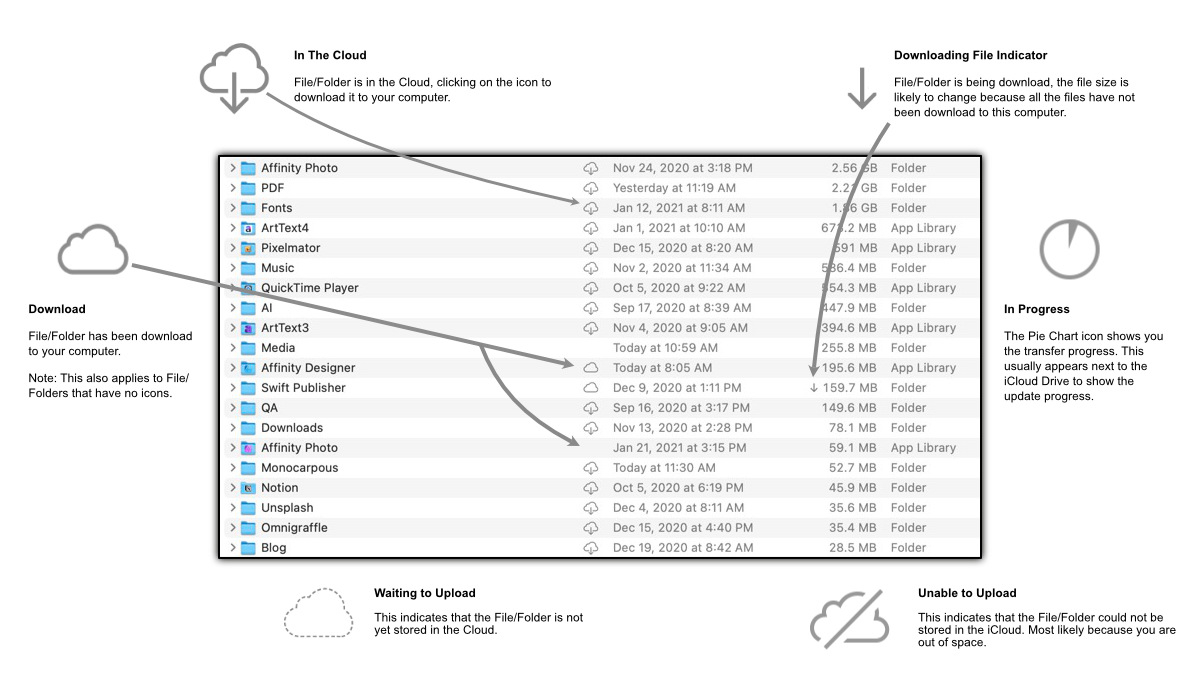
When using Apple's iCloud, you may see some additional icons in the Finder. Some of them make sense, but every once in a while I wonder what the icons mean.
Apple doesn't provide much help in figuring what the various icons mean. In particular, I was wondering about the arrow next to the file size. Why is it there?
I did some quick research and put together this handy guide. Feel free to download this for future reference.
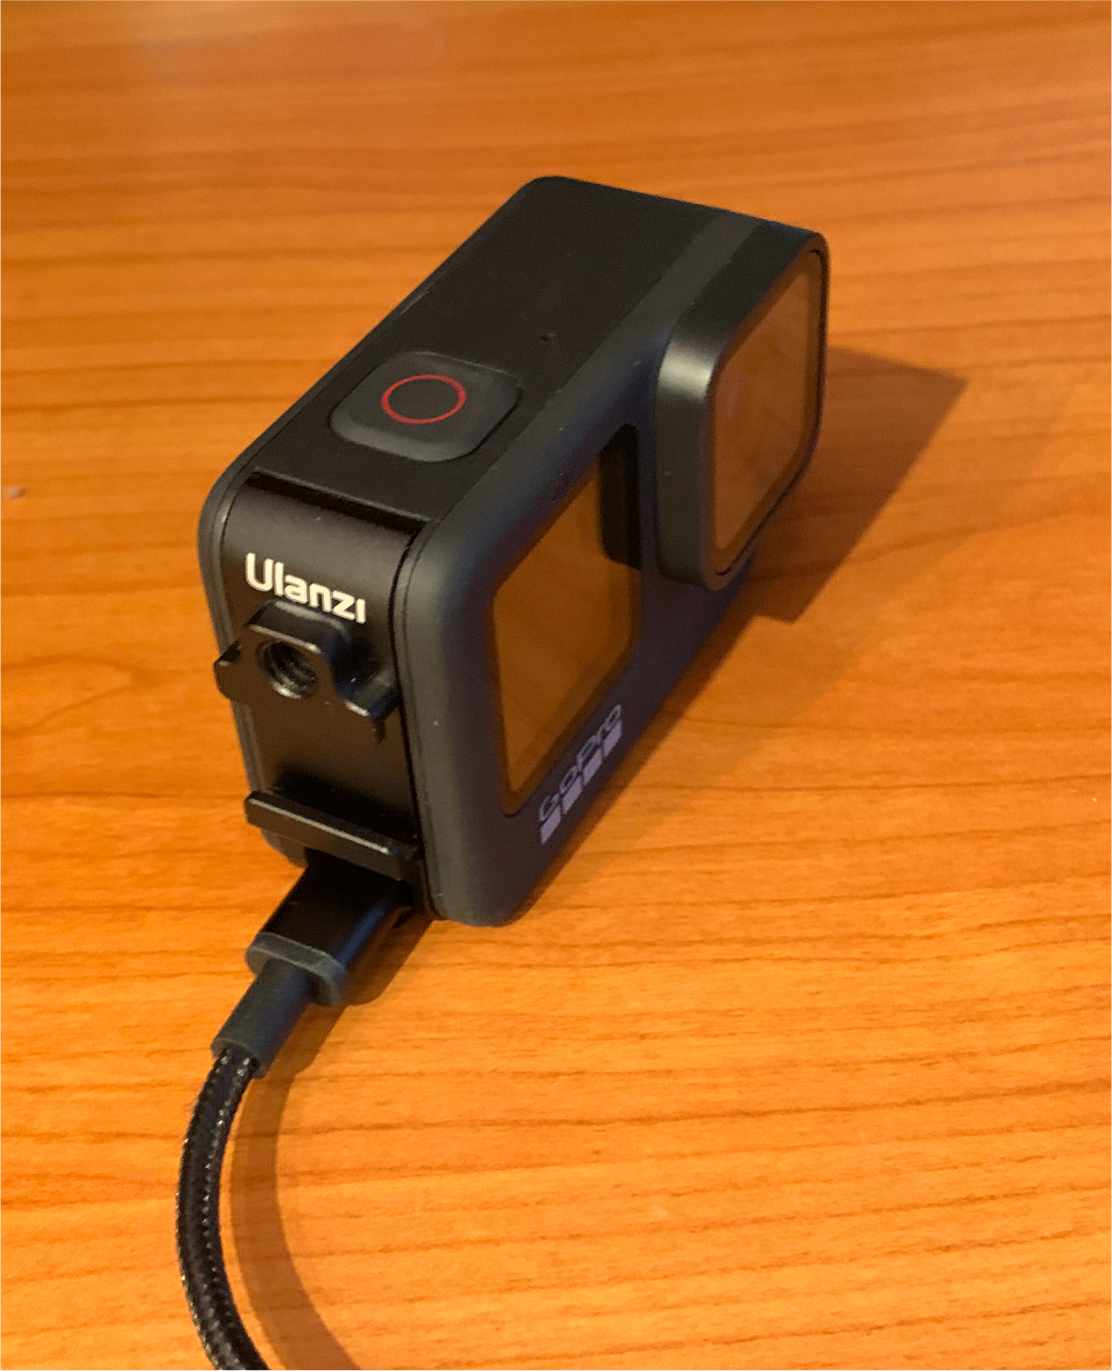
One of the things that I don't like about the GoPro is having to open the battery door to charge it every time. It's really not all that easy to open.
I get that the door is made that way to keep the device waterproof.
Just would be nice if it was easier to charge the device.
Fortunately there is an easy way…
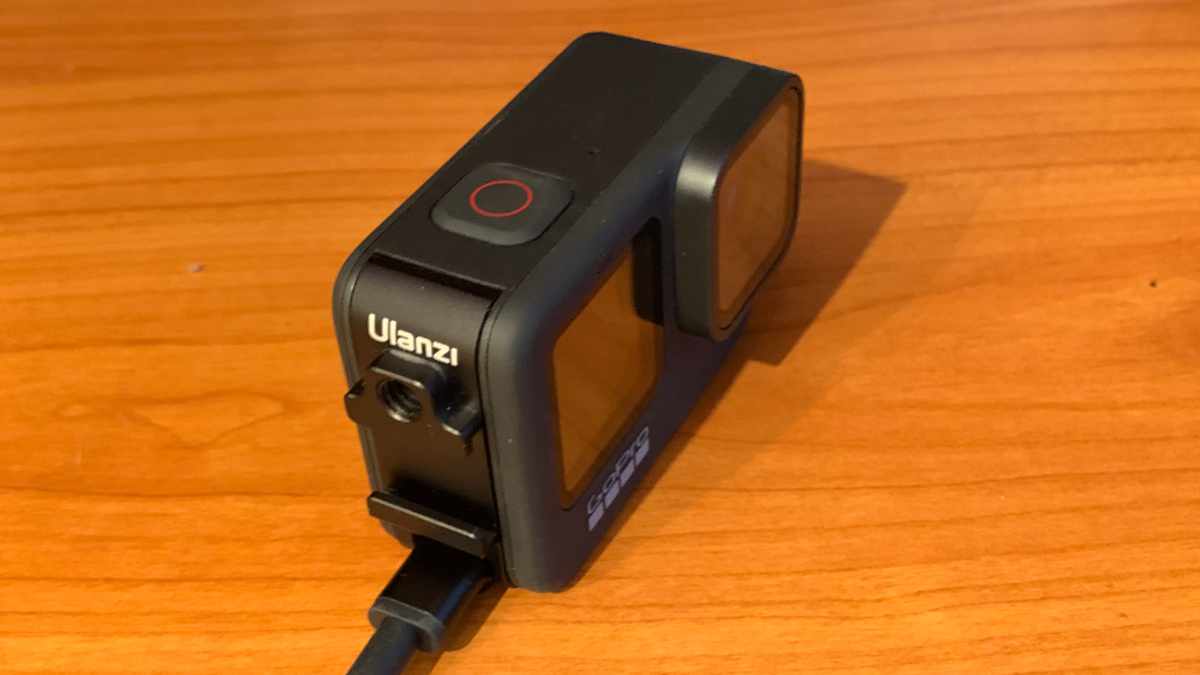
Ulanzi Metal Multifunctional Battery Cover
The Ulanzi battery door makes it easy to charge because the USB-C slot is always open.
Now this isn't the best solution if I was using the camera outside for time-lapse videos. Water could get in the camera.
There are other GoPro doors available. This one is better because it offers a Tripod mount and a cold shoe mount.
The tripod mount isn't on the bottom - but it's still cool to have when I may want to connect the GoPro on a tripod. All I need to do is to have a Tripod Mini Ball Head and I can have good horizontal footage.
The shoe mount is great because I can add various attachments such as microphones, lights, and other shoe mount accessories.
The Ulanzi battery door is easy to take off and put on when I want waterproof protection. It's very well built and is quality made.
Great GoPro Accessory
I have used the Ulanzi battery door for a week now and it's come in handy so many times. It makes it so much easier to charge up the GoPro with some basic usage.
I am careful about leaving the charging port exposed on cold New England nights. So when I do my nighttime time-lapse, I play it safe and use the standard door.
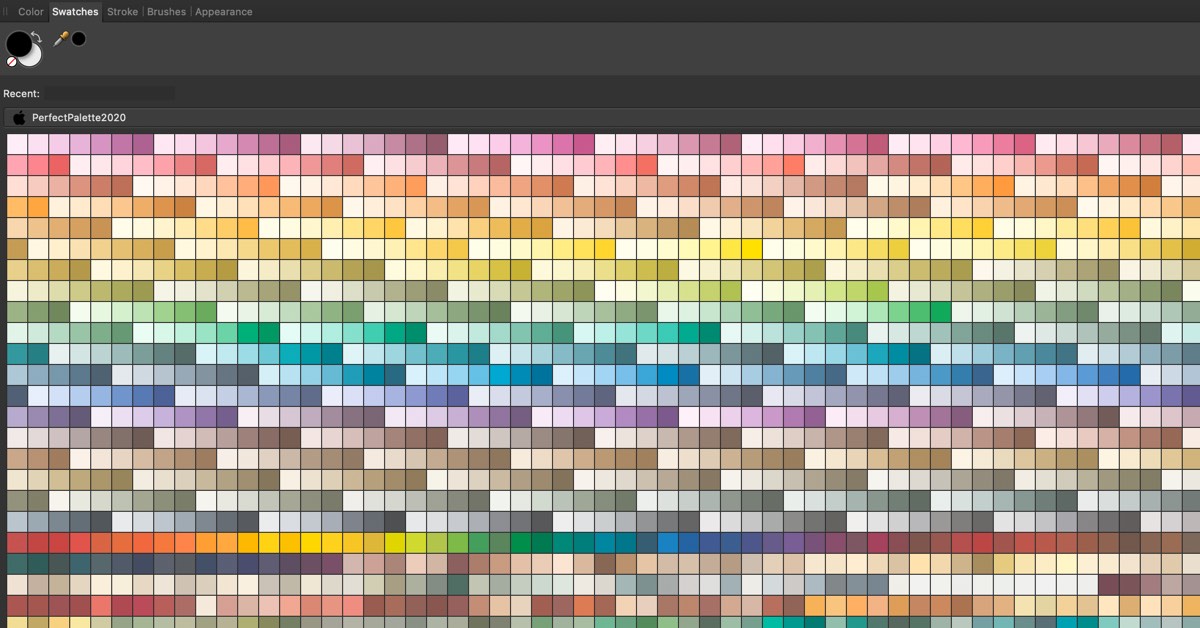
Swatches are a way easily pick a color that you would like to use as an object color or as a font color. It's a great way to switch between colors and maintain a consistent look and feel.
Affinity Designer supports the ability to import Swatches. You can import any standard. Swatch file to use in Affinity or in the system.
Build Your Library
Since you can import any library, why not import some generic colors. It might give you some colors that you may not have thought about.
Here are a couple of swatches to download and import:
Sherwin-Williams
One of the popular paint companies in the world has made available their entire paint catalog in a single swatch file.
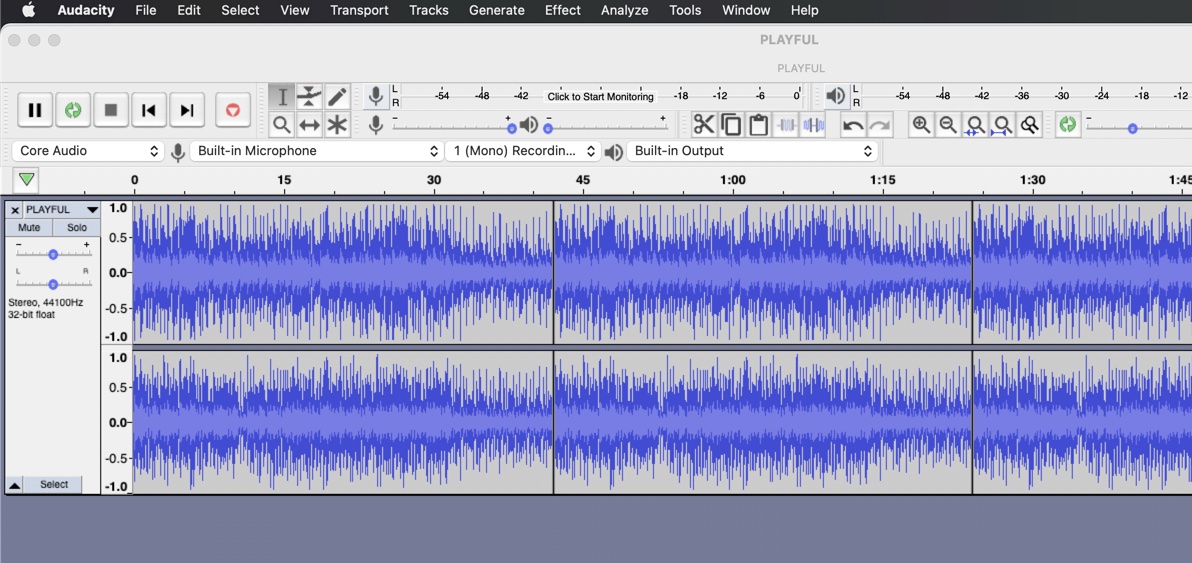
Last week I talked about using audio clips from iMovie. This week I wanted to use the "Playful.M4A" clip for the duration of the video that I was working.
This means that I had to figure out how to convert a 1-minute clip into 10 minutes. Unfortunately, there is no "loop" feature in Final Cut Pro.
Basically to loop this audio clip, you need to copy and paste it X number of times until you get the duration that you want. The problem with the "Playful" audio is that it fades in the last 2 seconds.
Five Things I Learned
The reason why I want to do this outside of Final Cut Pro was that I could create a new Audio file so I can reuse this in the future.
Apples' Garageband wasn't very friendly. I couldn't clip the final 2 seconds. I tried using Rogue Amoeba's Fission, but I couldn't get the copy clip to paste at the end of the clip.
Audacity was the clear winner.
The best program that I found to clip and duplicate the audio is Audiacity. It was very easy to clip the final 2 seconds and then copy/paste the clip over and over.
I only needed 7-minutes, but I ended up creating a 10-minute audio file. This way I don't have to do this in the future.
Other Audio Clips
If your looking for alternative audio clips, similar to the Playful clip check out Fiver. A few years ago I purchased a couple of good audio collections that is useful for background music.
I use Notion alot to create content for this blogs. It's so easy to start writing on my iPhone and then do finishing touches on my iMac.
One of my weekly tasks is to create a list of the weekly blog ideas. I then like to take this list and convert the ideas to pages. So I can start writing the blog post.
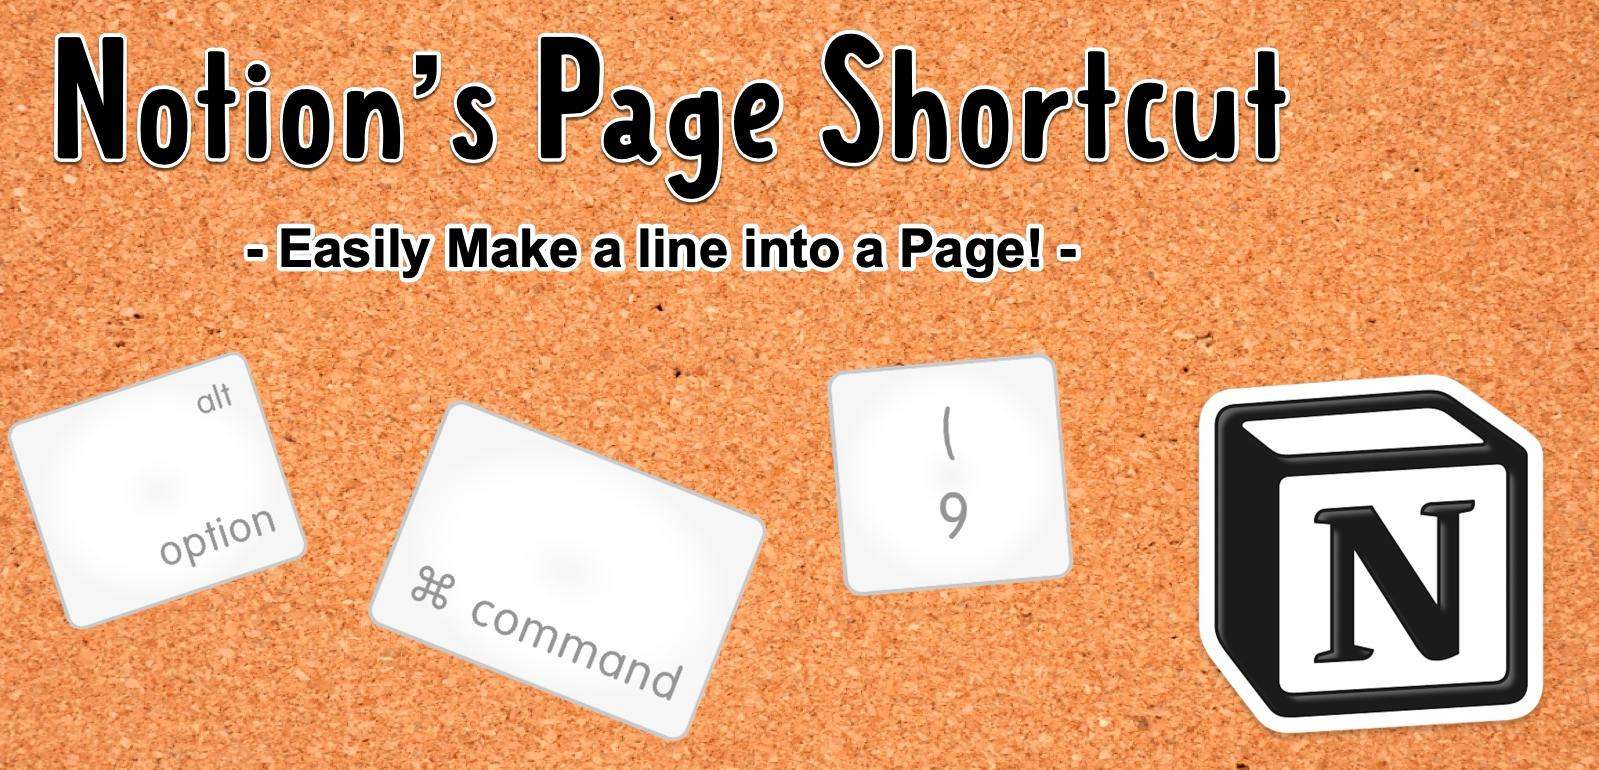
Quickly Convert Line item To Page
Notion makes converting any line text into a page. Simply type Command Option 9 - whatever line your on is now a link to a page.
This makes planning so much easier. Simply make the list, then once you're done convert the items to pages.
Obviously this shortcut only works on a Mac. But I can still use my iPhone to brainstorm my ideas and then use my Mac to drill down the topics.
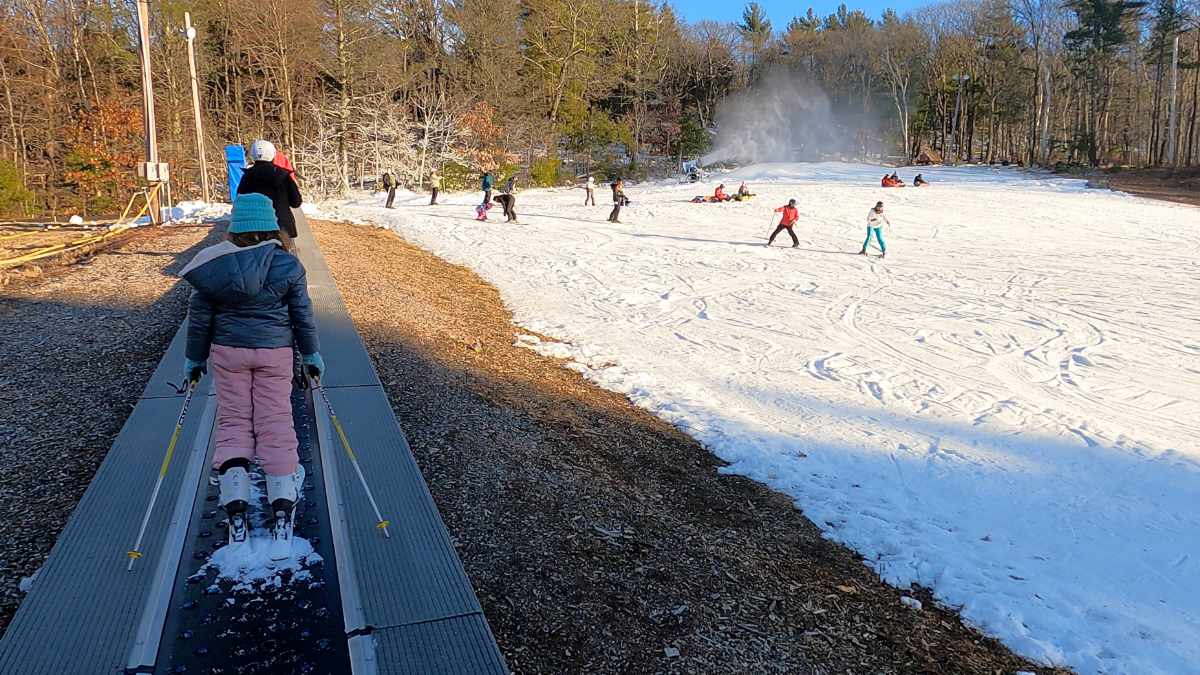
Today I took my daughter skiing at Blue Hills in Canton Massachusetts. This was her first time on skies and I haven't been on a mountain in 18 years.
We just decided to ski together without any formal lessons. I would just give her some tips and tricks on how to ski.
We had a fun time skiing and she actually wants to go back next weekend.
Blue Hills "Fenway" trail with the magic carpet taking skiers to the top of the trail.
Nine Things I Learned
Reservations Required. Due to COVID-19 state rules, we had to make reservations. We were able to secure a spot the night before we hit the slopes.
Time Constraint and Cost Also new this year is that you limited on how long you can ski. We had a 4-hour slot. Which was probably just enough for my daughter's first day on the slopes. However, it seemed expensive for 2 tickets and rentals for $170.
Confusing On Arrival. Prior to going to the ski resort, I checked the parking lots. I found that there were three lots and getting the first or second was ideal because I didn't need to take a shuttle bus. We were lucky to get a spot in the second lot. When we got to the buildings it was a bit confusing where to get tickets. We had prepaid rental and there was a section for that - however it was for people that had been there before. We met other people that were also confused.
No Private Lessons. As were skiing we saw a Blue Hills official approach a guy with several children and asked him if he was giving paid lessons. Apparently, you can't give private lessons that are not sponsored by the mountain. This could be a liability reason or they want people to use the mountain training.
Great Mountain to Learn. We found that Blue Hills is a great mountain to learn to ski. Its small size makes it easy to go up and down the mountain.
Limited Skiing. When we went, there wasn't much natural snow on the ground. Many trains were closed because they don't have 100% snowmaking coverage. Also once you become good at skiing, there's a limited number of trails to ski on.
Food and Drinks. The cafe was open. When I walked in, someone asked me if we plan on using the bathroom. I told them no, then he asked for my name and phone number- which I assume was for COVID-19 contact tracing. A bottle of Poland Spring water is only $1 - that was nice.
Fenway Trail. We spent all day on the Fenway trail. It was busy because most people had lessons on that slope. One thing I noticed is that most people didn't have any poles.
Magic Carpet Lift. The two green trails are served by two Magic Carpet lifts. The lift is a conveyor belt that gently moves you up the hill. I found it a bit tricky to use - I have been on a lot of lifts. Basically, you walk on the carpet and standstill as it moves you. I noticed some people lean forward to help keep their balance.
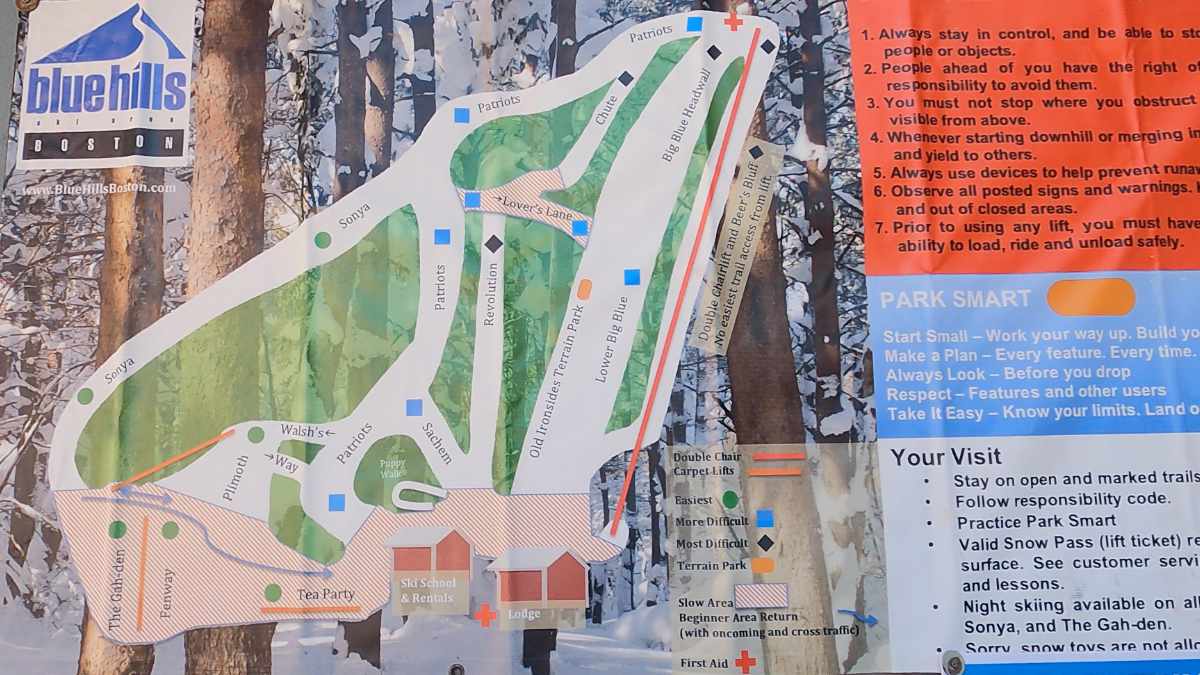
A picture of the trial map that hangs near the ticket window.
Bonus Tip
If you're going to Blue Hills, I would recommend getting there at least 45-mins early to get rental equipment and lift tickets. Your ski time is when you can get on a lift and not when you can get your equipment.
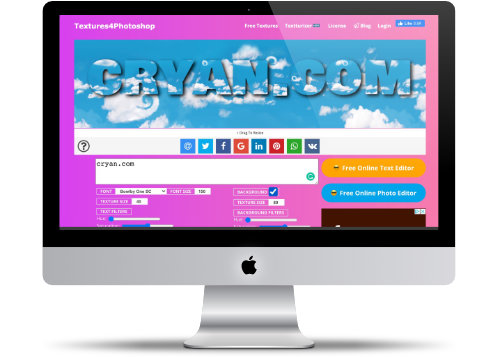
Textturizer is a cool website that offers you a quick way to generate header graphics for your website or online project.
If you use Notion, this is a great way to create a cool page cover.
Website Description
Textturizer is an online tool for creating textured text. Using our database of free textures you can create your own text effects and download the result as PNG images.
Over the past few months I have been using Apple's iCloud Drive as part of my everyday backup. The family subscribed to the 2TB plan.
Here's my review of the good/bad of using the iCloud as personal storage
Eight Things I Learned
Very useful when you have limited space. My iMac has only 500GB on an internal SSD drive. Having the iCloud makes it easy to backup files that I don't use frequently. I can get access to them any time.
Not Searchable. The advantage of storing files on a personal Thumb drive is that I can put them in and search within documents. With the iCloud, I have to download the files to search inside documents.
Available Between Computers. I used to use DropBox to quickly move files between computers. Now I just move them using iCloud. Many of my favorite applications have their own iCloud folders where I can store files.
Instant Free Storage. When I move files from the Desktop to a folder on the iCloud I get the space back.
Files Always Available. I store all my fonts in a folder on iCloud Drive. Anytime I need a particular font I can grab it and instantly use it. I can then remove it from the system. Did you know: Fewer fonts installed helps the computer performance.
Remove Download. MacOS automatically manages how long to keep downloaded files from the iCloud based on the last usage. However, I and right-click on any folder and select 'Remove Download' to free up space.
Downloaded Folders. Folders that are downloaded are temporary stored in xxxxx
Cost. The 2TB plan costs $9.99 a month. On Amazon, you can buy a standard 2 TB drive for $60. While it sounds cheaper, in the long run, to buy local storage it may not be. Apple's storage is well protected to make sure it's always available. If you ever lost a hard drive or a flash drive, you know the value of cloud storage.
At the End of the day...
I have thought of buying a new external drive for storage, but having used the iCloud drive for a couple of months convinced me that Apple iCloud is a better option. It's easy to manage the drive space and even easier to get files that I want.
It's nice to know that the files are protected and I don't have to worry about the hard drive crashing.
TimeWarp is a really cool effect from GoPro. It allows you to do Time-lapse with the inclusion of regular video.
TimeWarp has been available since GoPro 4, but in GoPro 9 they made some pretty cool changes.
Time-Lapse vs TimeWarp
Time-lapse is perfect for when you have a steady camera. Usually on a tripod. Perfect for the morning sunrise.
TimeWarp is used when you are in motion. This can be walking, skiing, or on a bike or car. Go Pro goes the extra mile to make sure the clip is sturdy. This is great when you want to show fast motion.
You use the TimeWarp option when your one the move.
TimeWarp Bonus
In TimeWarp mode you can break out of the warp into normal mode. This is useful when you want to describe something as your walking or if you want to pan a scene a bit slower than hyperspeed.
Make the Breakout Happen
There are two ways to take the video out of Time Lapse Mode in TimeWarp and into the "normal" mode:
Tap the rear screen
Click on the "Mode Button" otherwise known as the power button.
To put it back into TimeWarp, simply click on the screen or mode button again.
Read The Manual
You can learn more about the capabilities of TimeWarp in the GoPro Hero 9 manual. On page 34, there are some descriptions of the various settings.
Affinity Designer has a lot of great keyboard shortcuts as part of the standard installation. What's nice is that you can pretty much set your own shortcut to whatever works for you.
When I was using Photoshop, a long time ago, I got in the habit of using Shift Command D to place images. So for a while, I replaced the Affinity Designer section for "Place Images" with the Shift Command D.
Place Image Tool
Recently I have learned that the "Place Image Tool" offers the same flexibility to inserting images using the "Place" menu which is located under the File menu.
There's no short-cut assigned to the "Place Image Tool." The letter 'i' is assigned to the Color Picker, which I hardly use. It didn't make sense to have a short-cut to something that I don't use.
Last week, I decided to change the shortcut 'i' for the "Place Image Tool." The keyboard shortcut has come in handy so many times.
Remember the Place Image Options
The one thing I have to keep in mind is all the options when placing an image:
Drag
To place your image. (This is what I should do.)
Click
To place your image at default size. (This is usually what I do.)
Control
to preview the image before dragging
Command
To place center about the starting point
Shift
To drag without keeping the aspect ratoi
Option
To ignore snapping (if its on)
Good Reminder!
This is a good reminder to evaluate all the different keyboard shortcuts in Affinity Designer. Are there any that could be changed to make your life easier?
You can see all the keyboard shortcuts by going under Preferences and selecting Keyboard Shortcuts.
Final Cut Pro has a great collection of music and sound effects. The Final Cut Pro supplemental pack includes over 1300 royalty-free sound effects you can access from the Photos and Audio sidebar right in Final Cut Pro.
Even with all those sound effects and music, I still like the music from iMovie. I especially like Playful sound. It's great when you need a filler sound for when you doing a collage of video clips.
Seven Sounds of iMovie
These are the sounds that are available in iMovie:
Turns out you can "mix rip burn" the sound from iMovie - if you still have it installed on your computer. You can import these into Final Cut Pro for all your fun projects
Note the location of these files.
Getting the Audio
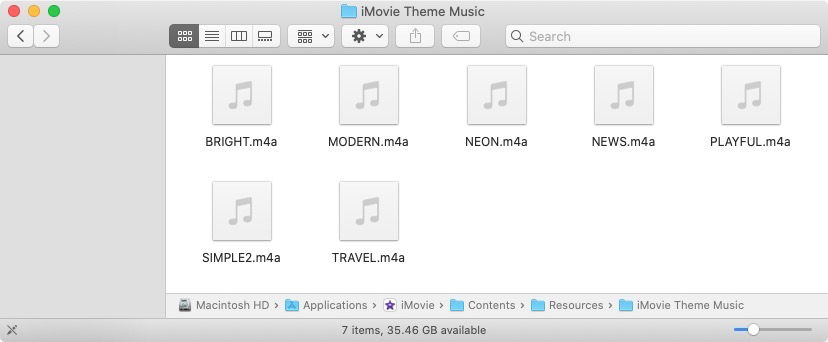
You can't use Spotlight search to find the "Playful.m4a" audio file. It's actually buried in the iMovie application. Here are the steps to find the audio include in iMove as the "iMovie Theme Music"
Go to the Applications folder and locate the iMovie applicaiton
Right click on the application and select "Show Package Contents"
Click on the "Contents" Folder
Click on the "Resources" Folder
Click on the "iMovie Theme Music" Folder
You should now see seven audio files.
You should drag and drop a copy of these files into another location. One option would be the Music application, so you can go under the Photos and Audio sidebar and use these files.
Just remember to copy the files, you don't want to lose the files in the original location!
Apple Music Tip
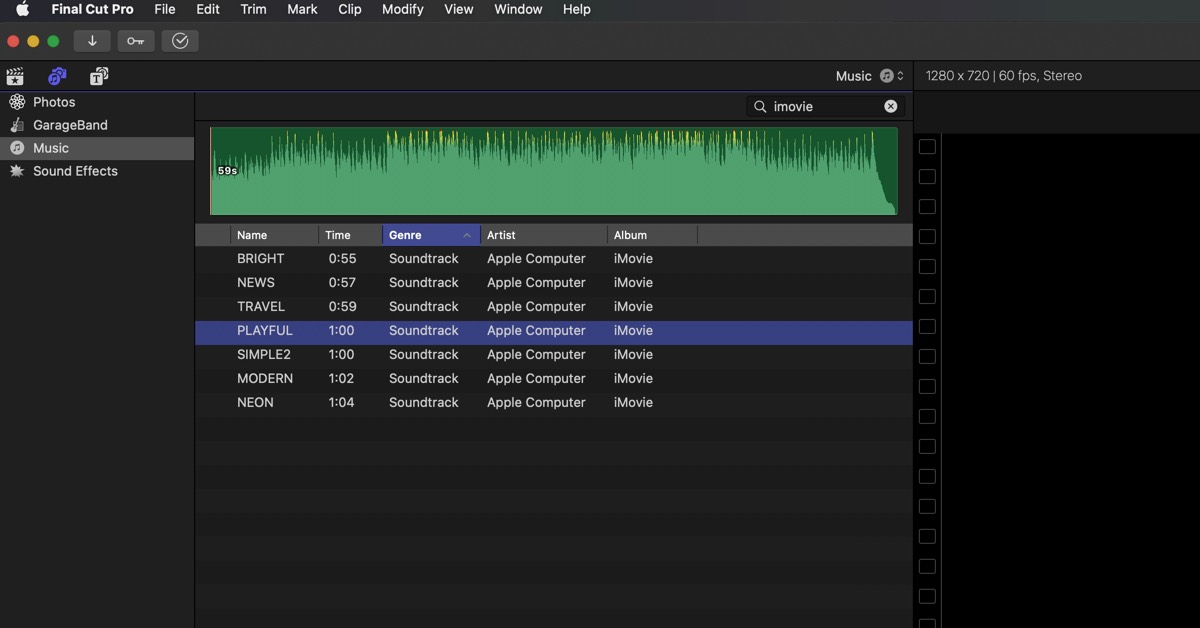
These audio clips don't have any metadata so when you are in Final Cut Pro it makes it hard to search for the clips that you got from iMove.
In Music, I selected the seven sounds, right-click, and selected "Get Info." I then added some metadata so that that it's easy to search:
All I have to do is search for "imovie" and the sounds show up!
Apple Licence
Here's the legal info about using the media files in iMovie and if you're allowed to move them to other applications:
The Apple Software contains media content including but not limited to graphics, audio clips, video clips, and/or templates ('Media Content'). This Media Content is proprietary to Apple and/or its licensors, and is protected by applicable intellectual property and other laws, including but not limited to copyright. Except as otherwise provided, all Media Content included in the Apple Software may be used on a royalty-free basis in your own video projects but may not be distributed on a standalone basis (and audio Media Content may only be used for your own personal, non-commercial use).
A picture may be worth 1,000 words, but what good is it if you can't find the photo?
Google Photos is a great tool, you can use their algorithm to find pictures easy. Google analyzes photos for objects and tag photos with those objects.
So it easy to find photos that contain objects such as:
White Car
Swimming Pool
Christmas Lights
Waterfall
All Fun and Games...
The problem is what if your description of a photo doesn't really match the A.I. algorithm.
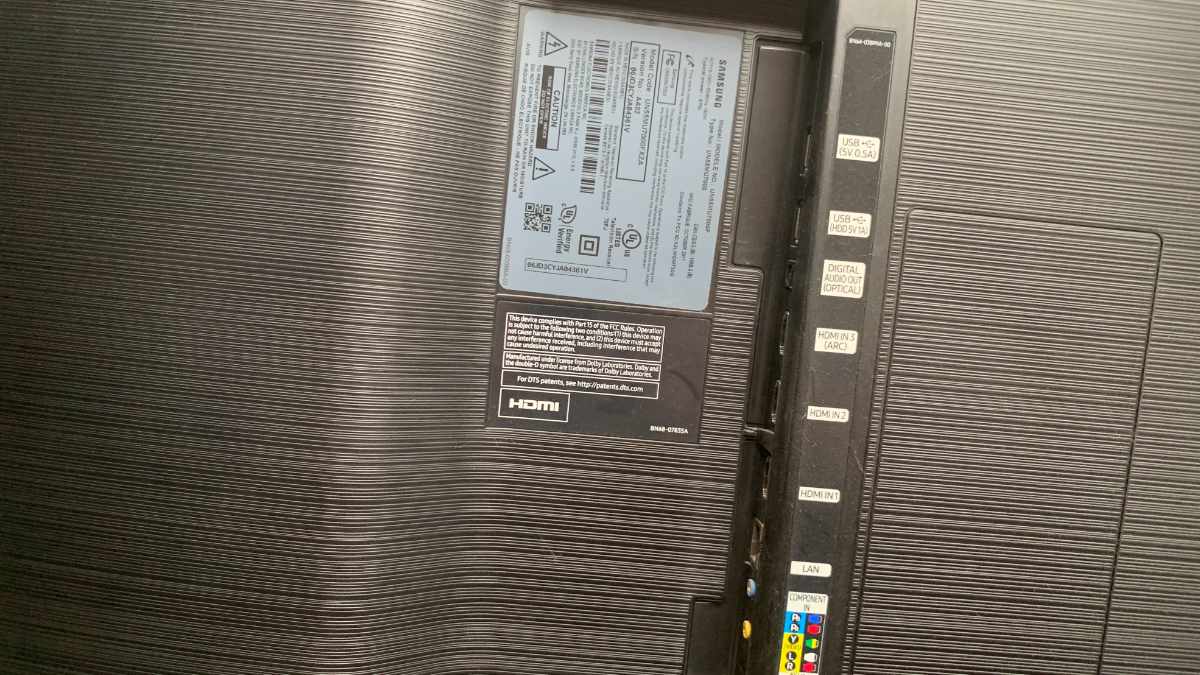
For example look at this photo:
This is the back of my Samsung TV. For me, this photo is useful because I know what ports are available on the back of the TV.
Google Photos doesn't know much about this photo. Searching for Samsung TV won't show this photo. That's because there's nothing to indicate that it's a Samsung TV.
Adding a description to this photo in Google Photos will help me find this photo. So in this example, I added, "Samsung TV Backside" to the description.
Google includes the description field as part of the photo search. So if I just search for Samsung, the above photo would be included in the search results.
Productivity Tip
Every once in a while you should add a description to recent photos that were uploaded to Google Photos.
A simple description of why you took that photo can make a huge difference. You don't need to write a long story, just a few words that might make you find this photo easier.
This 5 to 10 mins now can save you a ton of time later.
Sample Ideas
Here are some description ideas for you to think about:
Coldest Day of the year
First snow storm
Last Car seat ride
Yard Sale Books
Clothes Donation (Helpful around Tax time!)
First Apartment
How to Add a Description
Open Google Photos and look for a photo that you want to add a description. Click on the photo, then click on the "i" icon in the top left. Then add a description.
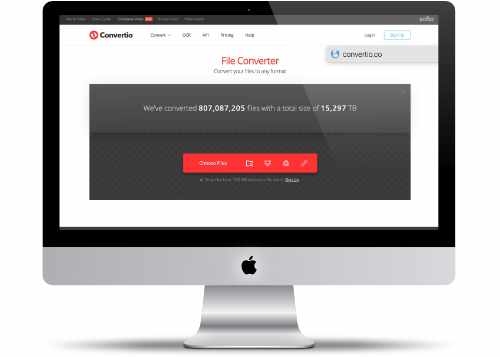
Convertio Online Converter is a great place to convert any image, video, documents and more to various formats.
Video files can convert from/to MP4, AVI, WEBM, WMV, MPEG, M4V, RM, and much more. A total of 37 different image formats.
Audio files can convert from/to MP3, WAV, M4R, FLAC, AIFF, and more. You can even convert legacy Real Audio files to OGG format - the latest open-source format. Converto supports 62 different audio formats.
Convertio supports all sorts of image conversions. Including converting popular RAW images to JPG formats. There are 112 different image format!
There's also Optical Character Recognition. You can convert scanned documents and images into editable Word, PDF, Excel, and plain text format.
Convertio.co is your one stop shop to change all your files. Check out the File Format support page.
Website Description
In 2014, we decided to create the first file conversion website with user experience in mind. Today Convertio is ranked among the 1000 most visited sites in the world and almost every competitor has already borrowed something from our interface.
We support 25600+ conversions between 300+ file formats
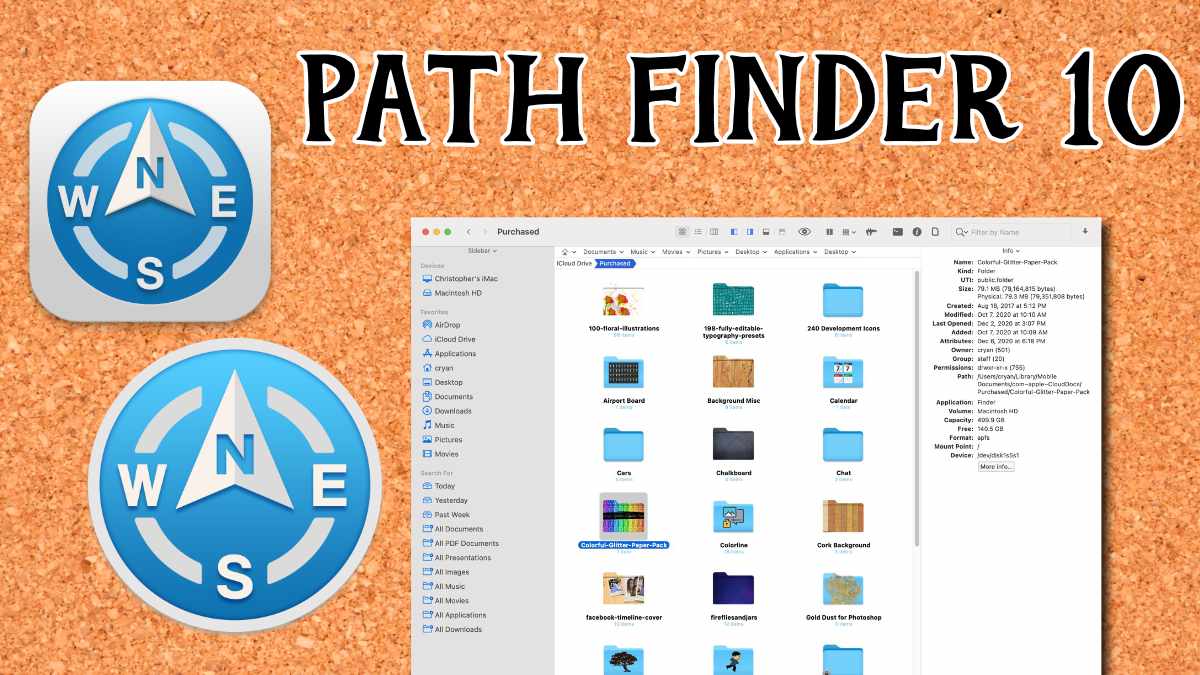
On December 8, 2020 Cocoatech shipped Path Finder 10. The last major update to Path Finder was October 2019.
New Features
This is the list of the major changes from CocoaTech:
Airdrop Integration! For devices discoverable by 'Everyone'
Share to AirDrop, Messages, Mail, Notes, etc.
Fully redesigned for macOS Big Sur with Native support for Apple Silicon.
Improved Dark Mode.
File Browsing on and file operations on USB connected iOS devices.
Improved Drop Stack
Improved Batch Renamer
Brand new Big Sur style icon
Lots of miscellaneous fixes, tweaks and improvements all over the app.
Notes on the Update
Airdrop - Airdrop feature is neat. It's nice to be able to drag and drop files between computers. You can't just drag and drop an object on the "AirDrop" icon. You have to click on the icon, and then drag your object to the device you want to move it to.
Fast AirDrop - You can quickly share an object by right-clicking and selecting the Share option.
Updated Icon - I did notice the new icon, I actually like the old icon. But I understand that particular icon style is where most developers will be using.
Browse Your iPhone or iPad - The iOS device connection is great. You get a lot more information than from iMazing. Very useful when you want to do a manual backup of your device. I particularly like that I can get the folder size, so I can find which areas are taking up the most space.
No More Cover Flow - The Cover Flow Module is gone. This wasn't a module that I used anyway, so I am not disappointed.
Dual Browser Tool - There is a new tool in the toolbar called Dual Browser. This allows you to quickly enable the Dual Browser feature - where you see two folders in one window. This is very cool!
No Other Surprises - I did a side-by-side comparison of Path Finder 9 against Path Finder 10 and don't see any other significant feature changes related to the update. The text seems to be a lot easier to read in Path Finder 10 than in 9. (I see that Kimberly Adams is now on the Marketing team.)
At The End of The Day
Path Finder is a great tool to have when you're doing Disk management. It will save you a lot of time - from finding large files to moving things around.
I like Path Finder and the update to version 10 is a very nice upgrade. Check out some of the cool features that I highlighted in Path Finder 9.
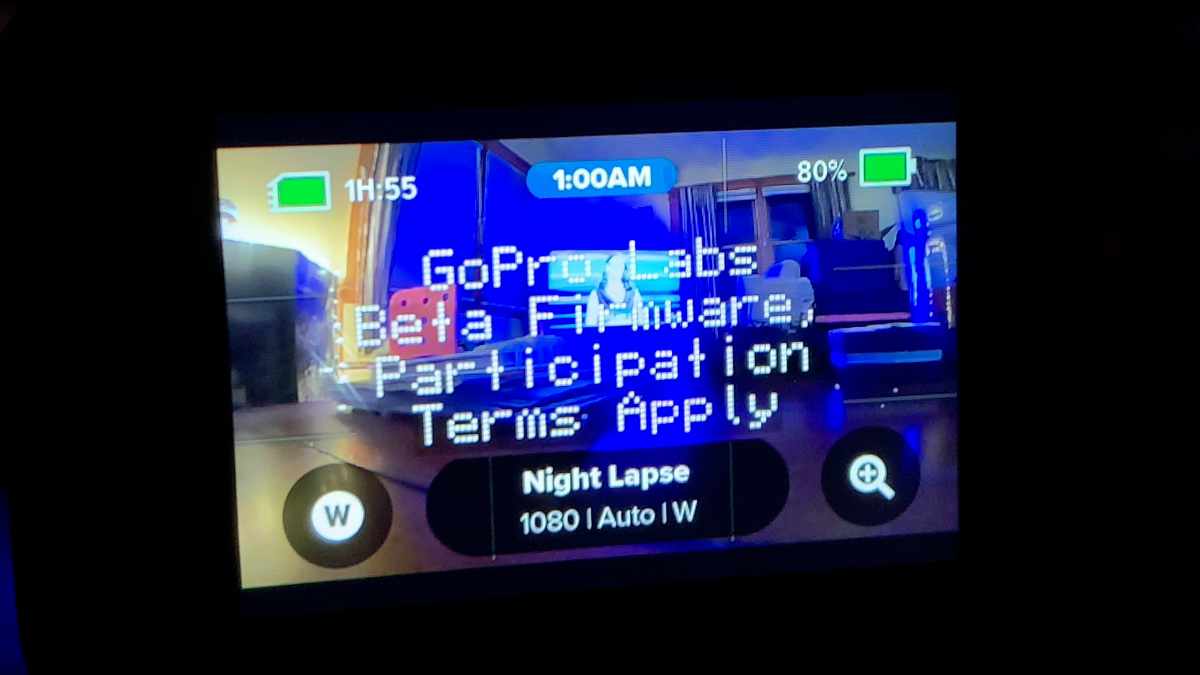
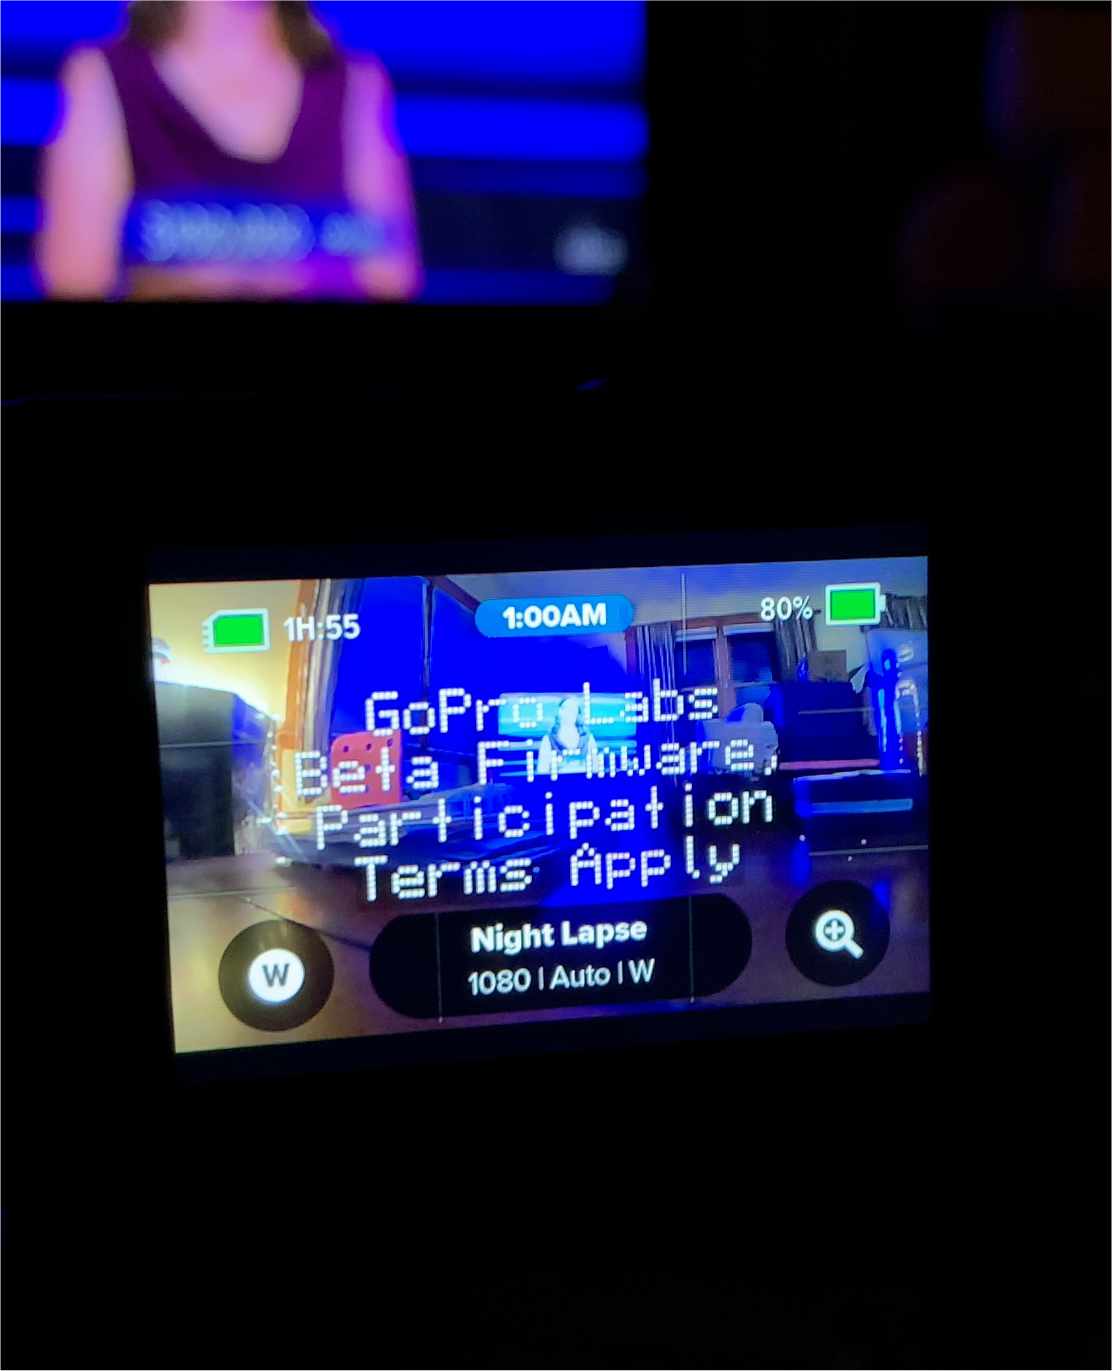
This week GoPro announce some new experimental features. These are unsupported features that GoPro has decided that are stable enough for the public to play with. Some of these came from hackathons - probably ideas inspired by long time users.
These new features are called GoPro Labs and are available via the GoPro Support Hub.
Camera Motion Triggers: Leverage the camera's accelerometer and/or gyroscope to start/stop capture only when the camera is in motion, preserving storage and battery.
USB Power Triggers: Your GoPro can start/stop capture when USB power is detected, enabling USB-triggered functions such as serving as a dash cam.
Motion Detection Enhancements: Motion detection is now supported in all video modes, including 360- motion detection on MAX, with improvements to the sensitivity range.
Simplified Live Streaming QR Code: Program GoPro to start live streaming within seconds of being connected to a designated Wi-Fi network.
Single-Setting/One-Button Mode: Enable a one-button mode where the operator can only start/stop capture, making it impossible to accidentally change camera mode. This is designed to capture critical events.
New Exposure Modes: Set timed exposure lock and minimum shutter speed settings.
New QR Code Controls: QR code controls supported in 5K and HindSight capture for HERO9 Black.
Things I Learned
As I mentioned the instructions to install is tricky. The instructions aren't clear that you need to move the uncompressed folder to the root of the SD card.
When you start up the GoPro you get the notification. I think this slows down the usability of the camera.
The startup text can be replaced with a Personalize QR Code. You can have "Owner's Information" which might be a nice saver if you ever lose the GoPro.
The QR Codes is a very cool feature. You can set up QR codes to quickly program settings.
I like the USB Power Triggers. This is great now that I use the GoPro as a dashcam. It would have been much better if this was supported in older GoPros.
Affinity Designer includes a lot of great keyboard shortcuts. These shortcuts make things so much easier.
The tools menu has a lot of great shortcuts enabled by default. For fun, I put in the shortcut letters (abcfghimnpvyz) in an anagram generator to see if some words might come out to help remember some of the letters.
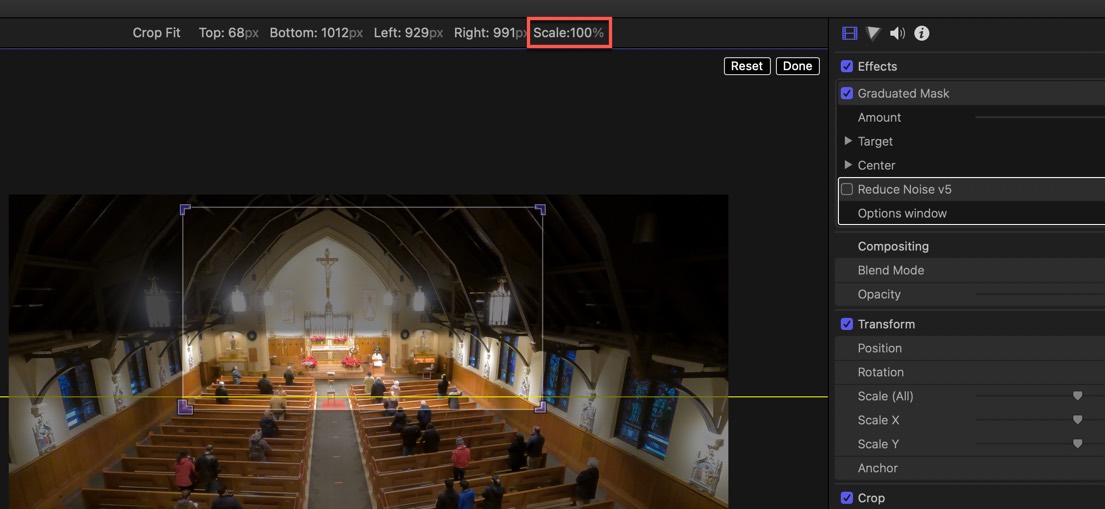
So the advantage of taking footage at 4K is that you have more flexibility when you convert the video to 1080p format.- You can now crop the video so that the scene fits to your production.
This is particularly useful when you use a GoPro camera and you want to focus on a particular part of the video - such as a stage or a landmark.
Crop to 1080p
When you crop a clip make sure the Scale value is at 100%
Fun Facts
4k Image is 3840 by 2160, which is twice as big as the standard HD format of 1920 by 1080 - otherwise known as 1080p.
When you crop a video you want to make sure that the scale is at 100%. (As seen above.) This shows that you have a correct proportional crop.
If possible crop the video before putting in the timeline, this way it doesn't downsample the video to 1080p and then crop it.
You can crop it to 100% at any place in the video - it doesn't need to be exactly in the center.
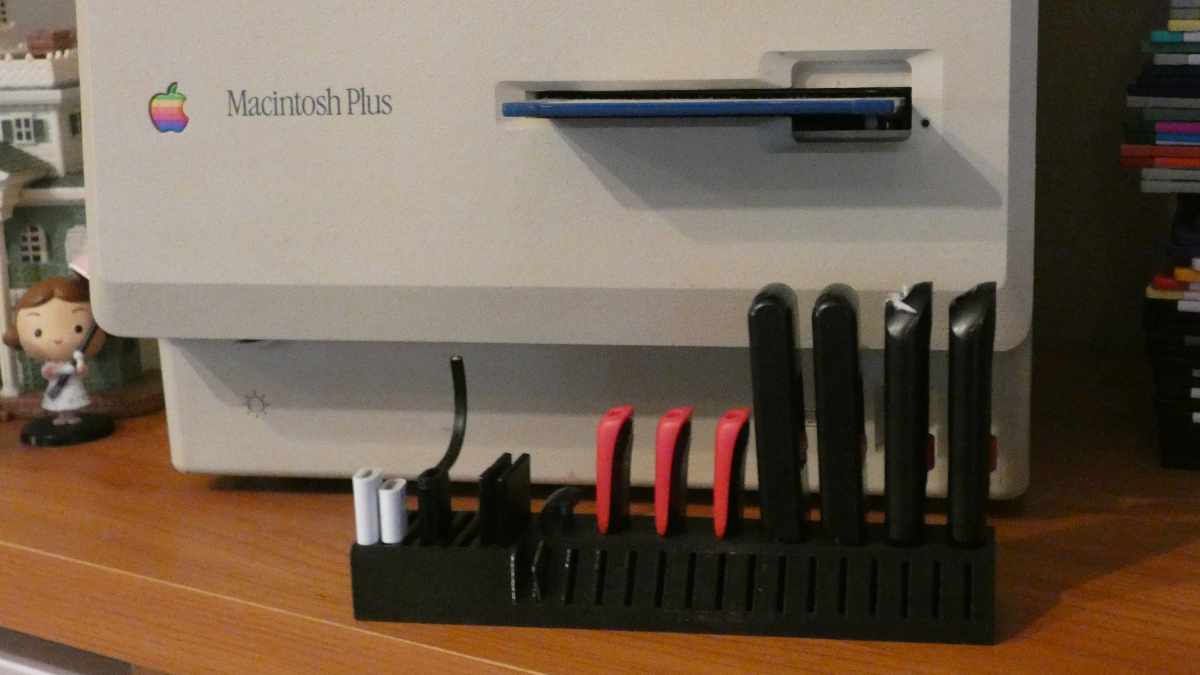
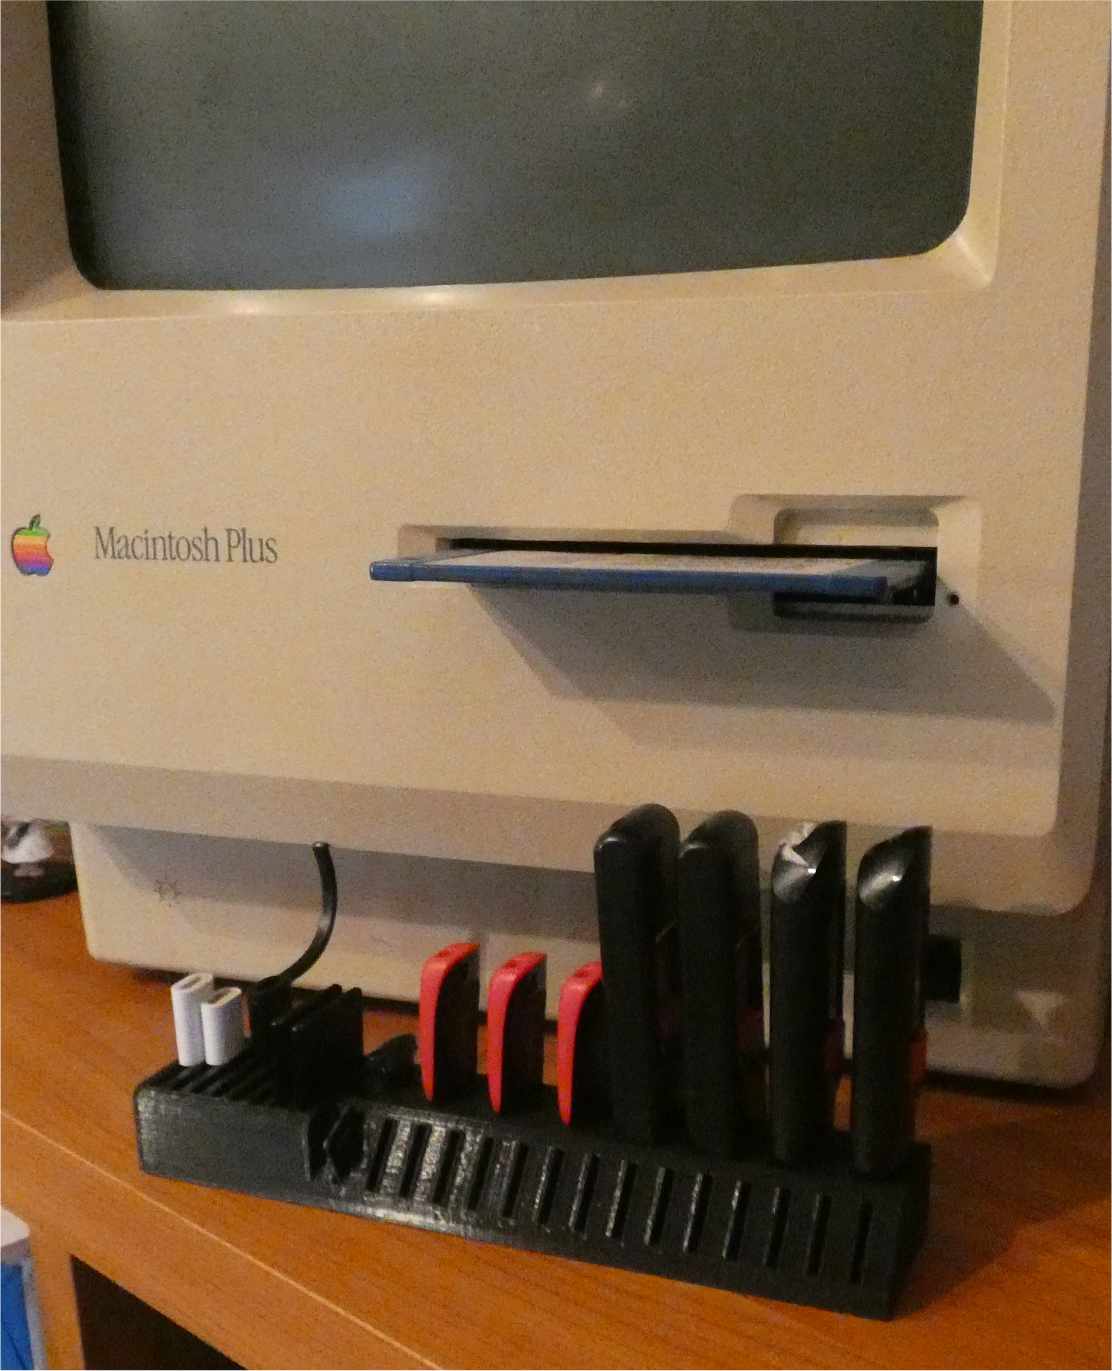
On Etsy.com you can get all sorts of cool things. One thing that I purchased recently is the Flash Storage Stand ( SD x8, USB x8, microSD x15).
This is a great organizer for anyone that has a coffee mug on their desk that is filled with USB drives and SD cards.
There are a lot of people making and selling these, the one that I happen to purchase it from was PontiacPrintingPress. The stand goes for about $5.99.
I don't think I'll ever have 15 Micro SD cards. I got this one because I think having 15 holes for the microSD card makes the stand look neat. Some shops have only five slots, but I think having more is good.
I don't have a lot of SD cards, so the empty slots are great for storing USB tips.
Highly Recommend!
So how doesn't this help with Productivity? Well, this is a simple design that looks good and doesn't clutter the desktop.
An unclutter desktop can help you stay focus on your important tasks.
Also, having your cards neatly organized can make it easy to find the storage device that you want.
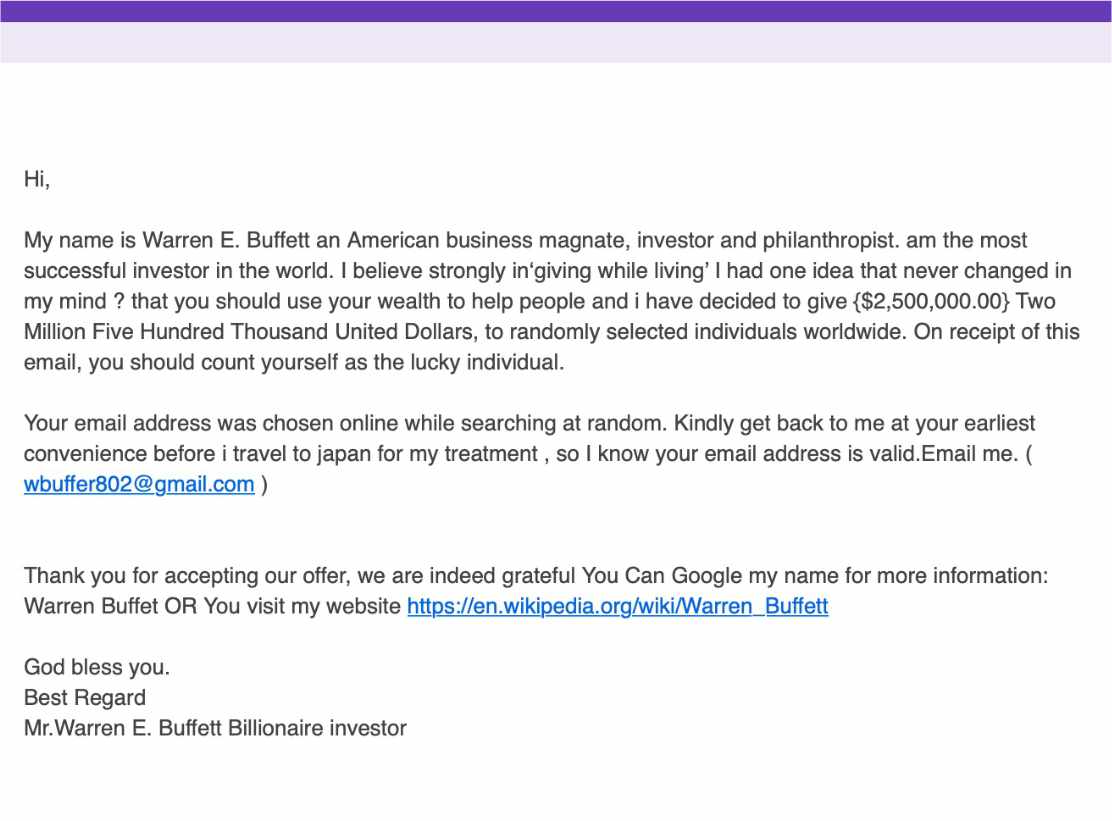
On December 19th, 2020, I got this email from Warren Buffett: (Seriously how can anyone fall for this?)
Text Body
My name is Warren E. Buffett an American business magnate, investor and philanthropist. am the most successful investor in the world. I believe strongly in'giving while living' I had one idea that never changed in my mind ? that you should use your wealth to help people and i have decided to give {$2,500,000.00} Two Million Five Hundred Thousand United Dollars, to randomly selected individuals worldwide. On receipt of this email, you should count yourself as the lucky individual.
Your email address was chosen online while searching at random. Kindly get back to me at your earliest convenience before i travel to japan for my treatment , so I know your email address is valid.Email me. ( wbuffer802@gmail.com)
Thank you for accepting our offer, we are indeed grateful You Can Google my name for more information: Warren Buffet OR You visit my website https://en.wikipedia.org/wiki/Warren_Buffett
God bless you.
Best Regard
Mr.Warren E. Buffett Billionaire investor
Scam All The Way...
This email arrived via an empty Google Form. (I am sure one of the richest people in the world would communicate via Google Forms.)
I can't count the number of mistakes in the first paragraph.
A person that lives in the United States would certainly clarify the value in "United States Dollars."
He's going to Japan for treatment. For What- Why does that matter to me? (or was this a bad cut/paste from another email?)
If you're going to send me $2.5 Million, I would think you would tell me more about why I was chosen other than a random email address.
Warren Buffett certainly ends all his emails with "Mr.Warren E. Buffett Billionaire investor" as his tag line.
Nigerian Scam
This is another play on the Nigeria Advance-fee scam. I am sure part of the scam is that you have to send money to get the $2.5 million release to you.
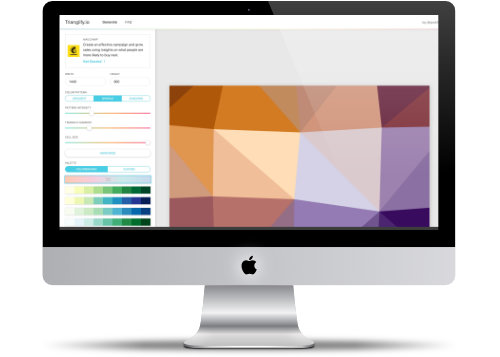
There are plenty of sites that sell triangle design patterns. Which are great for people that don't know how to generate the patterns using Photoshop or Affinity Photo.
trianglify.io is a site that allows you to generate you own tiangle patterns. These are great as desktop background or blog post background images.
Website Description
Trianglify.io is a tool for generating low poly triangle patterns that can be used as wallpapers and website assets.
Once you find the pattern that you like it cost $4 to download. Which is pretty cheap for a graphic design. For a little more than a cup of coffee, you can have your own color and style.
The Canonize command in BBEdit allows you to do a search and replace based on a user-configured file. Basically, each line is a search/replace statement. This is useful when you want to run the same search/replace job as a weekly task.
Hyperlink Database
If you do a lot of blogging, you may have some external links to certain sites. Usually, you make reference to them at least once in the post.
Using the BBEdit Canonize command, you can have BBEdit automatically put in the hyperlinks. Saving you time in putting in hyperlinks yourself.
You can build different Canonize files for different projects.
Sample URL file:
bbedit	<a href="https://www.barebones.com/">BBEdit</a>
Apple Computer	<a href="https://www.apple.com/">Apple Computer</a>
Google	<a href="https://www.google.com/">Google</a>
FireFox	<a href="https://www.mozilla.org/en-US/firefox/new/">FireFox</a>
Apple ios Store	<a href="https://www.apple.com/app-store/">App Store</a>
Save the file in a commonplace - the BBEdit iCloud folder is a very good option.
Using the Canonize Command
The Canonize Command is located in the Text Menu. (There's no keyboard shortcut.)
Select the transformation file that you wish to use.
Limitations
One of the downfalls of the command is that it does a global search and replace. I am still looking for a way to only replace the first match, not all matches.
I see that there's a way to do it in SED, Perl, and PHP. I just haven't figured it using an external data file.
In a blog post in April 2019, I wrote about why the iPhone Xs Max was a better night time camera because of the camera specs. Today I have 4 active devices that I can use for nighttime photography. I have the GoPro 7 Silver, iPhone Xs Max, Panasonic DC-FZ80, and the GoPro Hero 9.
Here's an updated table of the specs of four cameras that I have:
Name
GoPro 7 Silver
GoPro 9
iPhone Xs Max
Panasonic DC-FZ80
ISO
1600
6400
2,304
80 to 6400
Aperture
f/2.8
f/2.8
f/1.8
f/2.8 to f/8.0
Exposure Time
1/15
1/9600 (1080p60)
1/22000
1/2000
Winter Temperatures
Winter in New England means some cold nights are here. It might be risky to leave the GoPro out a night to take overnight time-lapse videos. Here are the recommended temperature settings for the GoPro cameras
GoPro 7 Silver
40-105 degrees
HERO9 Black
14- F ~ 95- F (10- C ~ 35- C)
Time Warp
As for night time Time Lapse photography, I'll be using the GoPro Hero 9. It certainly does a better job. Check out this video using the nighttime time-lapse settings. It makes it looks like a time warp
Converting a vector object to Curve allows you to manipulate the object even more.
Example
You can change individual letters in a text so they appear in different colors or styles.
This is a very common action, so much so that Affinity Designer has made it easy to do the conversion.
When the object is selected:
Click on the "Convert to Curve" in the toolbar.
In the Layers menu select the "Convert to Curves" menu option.
Right Click on the object and select "Convert to Curve"
Use they keyboard shortcut: Command Return
After the object is changed you should see the "(Curve)" in the object Layer row.
Why You Would Rasterize an Object?
Rasterizing is when you want to convert an object into a Pixel object.
This is usually done when you import an image and want to do some changes to it. When you rasterize an image, anything outside of the canvas will get chopped off.
Example
You placed an image in a document and you want to remove anything not on the canvas.
I decided to venture on my own - using some knowledge that I learned from watching some Udemy classes. Such as the Going Further With Apple Motion 5 class.
I created the design in Apple Motion and then imported it into Final Cut Pro.
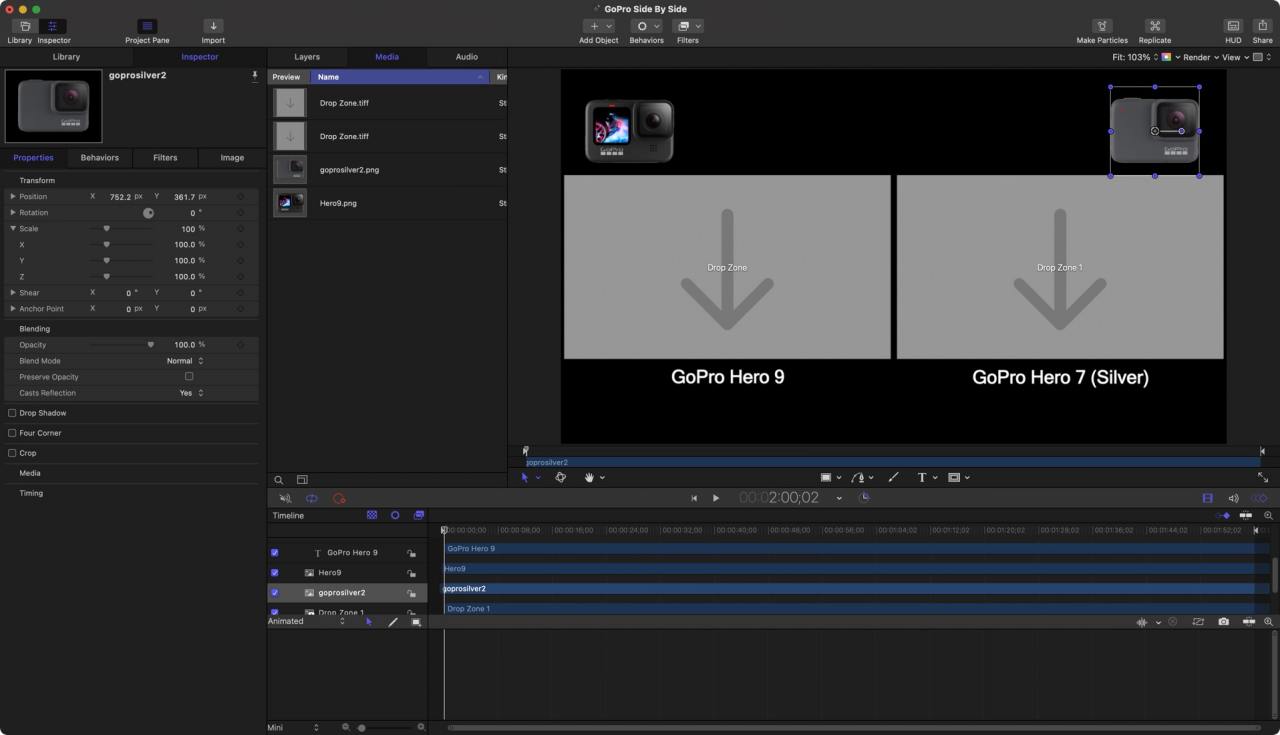
Started in Apple Motion
The first thing I had to figure out was the layout. How can I properly display two videos side by side?
I figured that making the image at 48% of the original size was a good way to have them side by side with a border between the videos. The videos would be 941 x 529.
I added the top graphics and bottom text so the viewer knew what video was what.
I added the screenshot of the videos for layout purposes and converted the image to drop zones.
The video is 2-minutes long which seems a long time as there isn't much going on in the videos. There is a way to be flexible on the duration. I just forgot about it.
Total time to get this up and running was about 20-mins.
Getting To Final Cut Pro
Once I was satisfied of the template was in good order. I had to convert the project to the Title Generator section. This is done by going under the File menu and selecting "Convert Project To" and then selected Generator.
I then gave it a name and a new location in the Generator section.
Ready to Go!
Now whenever I want to compare videos for the GoPro, I just use the template in the Generator section. Its ready to go.
The only change I would make is to fix the duration so that I can make it longer if needed.
iTerm2 comes with a suite of UNIX tools that makes things a lot easier to navigate files between networks. You need to manually install these tools via the "Install Shell Integration" command in the iTerm2 menu.
Here's a list of all the command line tools in iTerm2:
imgcat filename
Displays the image inline.
imgls
Shows a directory listing with image thumbnails.
it2api
Command-line utility to manipulate iTerm2.
it2attention start|stop|fireworks
Gets your attention.
it2check
Checks if the terminal is iTerm2.
it2copy [filename]
Copies to the pasteboard.
it2dl filename
Downloads the specified file, saving it in your Downloads folder.
it2setcolor ...
Changes individual color settings or loads a color preset.
it2setkeylabel ...
Changes Touch Bar function key labels.
it2ul
Uploads a file.
it2universion
Sets the current unicode version.
it2dl
One of the tools that I thought was very cool is the it2dl (iTerm2 Download) tool. With this tool you simply type in it2dl and the file you want to download to your computer.
So when you SSH to a location and find a file that you want to move, simply type in:
it2dl filename
it2ul
It's easy to upload a file to a remote server using the it2u; utility. Simply go to the remote server that you want the file to appear, and then type in it2ul. An upload dialog box will appear asking which file on your local computer that you wish to send to the remote server
it2ul
Doing More With the Command Line
Using the it2dl and it2up commands can help move files between remote and local servers. You shouldn't have to switch applications to move files around.
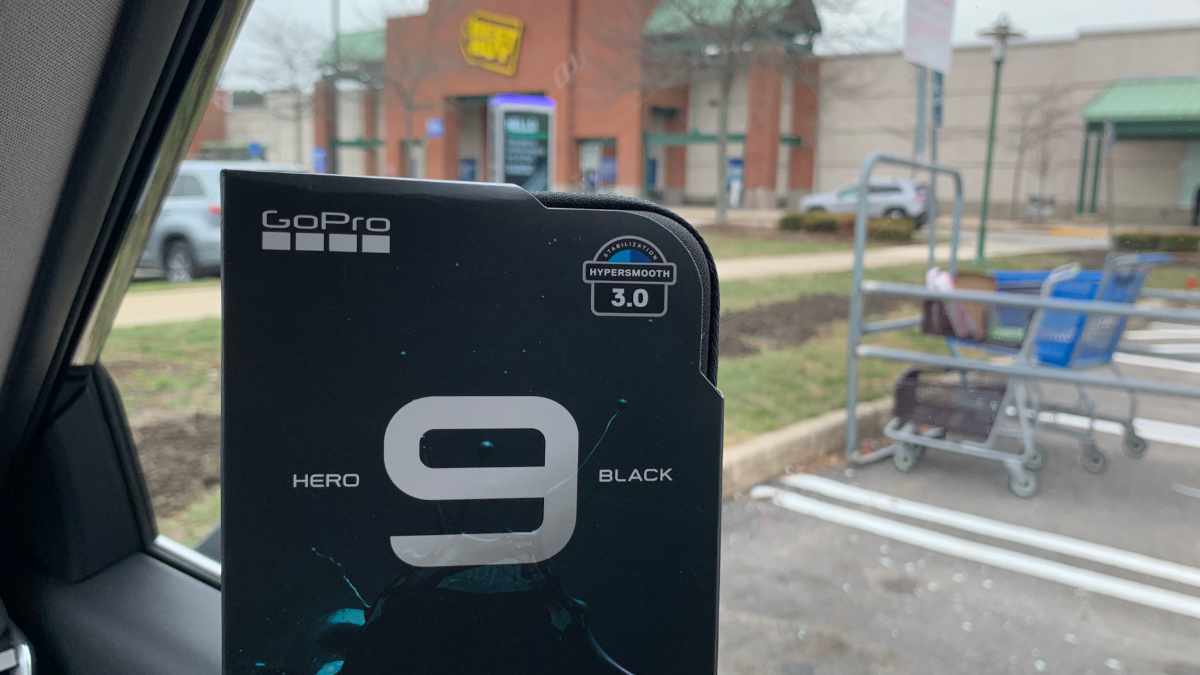
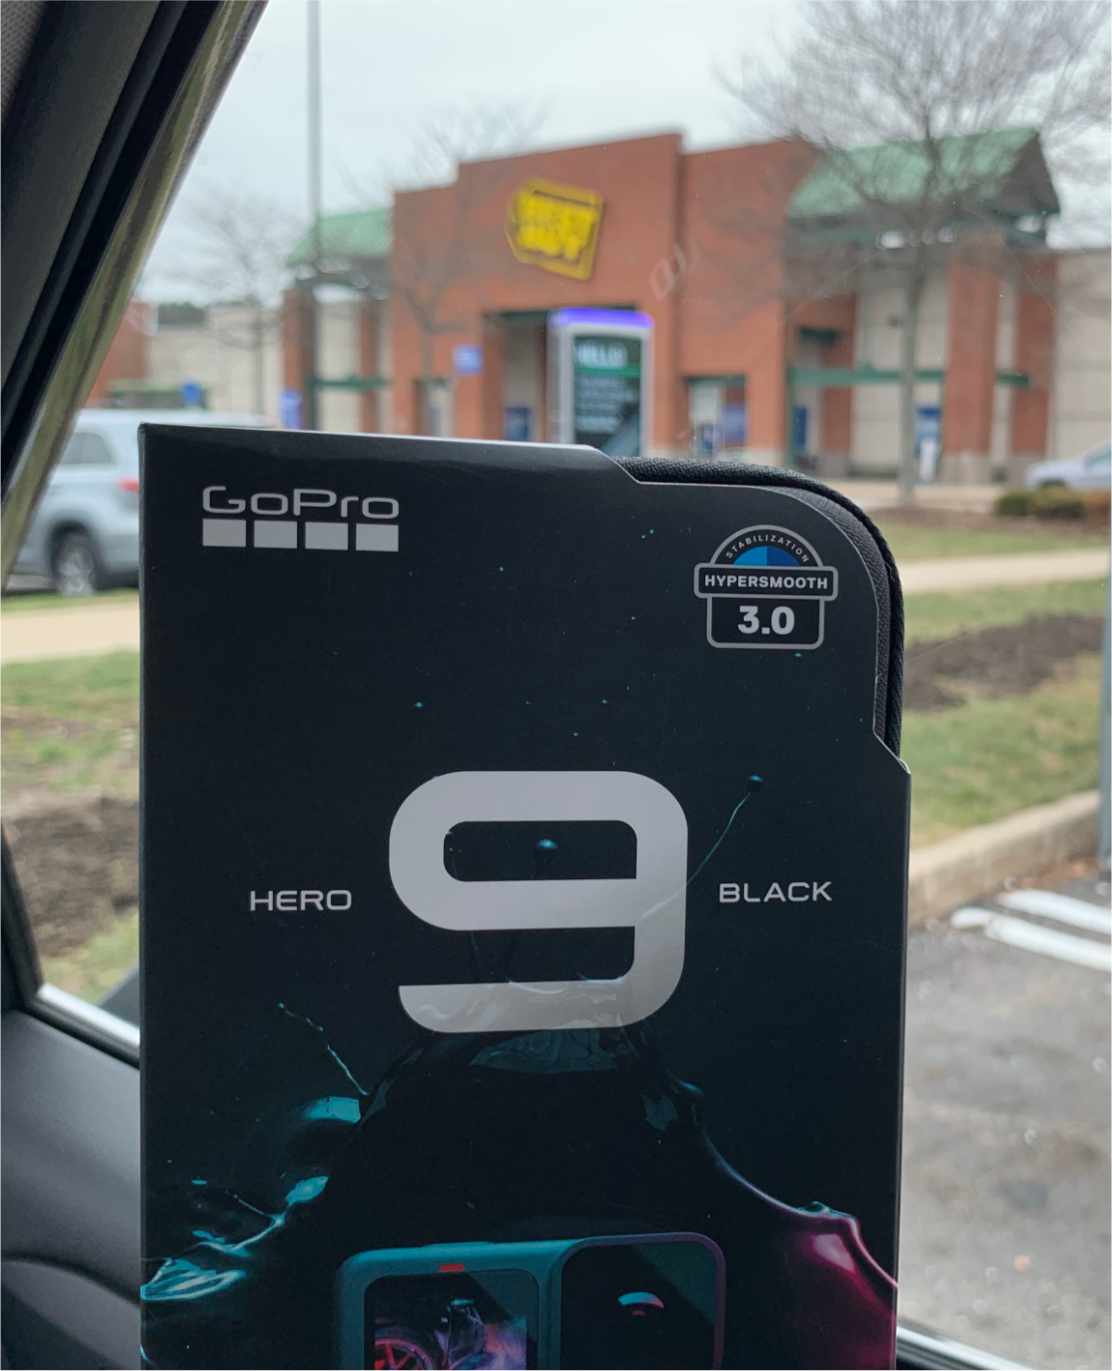
This afternoon I purchased the newest GoPro device - the GoPro Hero 9. I purchased this at a local BestBuy store instead of online as I used some gift cards to help with the purchase.
This is my second GoPro series as I currently have the GoPro Silver 7. I have been using the Silver 7 GoPro a lot and still plan to use both of them.
Six Things I have Learned
Just getting started learning about this cool tech toy. Here are some of the things I have learned so far.
The GoPro now comes in a nice travel case as part of the environmentally friendly packaging.
The GoPro battery is replaceable. Which is great for when I go on trips. I just need to bring a second battery for those occasions where I may do a lot of filming.
The mini SD card slot Is pretty hard to get a card in and out. Certainly much harder than the Silver 7. I think instead of the 64GB card that I have, I may get a 128GB just so that I have enough space for videos.
Photos, Videos, and Time-lapse are now scenes base. You select the scene that works for you. This makes it easy to select the one that works for you. I almost feel that there should be an additional video category for 5k videos.
The GoPro Hero 9 does support 5k for videos but the option is not enabled in the factory-installed scene. You have to edit an existing scene to change it to a 5k option.
The screen menus are difficult to select than in the Silver 7. I did read another review that mentioned that and didn't think it was an issue. It does get a bit frustrating at times trying to select a menu option or scroll through the menus.
Now What?
As I am excited to learn all about the Hero 9, I decided to make Thursday blog content around the new GoPro.
So instead of BBEdit, I'll focus on tips and tricks with the GoPro Hero 9.
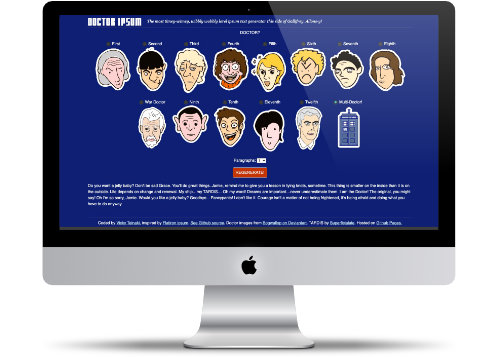
Random Text is fun and Lorem Ipsum is so 2020. Try something different like the wacky Doctor Ipsum generator. Perfect for all those late night software testing.
Website Description
The most timey-wimey, wibbly wobbly lorel ipsum text generator this side of Gallifrey. Allons-y!
The best thing about a machine that makes sense is you can very easily make it turn out nonsense. Let's go in! An unintelligent enemy is far less dangerous than an intelligent one'. You've had this place redecorated, haven't you? Hmm, don't like it. Logic, my dear Zoe, merely enables one to be wrong with authority. Oh my word! Life depends on change and renewal. Oh I'm so sorry, Jamie. Not allowed? Not allowed? Me, I'm allowed everywhere. There are some corners of the universe which have bred the most terrible things. Things which act against everything we believe in. They must be fought.
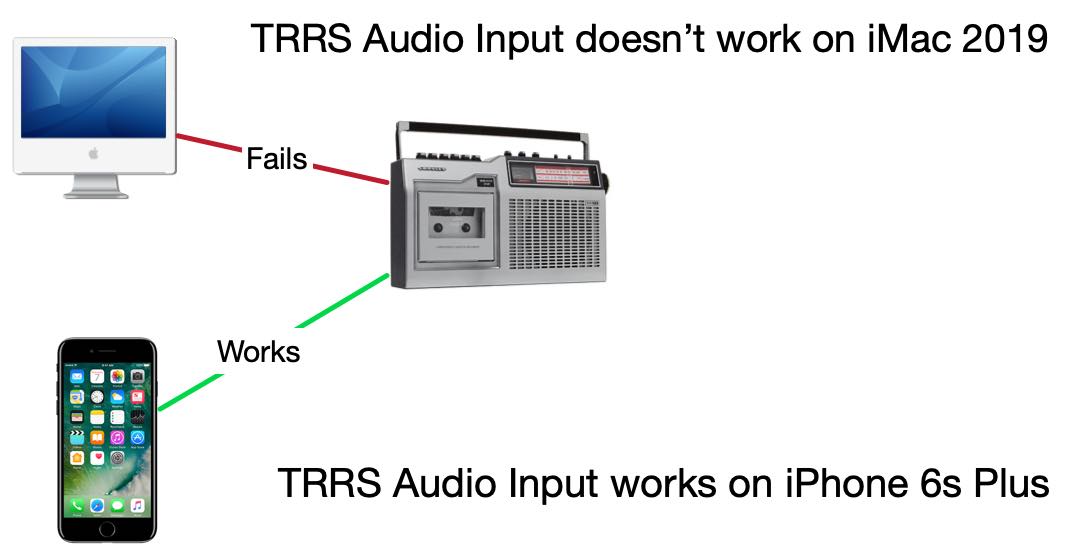
This week I was playing around with various cables with my iMac. I was trying to figure out how I can import audio from my Sony cassette player to my iMac using Audacity.
It turns out that using a TRRS cable does not import the audio to the computer.
Things I Learned
I used a "Headset Buddy Line-Level Audio Adapter with Built-in Attenuation." I connected one end to the iMac and the other end was connected to a standard audio cable from the cassette audio out.
I tested this cable on my old iPhone and it worked. I was able to record audio from the cassette player.
When I disconnected it from the iPhone and plug it into the iMac it didn't work. No audio was being recorded from the cassette player. I was testing using Audacity.
I tested another device: Ultimate Lavalier Microphone - Lapel Mic Clip-on Omnidirectional Condenser.
The Microphone worked with no problem.
Not Giving Up
I'll test some other cables to see if I can get them working on my iMac. It very well could be that the "Headset Buddy Line-Level Audio Adapter with Built in Attenuation" doesn't work for my iMac.
Welcome to cryan.com's main blog page! Here you'll find a diverse collection of informative posts covering topics ranging from technology and lifestyle to career advice. There's something here for everyone.
We are committed to delivering the highest quality content, ensuring you have access to the most current and reliable information.