In the ever-evolving world of social media, creating visually appealing content that fits the specific dimensions of various platforms can be a daunting task. Enter Pixelhunter, an innovative AI tool designed to streamline the process of resizing images for media publications. Leveraging advanced AI technology, Pixelhunter automatically adjusts pictures to the best quality and fits them into the most popular dimensions required by various media platforms¹.
Key Features of Pixelhunter
AI-Powered Resizing: Pixelhunter uses AI to automatically resize images to fit popular media dimensions. This ensures that your images are always optimized for the platform you're using.
Object Recognition: The tool can recognize objects within images, ensuring that important elements are not cropped out. This is particularly useful for maintaining the integrity of your visuals.
High-Quality Adjustments: Pixelhunter adjusts images to maintain the highest quality possible after resizing. This means you don't have to compromise on image quality for the sake of fitting dimensions.
Streamlined Workflow: The tool simplifies the image editing process, saving time for media professionals. This is a game-changer for those who need to resize images frequently.
Website Description
Cropping each and every image by hand can be tiresome. Pixelhunter utilizes amazing Uploadcare Intelligence API to recognize objects and crop pictures automatically, in a smarter way.
Just upload your image of any size and it will be automatically resized to each and every of 102 sizes we support. AI is there to ensure that your image is resized in the best way that a robot can do.
This week, I want to introduce you to a fantastic tool that can help you gauge the performance of your Mac, especially if you haven't updated your system in a while. Say hello to the Blackmagic RAW Speed Test!
What is Blackmagic RAW Speed Test?
Blackmagic RAW Speed Test is a CPU and GPU benchmarking tool designed to test the speed of decoding full-resolution Blackmagic RAW frames on your system. Whether you're a video editor, content creator, or just a tech enthusiast, this tool can provide valuable insights into your Mac's performance.
Why Should You Use It?
Performance Check: If you haven't updated your Mac in a few years, this tool can help you understand how well your system is holding up.
Upgrade Decisions: Thinking about upgrading your hardware? Use this tool to see if your current setup is still meeting your needs or if it's time for an upgrade.
Optimization: Identify any bottlenecks in your system and optimize your workflow accordingly.
New Machine?: If you recently got a new Mac from a yard sale or from a friend, this will help identify how good your new machine is.
How to Use Blackmagic RAW Speed Test
Download and Install: Head over to the Blackmagic Design website and download the Blackmagic RAW Speed Test.
Run the Test: Open the application and Cleck Start. The tool will then run a series of tests to measure the decoding speed of your CPU and GPU.
Analyze the Results: Once the test is complete, you'll get a detailed report showing the performance of your system. Use this information to make informed decisions about upgrades or optimizations.
My Experience
I recently ran the Blackmagic RAW Speed Test on my trusty iMAc Retina 5K, 27-inch, 2019, which I haven't updated in a few years. The results were eye-opening! While my CPU performed admirably, my GPU showed signs of aging. This insight helped me decide that my computer is still good for a while.
Results of my Test
Conclusion
The Blackmagic RAW Speed Test is an invaluable tool for anyone looking to understand their Mac's performance better. Whether you're considering an upgrade or just curious about your system's capabilities, this tool provides the insights you need.
Happy testing, and may your Mac always run at its best!
I hope you find this blog post helpful! If you have any other topics you'd like me to cover, just let me know.
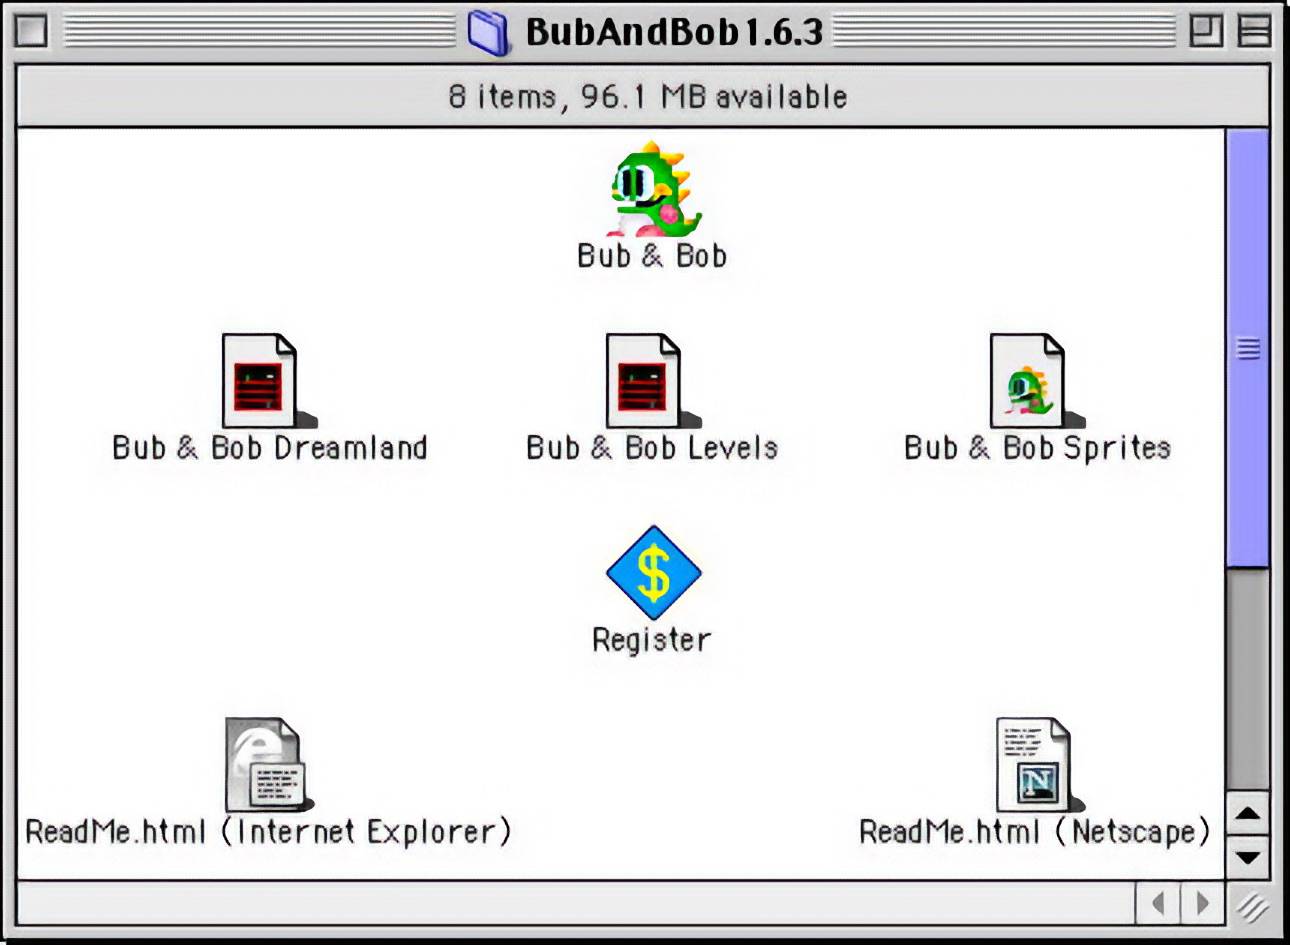
If you're a fan of retro gaming, you might have come across the classic arcade game "Bubble Bobble," which was also available on platforms like the Commodore 64, Atari ST, and Amiga. But did you know that there's a Macintosh game called "Bub & Bob" that's a 90% clone of "Bubble Bobble"? Let's dive into the nostalgic world of "Bub & Bob" and see what makes it so special.
The Basics of "Bub & Bob"
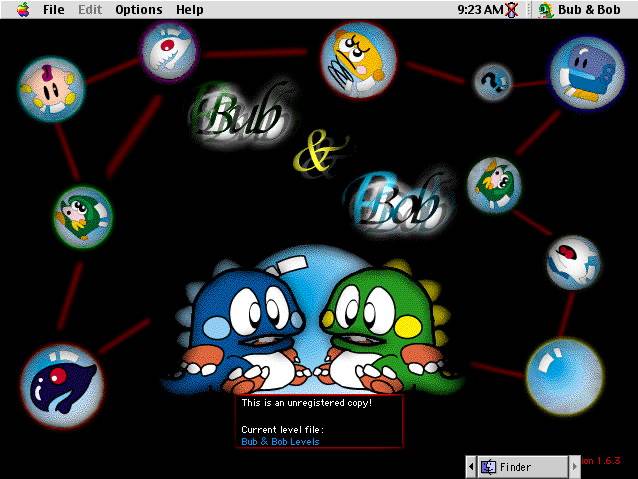
In "Bub & Bob," you play as a little green or blue dinosaur, reminiscent of the characters from "Bubble Bobble." Your main objective is to catch your enemies by shooting bubbles at them. Once trapped in a bubble, you can burst them with your back thorns, turning them into fruits. This simple yet addictive gameplay mechanic is what makes "Bub & Bob" so engaging.
Power-Ups and Enhancements
One of the exciting aspects of "Bub & Bob" is the variety of power-ups and extras available to enhance your abilities. These power-ups can include fast shots, speed boosts, and other enhancements that make the game even more thrilling. Collecting these power-ups adds an extra layer of strategy and fun to the gameplay.
Cooperative Play
Perhaps the best feature of "Bub & Bob" is the ability for two players to play together. This cooperative mode allows you and a friend to team up and tackle the game's challenges together. The camaraderie and teamwork required in this mode make "Bub & Bob" a fantastic game for social gaming sessions.
A Nostalgic Trip Down Memory Lane
"Bub & Bob" is a delightful trip down memory lane for anyone who enjoyed "Bubble Bobble" or other classic arcade games. Its charming graphics, engaging gameplay, and cooperative mode make it a standout title in the world of classic Macintosh games. Whether you're a retro gaming enthusiast or just looking for a fun game to play with a friend, "Bub & Bob" is definitely worth checking out.
So, dust off that old Macintosh, grab a friend, and get ready to catch some enemies in bubbles with "Bub & Bob"!
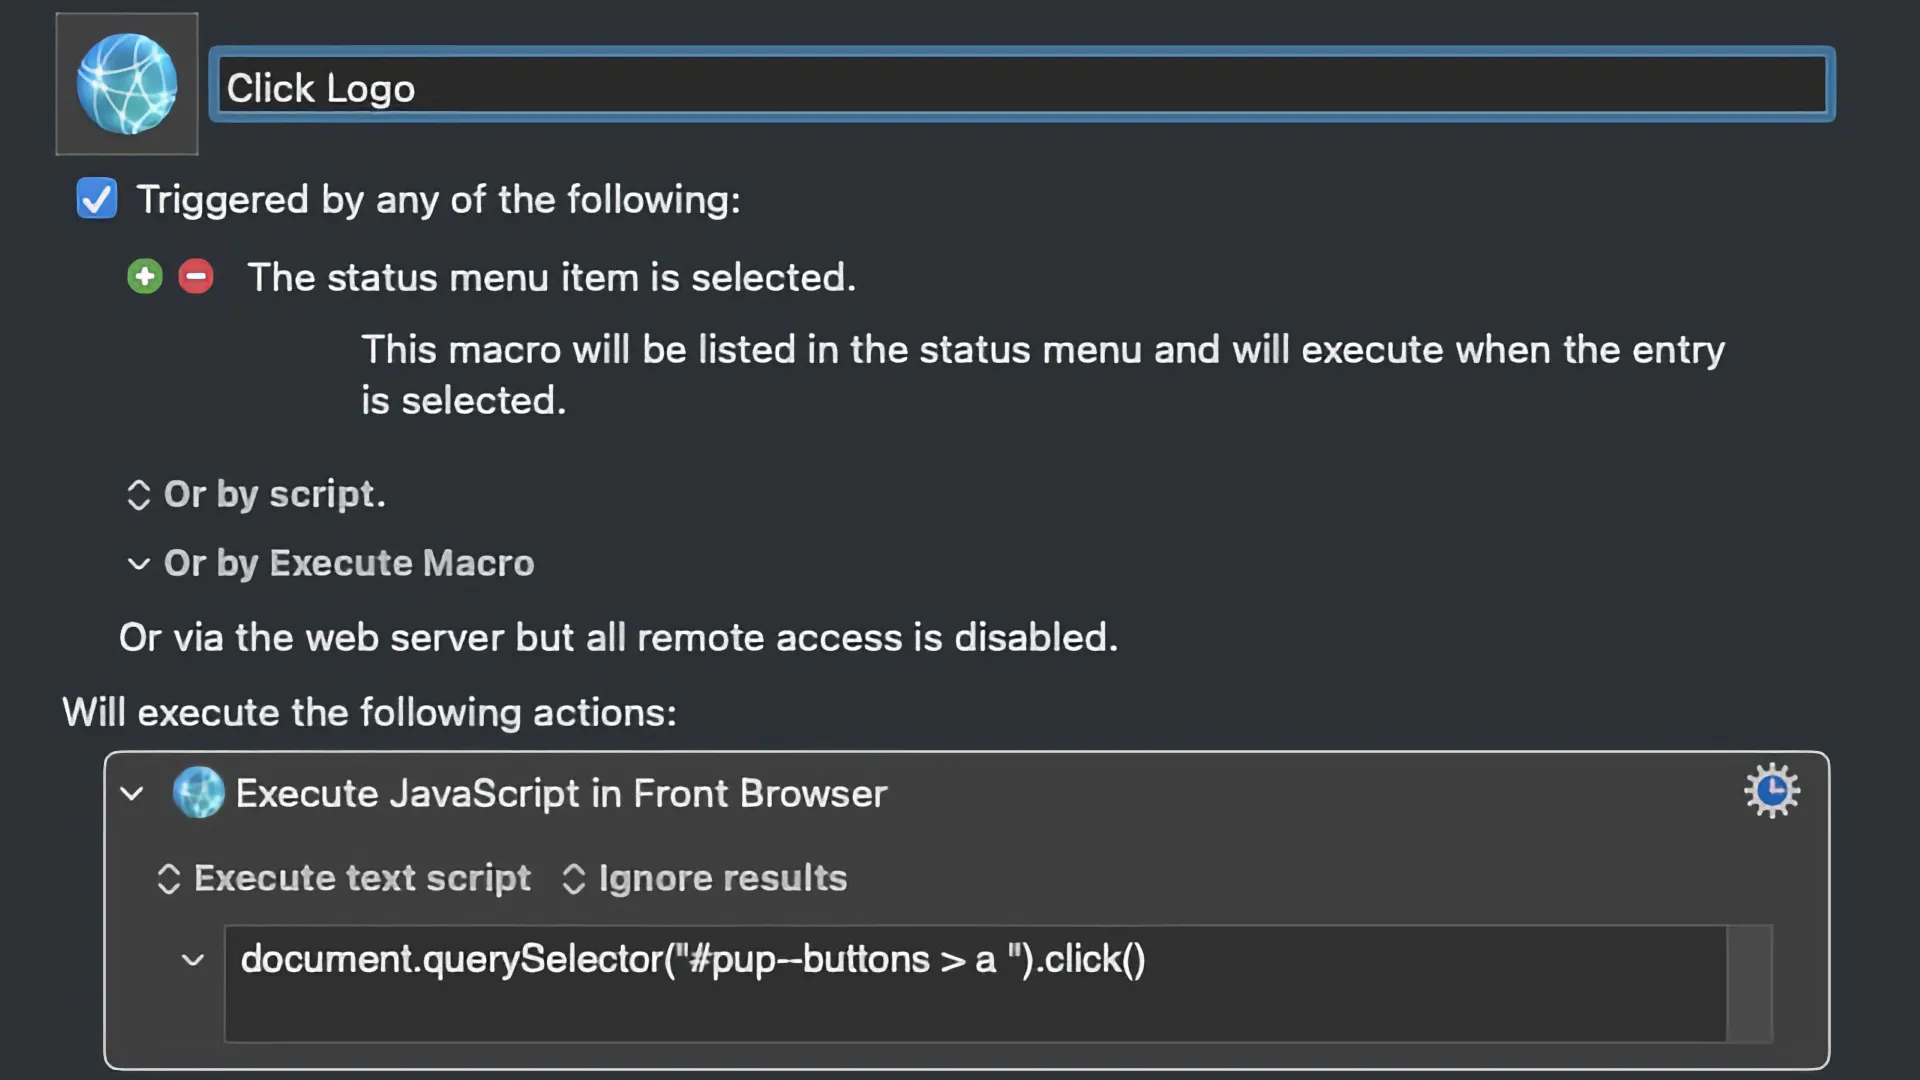
Among its many Keyboard Maestro capabilities, it can execute JavaScript within a web browser, opening up endless possibilities for local-based web-based automation.
Currently, Keyboard Maestro officially supports JavaScript execution in Google Chrome and Safari. However, if you're using Brave or Microsoft Edge as your browser of choice, you'll be pleased to know that these browsers can also be configured to execute JavaScript from Keyboard Maestro macros. Here's how to enable this feature in Brave and Microsoft Edge.
Enabling JavaScript Execution in Brave
To use JavaScript in Keyboard Maestro macros within the Brave browser, you'll need to adjust some developer settings. Follow these steps:
Open Brave Browser: Launch Brave and ensure it's up to date.
Access Developer Settings:
Navigate to the menu bar and select View > Developer.
In the developer menu, find and enable Allow JavaScript from Apple Events.
This setting allows Keyboard Maestro to communicate with Brave and execute JavaScript seamlessly.
Location of menu item in Brave
Enabling JavaScript Execution in Microsoft Edge
Similarly, you can enable JavaScript execution from Keyboard Maestro macros in Microsoft Edge by adjusting the browser settings:
Open Microsoft Edge: Make sure Microsoft Edge is running and updated to the latest version.
Access Developer Tools:
Go to the menu bar and select Tools > Tools.
In the tools menu, check Allow JavaScript from Apple Events.
Once this is enabled, you can use Keyboard Maestro to run JavaScript in Microsoft Edge just as easily as you would in Chrome or Safari.
Location of menu items in Edge
Example Use Cases
With JavaScript execution enabled in Brave and Microsoft Edge, you can create powerful macros for various tasks:
Automated Form Filling: Write a script that inputs repetitive data into online forms.
Web Scraping: Gather information from websites for analysis or reporting.
UI Interactions: Simulate clicks, scrolls, and other interactions to automate web-based workflows.
Conclusion
By extending JavaScript support to Brave and Microsoft Edge, Keyboard Maestro becomes an even more powerful tool for web automation. Whether you're filling out forms, scraping data, or controlling web-based applications, enabling JavaScript execution in these browsers allows you to streamline and enhance your workflows. Happy automating!
By following these steps, you can ensure a seamless integration of JavaScript execution in your preferred browser using Keyboard Maestro. Whether you're an avid user of Brave, Microsoft Edge, or any other browser, Keyboard Maestro's versatility has got you covered.
In the realm of Python testing with Pytest, understanding the currently executing test can be a game-changer, especially when aiming for code reusability and efficiency. This blog post will delve into the techniques that allow you to identify the specific Pytest test being run, empowering you to write more modular and adaptable automation scripts.
Leveraging os.environ.get('PYTEST_CURRENT_TEST')
One of the most straightforward methods to determine the current test involves utilizing the os.environ.get('PYTEST_CURRENT_TEST') environment variable. This variable, when accessed, provides a string representation of the test's full path, including the module and function names.
To extract specific information from the PYTEST_CURRENT_TEST string, you can employ Python's string manipulation techniques. For instance, to obtain just the test function name, you might use:
By parsing the test name, you can implement conditional logic within your test functions. This allows you to tailor the test's behavior based on the specific scenario.
Consider a scenario where you need to dynamically generate URLs based on the test being executed. By examining the test name, you can determine the appropriate URL parameters.
import osdef test_prod(): do_something(url="https://prod.example.com")def test_qa(): do_something(url="https://qa.example.com")def do_something(url):# Perform actions using the provided URL
Additional Considerations
Test Naming Conventions: Adhering to consistent naming conventions for your test functions can simplify parsing and conditional logic.
pytest-xdist: If you're using parallel testing with pytest-xdist, be aware that the PYTEST_CURRENT_TEST environment variable might not be set for all worker processes.
Custom Markers: For more granular control, consider using pytest markers to categorize tests and apply conditional logic based on these markers.
Conclusion
By effectively utilizing the PYTEST_CURRENT_TEST environment variable and understanding how to parse test names, you can write more flexible, reusable, and maintainable Pytest automation scripts. This knowledge empowers you to create tailored test cases that adapt to different scenarios and enhance the overall effectiveness of your testing efforts.
Last Saturday, I took a a virtual journey to the heart of Boston, capturing the entire trip with my trusty GoPro. The result? A dynamic video that showcases the transition from suburban landscapes to the bustling cityscape of downtown Boston.
The video kicks off in high gear with a mesmerizing timelapse sequence. You'll watch as we zoom along the Massachusetts Turnpike, with scenery whizzing by in a blur of colors and shapes. It's fascinating to see how quickly the environment changes - from quiet neighborhoods to busier suburbs, and finally to the outskirts of the city.
As we approach Boston proper, the pace changes. I switched the GoPro to regular speed, allowing viewers to fully absorb the urban atmosphere. You'll notice the gradual build-up of traffic, the increasing density of buildings, and the appearance of iconic Boston landmarks. This dual-speed approach offers a unique perspective on the journey. The timelapse portion emphasizes the distance covered and the changing landscape, while the regular speed segment lets you experience the city as if you were right there in the car with me.
Throughout the video, keep an eye out for:
The evolution of architecture as we get closer to the city
The ebb and flow of traffic on the Mass Pike - Not bad for 6pm on a Saturday.
Glimpses of Boston's skyline as we approach
Navigating the traffic downtown.
Watch the Video
Whether you're a Boston native, a frequent visitor, or someone who's never been to the city, this video offers a fresh look at the journey into one of America's oldest and most vibrant urban centers.
Have you taken a similar trip recently? Or have you used a GoPro to document your travels? Share your experiences in the comments below!
CRM systems are crucial parts of any business that wants to improve. Therefore, we want to discuss how CRM systems can drive innovation in customer loyalty programs and reward strategies. By using such systems, you can be sure that your loyalty programs are enticing. Let's go over details that can help you out.
Personalization and segmentation
You can't overlook the importance of creating loyalty and reward programs when using digital innovation to find business success. CRM systems revolutionize customer loyalty programs through advanced personalization and segmentation. These systems allow businesses to craft personal loyalty programs by leveraging detailed customer data. This high level of customization means rewards are relevant and more compelling to each customer. For instance, a CRM can track purchasing patterns and engagement levels, enabling tailored offers that resonate with unique interests. This targeted approach boosts program effectiveness, as customers are likelier to engage with rewards. Especially rewards that align with their personal preferences enhance overall loyalty and satisfaction.
Personalization is one of the ways how CRM systems can drive innovation in customer loyalty programs and reward strategies
Better customer insights
Businesses can provide tailored and enticing rewards by analyzing data to identify trends and preferences. For instance, by knowing a customer's purchasing patterns and past interactions, businesses can provide customized rewards that have a stronger impact on their target market. With this kind of insight, companies can provide incentives that are not only pertinent but also more likely to improve customer retention and satisfaction. That, in turn, builds better, longer-lasting relationships with their customers.
Automated reward systems
CRM systems streamline loyalty programs by automating the entire reward process, from tracking points to distributing rewards. This automation minimizes manual effort and reduces the risk of errors, ensuring that rewards are allocated promptly and accurately. With automated systems, businesses can easily manage complex reward structures and provide a seamless experience for customers. Timely and precise reward distribution enhances customer satisfaction by ensuring that earned benefits are delivered as expected. This efficiency not only boosts operational effectiveness but also strengthens customer trust and engagement, making the loyalty program more appealing and effective in retaining customers.
How CRM systems can drive innovation in customer loyalty programs and reward strategies
These technologies let organizations more accurately predict their customers' wants and preferences by studying past data and present tendencies. With this kind of foresight, businesses may modify their incentive systems and loyalty programs proactively, in line with emerging trends, instead of responding reactively to changes as they happen. Because of this, companies can maintain an advantage over rivals by providing prompt and pertinent rewards. Thus, predictive analytics improves loyalty program strategic planning, increasing participant engagement and satisfaction.
Such systems can provide you with valuable information
Multi-channel integration
CRM systems can drive innovation and are important when choosing the right SEO company for your small business. They enhance customer loyalty programs through multi-channel integration by unifying data from diverse touch points such as online, in-store, and mobile interactions. This comprehensive view of customer activity allows businesses to create consistent and cohesive loyalty strategies across all channels. By consolidating information from various sources, CRM systems ensure that rewards and engagement efforts are harmonized, providing a seamless customer experience. Regardless of how or where clients connect with the business, this integrated strategy helps to give targeted offers and preserve consistency in loyalty campaigns. Consequently, companies can enhance client interactions and promote increased pleasure and loyalty.
Feedback and improvement
CRM systems are important in enhancing customer loyalty programs by systematically gathering and analyzing customer engagement and reward feedback. This process allows businesses to gain valuable insights into the effectiveness of their loyalty initiatives and identify areas that require improvement. By leveraging this feedback loop, organizations can create a valuable connection with their customers, ensuring that their loyalty programs remain relevant and effective. Regular updates to the program, driven by real customer experiences, address potential issues and keep the offerings aligned with customers' evolving expectations. This proactive approach ultimately boosts customer satisfaction and strengthens long-term loyalty, thereby increasing customer lifetime value.
Gamification strategies
How can CRM systems drive innovation in customer loyalty programs and reward strategies? By adding gamification components, the process of earning rewards becomes more dynamic and interesting. Gamification uses elements of games, like leaderboards, challenges, and point systems, to increase customer satisfaction with loyalty programs. By introducing a competitive and enjoyable element, this strategy encourages customers to interact more frequently and raises their happiness overall. CRM systems assist companies in developing dynamic loyalty programs that draw in and keep consumers by combining these qualities, which make the reward experience both inspiring and memorable. Here are some ways you can approach this using things such as:
Achievement badges
Progress bars
Quests and missions
Referral contests
Tiered reward levels
Cross-selling and upselling opportunities
CRM systems unlock significant cross-selling and upselling opportunities within loyalty programs by leveraging detailed customer data. These systems identify opportunities to recommend additional products or premium services that align with individual preferences by analyzing purchasing history and engagement patterns. For instance, in the retail industry, CRM systems can suggest complementary products, like offering a customer who bought a camera an exclusive discount on accessories. In the hospitality industry, hotels might use CRM to provide guests with room upgrades or discounts on spa services based on their previous stays. Targeted rewards, such as exclusive offers or bonus points for related purchases, can encourage customers to explore new products or upgrade their current choices. This personalized approach enhances the customer experience, drives higher spending, and increases each customer's overall value, leading to a more profitable and dynamic loyalty program.
At the same time, for the moving industry, moverstech.com specializes in providing CRM solutions tailored specifically to the needs of moving businesses. These systems track customer interactions and service preferences and help businesses offer targeted rewards, such as discounts on packing services or referrals to related services like storage. This personalized approach enhances the customer experience, drives higher spending, and increases each customer's overall value. By utilizing this CRM system, moving companies can integrate cross-selling and upselling strategies into their loyalty programs, resulting in a more profitable and dynamic business model.
Real-time analytics and reporting
Customer loyalty programs can be revolutionized using real-time analytics and reporting from CRM systems. These offer rapid insights into program effectiveness. This feature allows businesses to monitor important data like customer feedback, award redemption rates, and engagement levels. With real-time data, businesses can quickly spot patterns, identify problems, and modify loyalty programs. This agility enables businesses to optimize their programs continuously, ensuring they remain effective and relevant. By acting on up-to-date information, companies can enhance the customer experience, boost satisfaction, and streamline success even better.
You can also recommend other services and products with such systems in place
Make the best of CRM systems
Using CRM systems to make the most to improve your business will help you engage with your customers. By explaining how CRM systems can drive innovation in customer loyalty programs and reward strategies, we hope we have helped you out. Find out how these systems can help you in loyalty programs and rewards.
In today's digital age, understanding what people are searching for online can provide invaluable insights into global trends, interests, and behaviors. One of the most powerful tools for this purpose is Google Trends, a platform that allows users to explore search interest over time, by location, and across various topics.
What is Google Trends?
Google Trends is a free tool that provides data and visualizations on the popularity of search queries in Google Search. It offers a unique glimpse into what people are curious about, concerned with, or excited about at any given moment. Whether you're a marketer, researcher, journalist, or simply a curious individual, Google Trends can help you understand the zeitgeist of the internet.
Key Features of Google Trends
Search Interest Over Time: Track how search interest for a particular topic has evolved over a specified period. This feature is particularly useful for identifying seasonal trends or the impact of major events on public interest.
Geographical Insights: Discover where in the world people are searching for a specific topic. This can help businesses tailor their marketing strategies to different regions or understand regional differences in interest.
Related Queries and Topics: Find out what other terms and topics are being searched in relation to your query. This can provide deeper insights into the context and nuances of public interest.
Real-Time Data: Explore what's trending right now with real-time data. This feature is perfect for staying on top of the latest news, events, and viral phenomena.
Website Description
Google Trends is a versatile and powerful tool that offers a window into the collective curiosity of the world. By harnessing the insights provided by this platform, individuals and organizations can stay ahead of trends, make informed decisions, and better understand the ever-changing landscape of public interest.
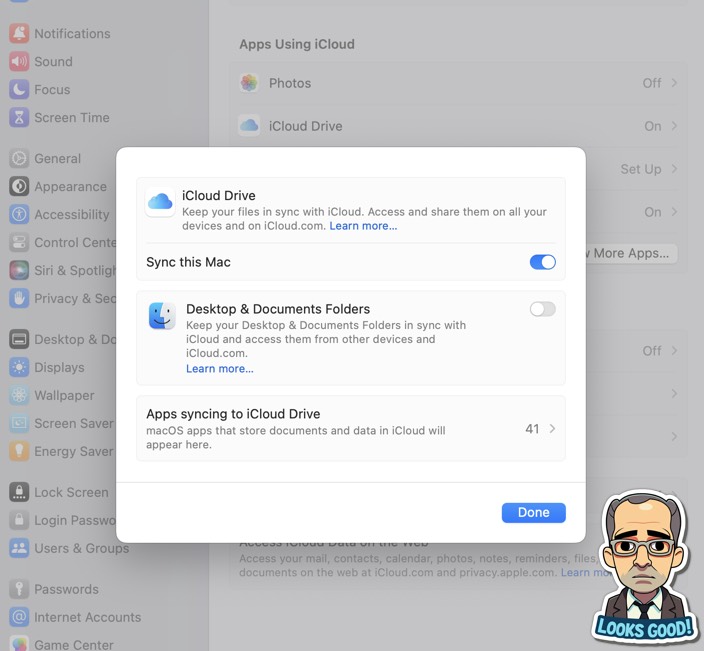
If you've ever felt like your iCloud Drive is taking up too much space, you're not alone. With Apple's "Sync this Mac" feature, iCloud can quickly consume not just your cloud storage but also valuable disk space on your Mac. The good news? There's a simple and effective way to clean up your iCloud Drive and reclaim that precious space.
Why Clean Up Your iCloud Drive?
iCloud Drive is a fantastic tool for keeping your files accessible across all your Apple devices, but it can also lead to unintended storage issues. iCloud Drive often "hijacks" local storage to keep files available offline. Over time, this can significantly reduce the available storage on your Mac, especially if you store large files or have enabled the "Optimize Mac Storage" option.
By moving files from iCloud Drive to your Mac, you can free up space in your iCloud storage and reduce the local disk space iCloud occupies. This is particularly useful if you're running low on storage or simply want more control over where your files are stored.
How to Move Items to Your Mac and Remove Them from iCloud Drive
Here's a step-by-step guide to safely moving your files from iCloud Drive to your Mac:
Open Finder: Click the Finder icon in the Dock to open a Finder window.
Access iCloud Drive: In the Finder sidebar, click on "iCloud Drive" to view all the files stored in your iCloud.
Drag and Drop: Select the items you want to move, then drag them to another folder on your Mac. This could be a folder on your desktop, such as "Recents" or "Downloads," or even an external drive if you're looking to free up a significant amount of space.
Confirm the Move: When you drag items out of iCloud Drive, they are copied to your chosen location on your Mac and removed from iCloud Drive. Remember, this action removes them from iCloud Drive on all devices linked to your Apple ID.
Revert If Needed: If you change your mind and want the items back in iCloud Drive, you can simply drag them back into the iCloud Drive folder in Finder.
Tips for Managing iCloud Storage More Effectively
Regular Clean-Up: Make it a habit to regularly review what's in your iCloud Drive and move files that you no longer need stored there.
Use External Drives: For large files or backups, consider using an external hard drive or SSD to keep them off your iCloud Drive and local storage.
Optimize Storage Settings: Check your Mac's storage settings by going to Apple Menu > About This Mac > Storage > Manage. This will give you a clear overview of what's taking up space and provide recommendations for optimizing your storage.
By taking these steps, you can keep your iCloud Drive organized and ensure that both your iCloud and Mac have plenty of free space.
I was searching through some old files on my WallStreet G3 laptop and I found a folder called Web Pages. This contained several files around Apple's Personal WebSharing.
What is Mac OS Personal Web Sharing
Mac OS Personal Web Sharing is the easiest way to share your information with others on your intranet, no matter what type of computer or browser they're using. All you do is put the items you want to share in the Web Pages folder and turn on Web Sharing.
As long as your computer is connected to a TCP/IP network (intranet or Internet) and your server is running (turned on in the Web Sharing control panel), the server's content is available to users of the network. You control what items are shared and who can see those items, by using the standard Mac OS file sharing privileges. You can specify who has access to items and assign a password to some or all of your Web server's content.
Interesting Easter Egg
I was checking the raw source code and discovered that Peter Joseph Ferrante left some interesting comments in the header of some of the Mac OS Personal Web Sharing files.
I bet that he didn't think anyone would ever check the raw HTML.
Yes, Peter Joseph Ferrante, your famous now that your comments appeared on cryan.com website blog!
In the fast-paced world of software development, design, and content creation, efficiency is key. One of the most underutilized tools in a power user's arsenal is Keyboard Maestro's Name Clipboard Switcher, a feature that can revolutionize the way you work.
Farewell to Cluttered Clipboard History
The traditional clipboard history is a useful feature, but it can quickly become cluttered with a myriad of copied snippets, making it challenging to find the specific information you need. This is where Keyboard Maestro's Name Clipboard Switcher shines.
Curate Your Snippets with Ease
With the Name Clipboard Switcher, you can create and organize your commonly used snippets, such as:
Website form field information
Company logos
Graphic stamps for screenshot overlays
Code snippets
Boilerplate text
And more!
By categorizing and labeling your snippets, you can easily access the right information at the right time, without sifting through a sea of unrelated clipboard entries.
Streamline Your Workflow
Imagine the time saved when you no longer have to remember where you stored that crucial company logo or search through your clipboard history for the right address to input. With the Name Clipboard Switcher, your most-used snippets are just a few keystrokes away.
Unleash the Power of Automation
But the benefits of the Name Clipboard Switcher go beyond just quick access to your snippets. By integrating it into your Keyboard Maestro workflows, you can automate repetitive tasks, further streamlining your productivity.
For example, you could create a macro that automatically inserts the appropriate contact information or logo when you're composing an email or creating a presentation. The possibilities are endless, limited only by your imagination.
Elevate Your Efficiency
Whether you're a software tester, graphic designer, or content creator, the Name Clipboard Switcher can be a game-changer. By curating your frequently used snippets and integrating them into your daily workflow, you'll free up valuable time and mental energy, allowing you to focus on the more important aspects of your work.
Start Optimizing Your Workflow Today
Ready to take your productivity to the next level? Dive into Keyboard Maestro's Name Clipboard Switcher and start customizing your snippets. You'll be amazed at how much time and frustration you can save, leaving you more time to tackle your most challenging and rewarding tasks.
As the Democratic National Convention unfolds in Chicago, it's a fitting time to reflect on a concept that resonates deeply in both the political and software testing worlds: "Taxation without Representation." This phrase famously underpinned the American Revolution, voicing the frustration of citizens taxed by a government in which they had no say. In the realm of software quality assurance (QA), a parallel can be drawn to "testing without representation."
What Is Testing Without Representation?
Just as citizens should not be subject to laws and taxes without having a voice in government, software should not be tested without involving those who will ultimately use it. When the end-users, stakeholders, and other key representatives are not included in the QA process, the testing may fail to capture the real-world scenarios that the software will encounter. The result? Missed bugs, unmet requirements, and a product that doesn't align with user needs.
The Risks of Exclusion
When end-users and stakeholders are excluded from the testing process, several risks emerge:
Unidentified Critical Bugs: Without a clear understanding of how the software will be used in the real world, QA teams might overlook bugs that could severely impact user experience.
Misaligned Features: Features that developers see as valuable may not resonate with users, leading to a disconnect between the software's functionality and the users' needs.
Increased Costs: Addressing issues after a product release is far more costly than catching them early. Testing without representation can lead to costly fixes, patches, and potentially even brand damage.
The Power of Inclusive Testing
To avoid these pitfalls, it's crucial that QA teams involve representatives from all relevant groups in the testing process. This includes:
End-Users: Those who will use the software daily can provide insights that no other group can.
Project Managers: They understand the broader business objectives and can ensure the software aligns with overall goals.
Developers: Collaboration between QA and development can lead to a more seamless testing process.
Designers: Their input ensures that the user interface is both functional and user-friendly.
By including these voices, QA teams can ensure a comprehensive testing process that accurately reflects the needs and expectations of all stakeholders.
Conclusion
Just as taxation without representation led to significant unrest and change, testing without representation can lead to unsatisfied users and costly errors. By embracing an inclusive approach to testing, QA professionals can deliver software that truly meets the needs of its users, resulting in a higher quality product and a better overall user experience.
In the spirit of the democratic ideals being discussed this week in Chicago, let's ensure our testing processes represent all voices, leading to better, more effective software.
On a warm summer day, August 17, 2024, I found myself among a growing crowd in front of Boston's historic Faneuil Hall. The air was buzzing with anticipation as we gathered to watch a street performer known as Snap Boogie. Little did I know that I was about to witness a 45-minute spectacle that would keep us all spellbound.
Snap Boogie, with his electrifying energy and infectious smile, began his show with a series of impressive dance moves that immediately caught everyone's attention. His body popped and locked with inhuman precision, drawing gasps and cheers from the audience. But this was just the beginning. As the performance progressed, Snap Boogie seamlessly blended dance, acrobatics, and comedy. He engaged with the crowd, pulling volunteers into his act and creating moments of laughter and awe. Children giggled with delight, and adults found themselves grinning from ear to ear.
About 15 minutes into the show, Snap Boogie announced that he would perform a mind-blowing trick. However, he added with a mischievous grin, we'd have to wait until the end of the show to see it. This tantalizing promise kept the crowd growing, with passersby stopping to join the already substantial audience.
Throughout the next half hour, Snap Boogie continued to entertain with increasingly impressive feats. He performed backflips over volunteer audience members, and even incorporated some beatboxing into his routine. All the while, the anticipation for the final trick continued to build.
As the 45-minute mark approached, the crowd had swelled to an impressive size. Some people who had been there from the beginning had waited over 40 minutes to see this promised spectacle. The air was thick with excitement.
Finally, Snap Boogie announced it was time for the grand finale. In a blur of motion that lasted barely a minute, he performed a series of moves that seemed to defy gravity and human limitations. The crowd erupted in cheers and applause, amazed by what they had just witnessed.
Watch the Entire performance
Great Show!
As I left Faneuil Hall that day, I couldn't help but marvel at Snap Boogie's skill, not just as a performer, but as a showman. He had masterfully built anticipation throughout his act, keeping the audience engaged for the full 45 minutes and leaving us all with a sense of wonder.
Snap Boogie's performance was a reminder of the magic that can happen on city streets, the power of live entertainment, and the joy of shared experiences. It was a testament to the enduring appeal of street performance and the ability of a talented artist to transform a ordinary day into something extraordinary.
If you ever find yourself in Boston, keep an eye out for Snap Boogie. Trust me, it's worth the wait.
A solid contract is the backbone to all successful professional partnerships. Without a formal contract in place, you open yourself up to necessary risk, conflict, and financial loss. Yet, up to 80% of business partnerships end in divorce, often because they neglect this crucial foundational step. But it's not hard to see why. Contracts are notoriously time-consuming and confusing to decipher. Fortunately, an AI contract review tool can streamline and simplify this complex process via sophisticated algorithms and machine learning capabilities that automatically screen contracts for risks and errors. By integrating this tool into your operations, you can better protect yourself legally and get a fair deal in whatever partnership you enter.
Identify and mitigate risk
AI contract review tools can flag potentially unfair terms that may not be in your best interests, so you can make edits and negotiate something more favorable. Similarly, it can also highlight unclear terms that leave room for potential dispute. You may have a very different interpretation of vague phrases like "as soon as possible" or "best efforts" compared to your potential business partner, for example. AI flags this sort of unclear language, so you can improve clarity and enter into a fairer arrangement. The same goes for payment terms. The tool will check due dates, payment amounts, and penalties are clear, fair, and consistent throughout the contract. So, with AI, you won't ever end up inadvertently agreeing to a bad contract that's not in your best interests.
Summarize lengthy contracts
Business contracts aren't exactly fun or easy to read, but an AI contract review tool can summarize them for you. It can extract key points and clauses, and copy them to separate documents or store them as rich metadata text fields for you to review. You can therefore get a handle on the main points without having to read the whole thing right away. This improves accuracy and saves time. In fact, AI can review a contract in just 26 seconds, whereas lawyers take 92 minutes on average.
Yet, it's important to stress that no matter how capable AI may be, you also don't want to defer to it completely. After all, it's just a machine and not infallible. Human oversight remains essential, and particularly so in sectors like law that rely on data integrity. Shockingly, one in six legal AI tools have been found to make up false information. So, contracts and documents should always ultimately be read over by a human in full before you decide whether or not to sign the dotted line. Balancing AI with human judgment will ultimately help you get the most out of the tool.
Best practices for AI contract review tools
You can also reap the maximum benefits from AI contract review technology by following best practices. For example, before investing in a tool, set goals for what you want to use it to achieve. Do you want to lower risk above all? Speed up review times? Improve accuracy? By being clear on your goals and needs, you'll have an easier time choosing the most suitable tool.
You should also always choose AI tools that adhere to strong security standards, so as to protect sensitive information (over 40% of businesses have had an AI privacy breach). Before purchasing a tool, check it has security certifications. It should also do continuous security audits that identify and fix vulnerabilities in real-time. These precautions can mean the difference between keeping your data secure or accessible to hackers.
Also, be prepared to set aside time to train your AI tool to make it as accurate and effective as possible. As these tools use machine learning, they need to be trained over time to understand the specific language, terminology, and clause variants commonly used in your industry. So, this just means you should feed it a number of your previous business contracts so it can familiarize itself with them before officially using it for contract review.
AI can help you streamline the contract review process, so you can improve accuracy, save time, and enter into fair business partnerships. By understanding how to get the most out of your chosen tool, you can successfully protect yourself from legal risks.
In the ever-evolving world of artificial intelligence, Claude.ai stands out as a next-generation AI assistant developed by Anthropic. Designed to be safe, accurate, and secure, Claude.ai is built to assist users with a wide range of tasks, from generating natural, human-like responses to processing text and image-based inputs.
What Makes Claude.ai Special?
Claude.ai is not just another AI assistant; it is the result of Anthropic's extensive research into creating helpful, honest, and harmless AI systems. The platform offers access to Claude 3.5 Sonnet, the most capable model yet, which ensures high performance and reliability. Users can interact with Claude through a chat interface or API, making it versatile for both personal and professional use.
Key Features
Human-Like Responses: Claude.ai can generate responses that feel natural and engaging, making interactions more enjoyable.
Versatile Input Handling: Whether it's text or images, Claude.ai can process various types of inputs, providing accurate and relevant outputs.
Safety and Security: Built with a focus on safety, Claude.ai ensures that interactions are secure and free from harmful content.
Website Description
Claude is an Artificial Intelligence, trained by Anthropic using Constitutional AI to be safe, accurate, and secure the best assistant for you to do your best work.
You can use Claude for your own personal use or create a Team account to collaborate with your teammates.
Tags in macOS are a handy way to organize files, making them easy to locate and manage. Whether you're categorizing documents, images, or videos, tags can streamline your workflow. However, there's an interesting quirk you might not know about when tagging audio files.
When you assign a tag to an audio file, macOS does something special: it displays the audio title in the tagged items list instead of the actual filename. This behavior is unique to audio files and doesn't apply to other types of files, such as documents or images.
What Does This Mean?
Let's say you have a podcast episode titled "Productivity Tips" stored as "podcast_episode_123.mp3." If you tag this file, macOS will show the title, "Productivity Tips," in your tagged items list instead of the original file name. This can make it easier to identify audio files at a glance, especially when you have many audio clips with generic filenames.
Why Does This Happen?
macOS extracts the metadata from audio files, specifically the title tag embedded in the file, and uses that to label the tagged item. Since audio files often come with metadata like artist, album, and track title, macOS leverages this information to give you a more meaningful display name. This helps you avoid the clutter of technical filenames and focus on the content.
Practical Uses
Music Library Management: When organizing your music collection, tagging songs by genre, mood, or project can make searching more intuitive. Seeing the track title rather than the file name adds clarity.
Podcast Editing: If you work with podcasts or any other spoken-word content, tagging by episode themes or segments can help streamline your workflow, giving you a quick overview of your content based on titles.
Audio Projects: For audio producers, this feature helps distinguish between multiple takes or versions of a track that may have similar filenames but different titles.
Conclusion
This fun fact about macOS tags adds an extra layer of convenience when working with audio files. By displaying the title instead of the filename, macOS simplifies how you interact with your tagged audio clips, making your workflow more efficient and organized.
Next time you tag an audio file, take a moment to appreciate this small yet powerful feature that makes macOS a unique and thoughtful operating system for creators.
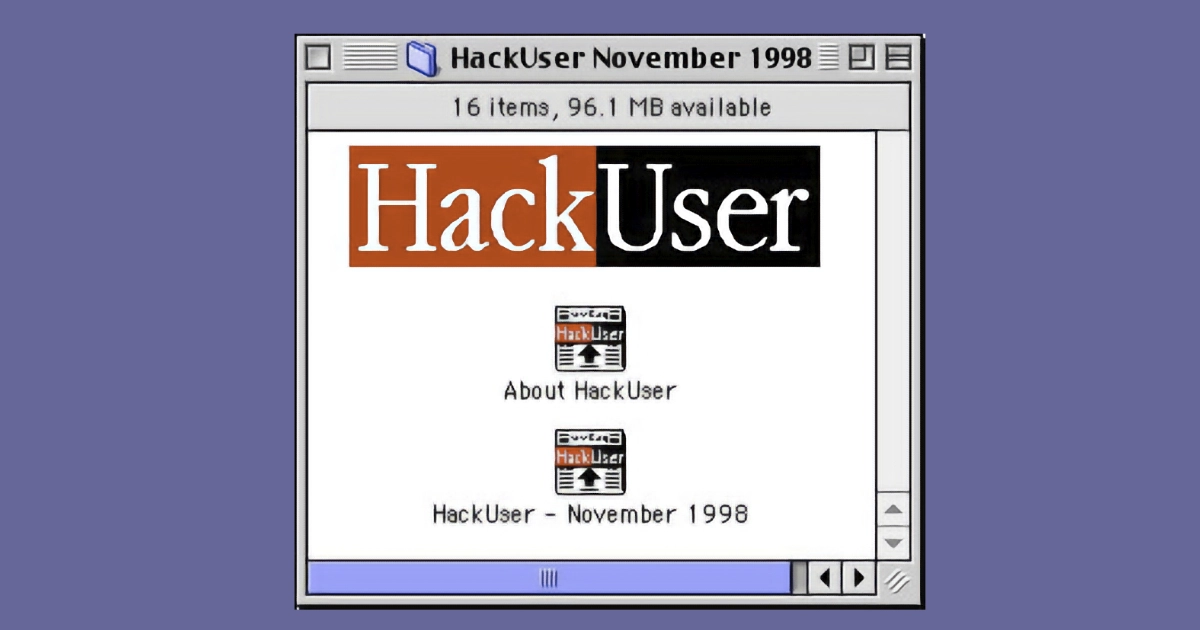
Hello, fellow Macintosh enthusiasts! Welcome to this week's edition of "Retro Mac Rewind," where we dive into the quirky, controversial, and sometimes forgotten corners of Macintosh history. Today, we're turning back the clock to November 1998 to explore a utility that had the Macintosh community buzzing: HackUser.
In the late '90s, as software was evolving at a breakneck pace, many Mac users found themselves with a library of older programs they couldn't bear to part with. Enter HackUser, a tool that promised to breathe new life into aging software by providing a vast database of serial numbers and cracks.
Now, before we go further, let's address the elephant in the room: HackUser operated in a legal and ethical gray area. It's important to note that using software without proper licensing is generally not legal or ethical. However, HackUser's creators positioned their tool as a means of preservation rather than piracy.
Use Your Old Software Again.
The HackUser team described their mission as archiving old serial numbers that were often purged from other databases to make room for newer software. They saw themselves as digital archaeologists, preserving access to software that might otherwise be lost to time.
What made HackUser unique was its comprehensive approach. The creators compiled serial numbers and cracks from various sources, crediting contributors like "The Informant," "Hackers Helper," "Buck's Cracks," and "Zeus." This collaborative effort resulted in what they claimed was the most extensive serial number database available at the time.
HackUser releases were eagerly anticipated by a subset of the Mac community. Each monthly issue promised growth "at a phenomenal rate," with a "What's New?" section catering to those seeking the latest additions.
Product Description
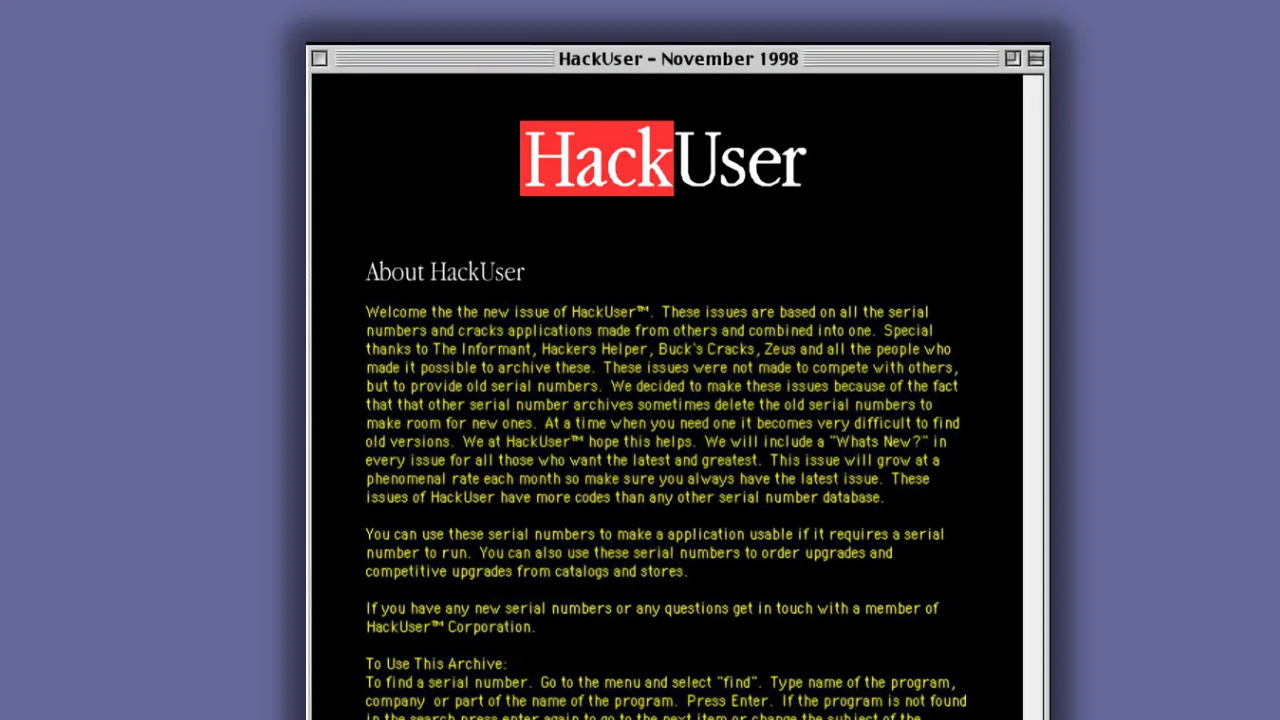
About HackUser
Welcome the the new issue of HackUser. These issues are based on all the serial numbers and cracks applications made from others and combined into one. Special thanks to The Informant, Hackers Helper, Buck's Cracks, Zeus and all the people who made it possible to archive these. These issues were not made to compete with others, but to provide old serial numbers. We decided to make these issues because of the fact that that other serial number archives sometimes delete the old serial numbers to make room for new ones. At a time when you need one it becomes very difficult to find old versions. We at HackUser hope this helps. We will include a "Whats New?" in every issue for all those who want the latest and greatest. This issue will grow at a phenomenal rate each month so make sure you always have the latest issue.These issues of HackUser have more codes than any other serial number database. You can use these serial numbers to make a application usable if it requires a serial number to run. You can also use these serial numbers to order upgrades and competitive upgrades from catalogs and stores.
If you have any new serial numbers or any questions get in touch with a member of HackUser Corporation.
To Use This Archive:
To find a serial number. Go to the menu and select "find". Type name of the program, company or part of the name of the program. Press Enter. If the program is not found in the search press enter again to go to the next item or change the subject of the search.
About HackUser Page
More Than Just Rebooting Old Software
But HackUser wasn't just about running old software; it also provided a pathway for users to order upgrades or competitive upgrades from catalogs and stores. In a time before widespread digital distribution, this feature helped users navigate the complex world of software licensing and upgrades.
Useful Tool
Looking back, HackUser represents a fascinating moment in Macintosh history. It highlights the community's desire to preserve and continue using older software, even as the platform rapidly evolved. It also underscores the complex relationship between users, developers, and the concept of software ownership.
While we can't condone the use of unlicensed software, HackUser serves as a reminder of the passion and ingenuity of the Macintosh community. It's a testament to the enduring appeal of classic Mac software and the lengths to which enthusiasts would go to keep their beloved programs running.
As we reflect on utilities like HackUser, it's worth considering how far we've come in terms of software preservation and backwards compatibility. Today, initiatives like the Internet Archive's software library provide legal ways to experience classic software, while Apple's own efforts have made transitioning between system versions smoother than ever.
Your Thoughts?
What are your thoughts on HackUser and similar utilities from the '90s? Did you ever use them to keep your favorite old programs running? Share your experiences in the comments below, and join us next week for another journey into Macintosh history!
Remember, folks: always respect intellectual property rights and support software developers by purchasing and using software legally. Happy computing!
In the fast-paced world of technology, efficiency is key, and one of the most powerful tools to enhance your workflow on macOS is Keyboard Maestro. This incredible automation tool allows you to create Macros that simplify your daily tasks, saving you time and energy. Today, we'll explore a practical macro that captures a screenshot of your workspace before your Mac goes to sleep - ensuring you know exactly what files and windows were open when you left off.
Why Capture a Screenshot Before Sleep?
We've all been there: your Mac goes to sleep, and when you wake it up, you're trying to remember what you were working on. Maybe you had important documents open, or perhaps you were in the middle of a creative project. Capturing a screenshot before your Mac sleeps provides a visual reference, helping you pick up exactly where you left off.
Setting Up the Macro
Let's walk through creating this handy macro in Keyboard Maestro.
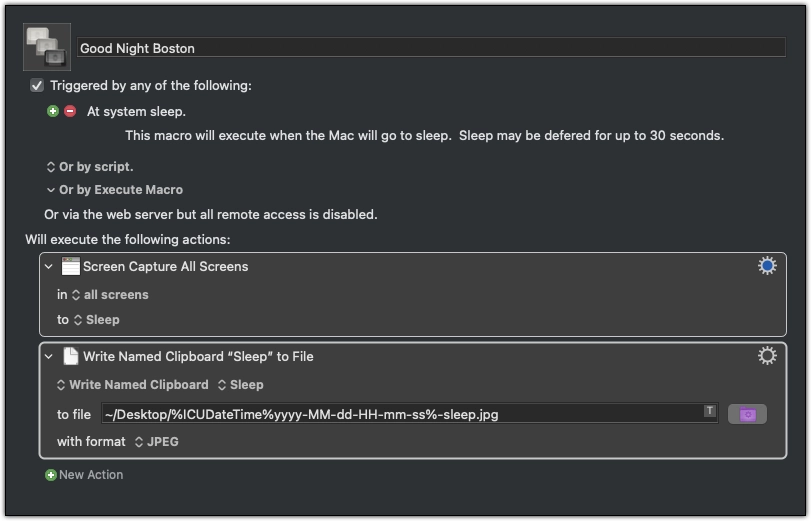
Create a New Macro: Start by opening Keyboard Maestro and creating a new macro. You can name it something like "Good Night Boston."
Add a Trigger: We'll use the "Sleep" trigger for this macro, which activates when your Mac is about to go to sleep. To do this, click on the New Trigger button and select "At System Sleep" from the available triggers.
Capture the Screenshot: Next, add an action to take a screenshot. Click on New Action and search for "Screen Capture All Screens". Select "All Screen" and choose whether you want to capture the entire screen or a specific area.
Save to Named Clipboard: After capturing the screenshot, you'll want to save it to a Named Clipboard for easy access later. Select a new Named Clipboard. This is useful in case the file didn't get saved or you wanted to access the screenshot later.
Save the Screenshot to a File: To ensure you have a physical copy of the screenshot, add one more action to save it as a file. Choose "Write Named Clipboard to File" and set the destination: ~/Desktop/%ICUDateTime%yyyy-MM-dd-HH-mm-ss%-sleep.jpg
Macro Screenshot
Encouragement: Be the Champion of Your Mac
With this macro in place, you've taken another step toward mastering your Mac. Small automations like these empower you to be more organized, more efficient, and ultimately, more in control of your workflow. Remember, every time you create a new macro, you're not just saving time - you're becoming a true champion of your computer.
So, go ahead, set up this macro today, and experience the difference it makes in your daily routine. Your Mac is a powerful tool, and with Keyboard Maestro, you're making the most of it!
Feel free to customize the macro to suit your needs, and as always, keep exploring the endless possibilities that Keyboard Maestro offers. Happy automating!
In the world of software testing, creativity and simplicity often go hand-in-hand. A good test idea doesn't always need to be a detailed script or an elaborate plan; sometimes, a short and focused phrase can encapsulate a powerful concept. Testing is about exploring possibilities, thinking outside the box, and focusing on what truly matters. Here are 15 test ideas that prove the effectiveness of simplicity.
Why Test Ideas in Five Words or Less?
Software testing is a crucial part of ensuring quality, but it doesn't have to be complicated or cumbersome. With five words or fewer, we can encapsulate concepts that spark exploration, promote efficiency, and encourage a mindset of curiosity. The brevity of these test ideas fosters quick thinking and flexibility, making them applicable across various testing contexts.
Benefits of Simple Test Ideas
Clarity: Concise test ideas are easier to understand and communicate.
Focus: They help testers focus on the key aspects of the application.
Flexibility: Short test ideas allow testers to adapt and expand based on the context.
Creativity: They encourage out-of-the-box thinking and exploration.
15 Test Ideas in 5 Words or Less
Check Button Alignment Consistency
Ensure buttons are uniformly aligned throughout the application, creating a consistent user experience.
Test Text Color Visibility
Verify that text is easily readable against different background colors to enhance accessibility.
Assess Error Message Clarity
Evaluate whether error messages clearly convey what went wrong and how users can resolve it.
Examine Image Load Times
Check if images load promptly, ensuring that users don't experience frustrating delays.
Verify Form Field Validation
Ensure form fields accurately validate input, preventing incorrect data submissions.
Analyze Page Responsiveness Speed
Measure how quickly a page responds to user actions, contributing to a smoother user experience.
Check Multi-device Compatibility
Test the application's functionality across various devices, ensuring it works seamlessly on all platforms.
Evaluate Login Authentication Process
Examine the security and efficiency of the login process to protect user accounts.
Explore Unusual User Behavior
Simulate unexpected user actions to identify potential application weaknesses or vulnerabilities.
Test Navigation Menu Functionality
Ensure that all navigation links are working correctly, allowing users to access desired sections.
Investigate Data Handling Errors
Look for data processing issues that could lead to inaccurate information being displayed or stored.
Check Session Timeout Management
Test how the application handles user sessions and ensures automatic logouts after inactivity.
Examine Accessibility Screen Readers
Ensure the application is compatible with screen readers to support visually impaired users.
Verify Currency Conversion Accuracy
For financial applications, ensure currency conversions are correct and updated in real-time.
Evaluate Cross-browser Compatibility
Test the application's appearance and functionality on different browsers to ensure consistent performance.
Putting It All Together
These simple test ideas are not exhaustive but serve as a starting point for creative exploration. They remind us that sometimes, less is more. By focusing on the essence of what needs testing, we can cover more ground efficiently and effectively.
Embrace the Simplicity of Testing
As testers, embracing simplicity doesn't mean neglecting thoroughness. Instead, it highlights the importance of prioritizing and exploring core areas that impact user experience.
What are your favorite short test ideas? Feel free to share them in the comments below!
In a recent YouTube video upload, Christopher Ryan takes viewers on a trip down memory lane with a recording of himself playing Intellivision games MBA Baseball and Lock and Chase. The video, titled "Intellivision Games", was uploaded on August 11, 2024., but was filmed in the late 1980s.
The video is a classic example of a comedic take on a sports-related situation. The humor stems from the absurdity of the situation: a baseball game where players are forced to pitch due to a lack of available pitchers. The dialogue is witty and the pacing is perfect, making for a quick and enjoyable watch.
I highly recommend checking out this video if you're looking for a good laught. It's sure to brighten your day.
Artificial intelligence (AI) is transforming how businesses operate, offering numerous opportunities to enhance efficiency and drive growth. By integrating AI into your existing operations and workflows, you can stay competitive and innovative in today's fast-paced market. Embracing AI with a positive attitude and strategically can unlock its full potential. Here are some strategic ways to embrace AI and optimize its benefits for your business.
Embrace AI with a Positive Mindset
Embracing AI as an opportunity gives you a positive start. When you view AI as a beneficial tool rather than a disruptive force, you set the stage for successful integration. This positive mindset encourages you and your team to explore AI's potential without fear, fostering a culture of innovation. By seeing AI as an ally, you can identify areas where it can make the most significant impact, from improving customer service and streamlining operations to enhancing decision-making processes, ultimately positioning your business for long-term success.
Enhance Visual Content Creation
Businesses can use AI-generated images to create engaging visual content quickly, enhancing marketing efforts, product listings, and social media presence. This approach allows you to produce high-quality visuals without the extensive time and resources typically required for traditional design processes. By using AI to generate images, you can attract more attention and engagement from your audience, ultimately driving higher conversion rates. Utilizing a text-to-image tool exemplifies how AI can streamline content creation, making it a valuable addition to any business's arsenal of tools.
Strategize with Data
Developing a data strategy can enable more effective decision-making. By collecting and analyzing relevant data, you gain insights into customer behavior, market trends, and operational efficiency. This data-driven approach allows you to make informed decisions that align with your business goals. A well-structured data strategy helps in identifying patterns and predicting future trends, providing a competitive edge. By leveraging AI to process and interpret data, you ensure that your business can swiftly adapt to changes and seize new opportunities, ultimately enhancing overall performance.
Ensure Fair AI Practices
Monitoring biases in data and algorithms used in AI prevents unfair or inaccurate results. Bias can inadvertently creep into AI systems, leading to decisions that may harm certain groups or yield skewed outcomes. By regularly reviewing and refining your data and algorithms, you can mitigate these risks and ensure fairer, more accurate AI applications. This vigilance not only improves the reliability of your AI tools but also reinforces ethical standards, promoting inclusivity and equality in your business practices, thereby fostering a more just and equitable work environment.
Build Trust with Transparency
Prioritizing transparency in the development and use of AI builds trust with customers. When you are open about how AI is used in your business, customers are more likely to feel confident in your practices. Transparency involves clearly communicating the purposes and benefits of AI applications, as well as being honest about the limitations and potential risks. By fostering an open dialogue, you can demystify AI for your stakeholders, enhancing their trust and loyalty. This openness ultimately strengthens your business relationships and reputation.
Train Your Team Thoroughly
Giving employees thorough training makes them more likely to embrace the new AI. Proper training ensures that your team understands how to use AI tools effectively and can integrate them into their workflows seamlessly. Training programs should focus on both the technical aspects of AI and its strategic applications within your business. When employees feel confident in their ability to work with AI, they are more likely to support its implementation, driving higher adoption rates and maximizing the technology's benefits.
AI integration can revolutionize your business, driving efficiency and fostering innovation. By adopting AI with a forward-thinking approach, you can leverage its capabilities to enhance operations and stay competitive. This proactive stance ensures that your business remains agile and responsive in an ever-evolving market, securing long-term success and growth. Embracing AI thoughtfully and strategically will help you navigate the future, maintaining your position at the forefront of your industry.
Stay updated with the latest blogging trends and dive into a variety of intriguing topics at Cryan.com. From tech tips to personal stories, our daily blog posts offer something for everyone.
In the digital age, visual content is king. Whether you're a web designer, marketer, or content creator, having high-quality images is essential. Enter PNGMaker.io, an innovative online tool that leverages advanced AI technology to convert text into stunning PNG images with transparent backgrounds.
Why PNGMaker.io Stands Out
AI-Powered Transformation: PNGMaker.io utilizes cutting-edge AI to transform text input into high-quality PNG images. This ensures professional results with minimal effort, bringing your concepts to life with precision.
Custom Text to PNG: Users can easily convert their text into PNG images by describing their vision or idea. The AI-powered tool creates personalized text to PNG images, allowing for unique and tailored outputs that match specific needs. The detail the description the better the results.
Transparent PNG Maker: One of the standout features of PNGMaker.io is its ability to create PNG images with transparent backgrounds. This feature ensures versatility, making it easy to integrate the images into various projects, such as web design, marketing materials, and digital content.
User-Friendly Interface: The text maker PNG interface is designed to be user-friendly, allowing users to customize fonts, sizes, and colors effortlessly. Once the PNG image is generated, users can review and edit it to ensure it meets their expectations.
Free Online Access: PNGMaker.io provides free online access, allowing users to create PNG images anytime, anywhere. This makes it an ideal solution for those who need quick and efficient image creation without the hassle of downloading software.
Website Description
PNG Maker is an innovative online tool that utilizes PNG maker AI to convert text to PNG images. This PNG maker online free service allows users to create transparent PNG images effortlessly, making it an ideal solution for web designers, marketers, and content creators. With its advanced text maker PNG capabilities, users can easily transform text to PNG with various customization options, ensuring professional and visually appealing results.
Apple's latest operating system, macOS 15 Sequoia, is packed with innovative features that promise to enhance your Mac experience. The successor to macOS Sonoma, was announced at WWDC 2024 on June 10, 2024. From advanced AI capabilities to improved integration with iOS devices, here's a look at the key features to be excited about in macOS 15.
1. Apple Intelligence
One of the standout features of macOS 15 is Apple Intelligence. This custom-built AI is designed to perform complex tasks, such as summarizing web pages, organizing photos, and even helping you compose or rewrite text. With privacy in mind, many tasks are processed on your Mac, ensuring your data remains secure¹².
2. iPhone Mirroring
With iPhone Mirroring, you can now fully control your iPhone from your Mac. This feature goes beyond traditional screen mirroring, allowing you to run almost any iPhone app, swipe the Home Screen, and use your Mac's keyboard and mouse to interact with your phone. Notifications from your iPhone can also appear on your Mac, making it easier to stay connected¹².
3. Passwords App
Apple introduces a new Passwords app that consolidates all your website passwords, Wi-Fi passwords, and passkeys in one place. This cross-platform app runs on macOS and iOS, and an iCloud Passwords app for Windows is also in the works. It offers a secure and convenient way to manage your passwords without relying on third-party services¹².
4. Text Effects and Emoji in Messages
The Messages app gets a fun upgrade with animated stickers, text effects like bold and italic, and the ability to schedule messages to be sent later. These enhancements make your conversations more expressive and engaging¹².
5. Video Presenter Preview
For those who frequently use video conferencing, the new Presenter Preview feature is a game-changer. It allows you to choose which windows on your screen will be visible to attendees when you share your screen, providing more control and a smoother presentation experience¹².
6. Window Tiling
Window Tiling is another productivity booster in macOS 15. This feature lets you easily organize and snap windows into place, making multitasking more efficient and your workspace more organized¹².
Conclusion
macOS 15 Sequoia brings a host of exciting new features that enhance productivity, security, and user experience. Whether you're a professional looking for advanced tools or a casual user wanting a more seamless integration with your iPhone, there's something in Sequoia for everyone. Stay tuned for its public release this fall and get ready to explore all that macOS 15 has to offer!
All of these features are coming this Fall, most likely sometime in early October.
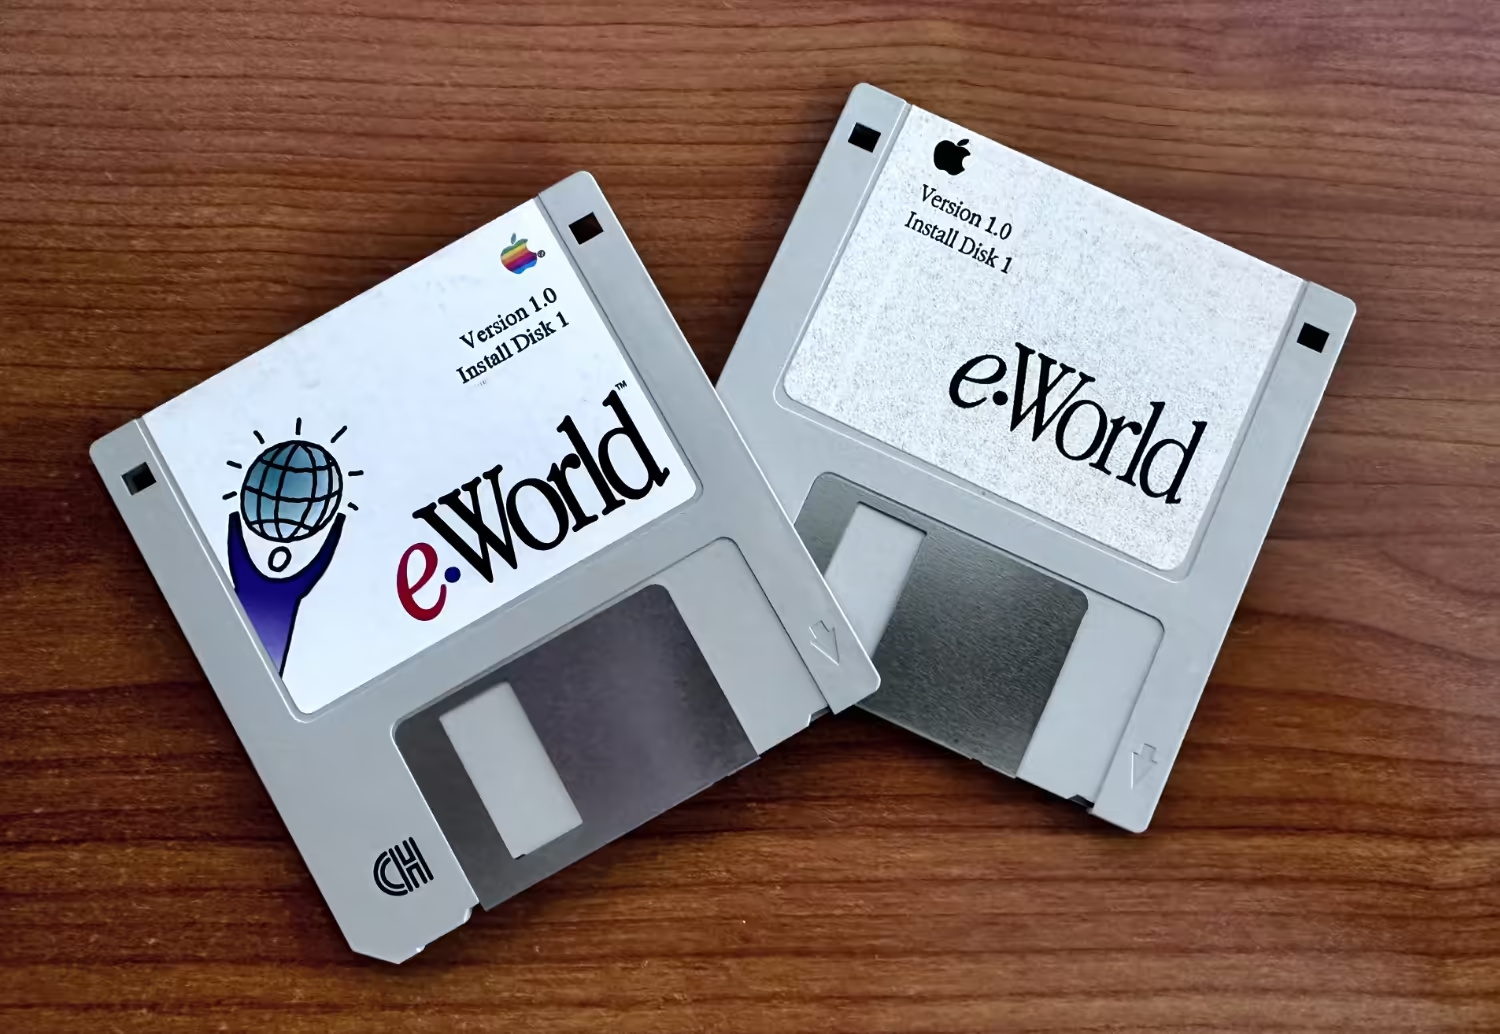
As a tech enthusiast and font aficionado, I recently embarked on a nostalgic journey that led me to unearth a piece of Apple's forgotten history: the eWorld font. This elusive typeface, once integral to Apple's short-lived online service in the mid-1990s, has become something of a digital artifact. Today, I'm sharing my adventure in attempting to resurrect this piece of typographic history.
The Discovery
It all started when I managed to get my hands on an original installation floppy disk containing the eWorld font. The date stamp on the font file read April 28, 1994. Excitement coursed through me as I held this piece of Apple's past in my hands. Also on the floppy disk were Monoco (May 16, 1994) and Palatino (May 111, 1994).
The Challenge
However, my initial enthusiasm was quickly tempered by reality. Despite having the font file, I found myself unable to install it on my modern system. It was a stark reminder of how quickly technology moves forward, often leaving behind compatibility with older software.
A Glimpse into the Past
Undeterred, I turned to my trusty G4 computer - a relic in its own right, but newer than the eWorld era. While I couldn't install the font, I was able to preview it.
Looking at the preview, I was struck by the font's clean lines and friendly appearance. It exuded a sense of approachability that was characteristic of Apple's design philosophy at the time.
Modern-Day Equivalents
Intrigued by what I saw, I began comparing the eWorld font to other typefaces in my collection. To my surprise, I found that two fonts bore a striking resemblance to eWorld:
Lucida Grande
Apple Symbols
These fonts, which have been staples in Apple's typographic arsenal for years, seemed to carry the DNA of their eWorld predecessor. It was fascinating to see how Apple's font design had evolved while maintaining certain core aesthetic principles.
Lucida Grande and Apple Symbols are very similar to the eWorld Font.
The Legacy of eWorld
While the eWorld online service was short-lived (1994-1996), its font appears to have had a lasting impact on Apple's typography. The similarities between eWorld and more recent Apple fonts suggest that the design principles behind eWorld - clarity, friendliness, and ease of reading - continued to influence Apple's typographic choices long after the service itself was discontinued.
Reflections
My journey with the eWorld font, from the excitement of discovery to the challenges of compatibility, serves as a reminder of the rapid pace of technological change. It also highlights the importance of digital preservation. Fonts, like other software, can become casualties of progress, existing only in the limbo of outdated file formats and incompatible systems.
For designers and tech historians, fonts like eWorld are more than just letters on a screen. They're windows into the aesthetic and functional priorities of their time. They tell us about the technology available, the design trends in vogue, and the ways in which companies like Apple sought to present themselves to the world.
Conclusion
While I may not have been able to fully resurrect the eWorld font, this experience has given me a deeper appreciation for the evolution of digital typography. It's a reminder that behind every letter we type is a rich history of design, technology, and cultural shifts.
For those interested in typography or Apple's history, I encourage you to look beyond the fonts we use every day. There's a whole world of forgotten typefaces out there, each with its own story to tell. Who knows what other typographic treasures are waiting to be rediscovered on old floppy disks and CD-ROMs?
Have you ever stumbled upon an old font or piece of software that fascinated you? I'd love to hear about your experiences in the comments below!
Six years ago, I wrote about Keyboard Maestro's Trigger Macro by Name feature, which is a powerful tool for quickly accessing and managing your macros. Given its importance and continued relevance, I decided to revisit this topic for this week's Keyboard Maestro post. If you're interested in my original post from August 7, 2018, you can check it out here. Today, I want to delve deeper into how this feature has evolved, what makes it indispensable, and some insights I've gained over the years.
What is Trigger Macro by Name?
Trigger Macro by Name is a versatile feature in Keyboard Maestro that allows users to search for and execute macros without needing to remember their exact trigger action. This can be incredibly useful, especially when dealing with a large collection of macros where recalling specific triggers isn't feasible. Additionally, it serves as a perfect solution for macros that don't have a set trigger action. By simply typing a portion of the macro's name, you can quickly locate and execute the desired macro.
Four Things I Have Learned
Over the past six years, I've discovered several nuances and techniques that make Trigger Macro by Name even more effective. Here are four key insights I've gained:
1. Useful Information at a Glance
One of the great features of Trigger Macro by Name is the ability to see detailed information about a macro when you select it. This includes data on how often each macro is used, which is particularly helpful for identifying which macros are most critical to your workflow. If you have several macros with similar names or functions, this usage statistic can guide you in choosing the macro that truly matters most to you.
Pro Tip: Regularly review your most frequently used macros. It can provide insights into your habits and areas where automation could be further enhanced or refined.
2. Managing Similar Macros
When dealing with macros that have overlapping purposes or names, it can be challenging to remember which one is the most effective. With the usage data provided by Trigger Macro by Name, you can easily distinguish between similar macros and decide which one best suits your current needs.
For example, if you have multiple macros for formatting text, such as bold, italicize, and underline, knowing which one you rely on most frequently can streamline your editing process. This awareness helps in optimizing and potentially consolidating your macro library to avoid redundancy.
3. Quick Editing with Option-Return
Sometimes a macro doesn't function as intended, or you may need to tweak it to better fit your current project. With Trigger Macro by Name, you can easily access the editing interface of any macro. Simply select the macro you want to modify and press Option-Return. This action will open Keyboard Maestro directly to that specific macro, allowing you to make adjustments without hassle.
Pro Tip: This quick access feature is a lifesaver when debugging or refining macros. If a macro fails to execute correctly, using Trigger Macro by Name lets you find the macro in question, view recent attempts, and seamlessly transition to editing mode.
4. Creating Multiple Trigger Macro by Name Actions
A lesser-known feature is the ability to create multiple Trigger Macro by Name actions. This is particularly beneficial if you want to have a set of macros with different search parameters or if you desire varied trigger actions for specific workflows.
By assigning different triggers to Trigger Macro by Name, you can tailor your macro search experience. For instance, you might have a set dedicated to work-related macros and another for personal projects, each accessible with unique hotkeys.
Pro Tip: Organize your macros into categories and use multiple Trigger Macro by Name actions to swiftly navigate between these categories. This can dramatically increase your efficiency, especially if you work in diverse environments requiring distinct sets of macros.
Why Revisit Trigger Macro by Name?
Revisiting Trigger Macro by Name after six years offers a fresh perspective on its capabilities and ongoing value. As our digital lives grow more complex, the need for efficient tools like Keyboard Maestro becomes ever more crucial. This feature remains a cornerstone for users seeking to automate and optimize their workflows effectively.
By understanding and leveraging the full potential of Trigger Macro by Name, you can ensure that your macros are always just a keystroke away, empowering you to work smarter and more efficiently.
Conclusion
Keyboard Maestro's Trigger Macro by Name continues to be an essential tool in my daily workflow. Its ability to quickly locate and execute macros, provide insightful usage data, and offer editing convenience makes it indispensable for anyone looking to enhance their productivity.
As you explore this feature, I encourage you to consider how it can be tailored to fit your unique needs. Whether you're a seasoned Keyboard Maestro user or just beginning your automation journey, Trigger Macro by Name is a feature that should not be overlooked.
Feel free to share your experiences and tips in the comments below, and let's continue to explore the vast potential of Keyboard Maestro together!
I hope this post offers valuable insights into the Trigger Macro by Name feature in Keyboard Maestro. If you have any questions or need further information, please let me know!
As a QA automation engineer working with Pytest, you may have encountered a peculiar issue while saving test files in Visual Studio Code: a web browser opens up, only to display a blank page for a few seconds before closing. This behavior can be both puzzling and frustrating, especially when you're in the middle of debugging or running automated tests. In this blog post, we'll explore the common reasons behind this issue and how to effectively resolve it.
Why Does This Happen?
The sudden appearance of a blank webpage when saving a Pytest file is often linked to specific configurations within your test scripts. This phenomenon is generally attributed to two primary factors:
Commented-Out Headless Mode:
In many automation scenarios, especially when using Selenium WebDriver, tests are often executed in a "headless" mode. This means the browser operates without a graphical user interface, running in the background to speed up testing and reduce resource consumption.
If you accidentally comment out or remove the line that specifies headless mode, the browser will launch visibly. This can lead to an unexpected blank page opening when the WebDriver attempts to perform actions without the necessary instructions for rendering content.
Empty WebDriver References:
Another common reason for the blank page is when your test script references the WebDriver to access a URL or perform an action at a location that is undefined or empty. For example, calling driver.get("") or trying to interact with a non-existent element can cause the browser to load a default blank page.
This usually happens when variables holding URL paths or element locators are improperly defined or left uninitialized.
Let's delve into some practical examples and solutions to address these issues.
Example Scenario
Imagine you're writing a Pytest script to automate a login process for a web application. You may have something like the following code:
from selenium import webdriverfrom selenium.webdriver.common.by import Byimport pytest@pytest.fixture(scope="module")def browser(): options = webdriver.ChromeOptions()# Uncomment the next line for headless execution# options.add_argument("--headless") driver = webdriver.Chrome(options=options)yield driver driver.quit()def test_login(browser):# The URL is incorrectly referenced here, leading to a blank page url =""# Intended URL is commented out or not assigned browser.get(url) login_field = browser.find_element(By.ID, "username") login_field.send_keys("test_user")# Additional test steps...
Problem Breakdown:
Commented-Out Headless Mode:
Notice that the headless option is commented out. If you're running tests and saving changes, the browser will open visibly, which might not be the intended behavior during development.
Empty URL Reference:
The url variable is set to an empty string, leading to a blank page when browser.get(url) is executed.
Solutions and Best Practices
To prevent these issues from occurring, consider implementing the following strategies:
1. Ensure Proper Headless Configuration
Double-check your code to ensure the headless option is correctly configured if you intend to run tests without a visible browser. Uncomment the headless argument as needed:
options.add_argument("--headless")
Additionally, ensure you're setting the right environment based on your testing needs. For instance, if you want to observe the browser actions during test development, you can toggle the headless setting conditionally:
Ensure that all WebDriver references, particularly URLs, are correctly initialized and not left empty or undefined. Always verify the URLs and locators used in your tests:
Using environment variables or configuration files can help manage these paths and settings more effectively, reducing the risk of accidental omissions.
3. Implement Logging for Better Debugging
Incorporating logging can help trace where things go wrong, especially with WebDriver calls. Use Python's logging module to capture the execution flow and any potential issues:
Encountering a blank webpage when saving Pytest files in Visual Studio Code can be a common annoyance, often resulting from overlooked code changes such as commented-out headless mode or empty WebDriver references. By understanding the root causes and implementing best practices, you can minimize these occurrences and maintain smoother automation workflows. Always keep an eye on your test configurations, validate inputs, and leverage logging to catch issues early in the testing process.
As I gear up for my upcoming Disney World trip, I can't help but reflect on how much has changed since my last visit. Back then, I was content with capturing memories in 1080p. But this time, I'm stepping up my game and shooting everything in glorious 4K. Why? Because I've discovered the magic of repurposing 4K footage for platforms like YouTube Shorts and TikTok.
The 4K Advantage
Shooting in 4K isn't just about crystal-clear clarity (though that's a fantastic bonus). It's about flexibility. Here's why:
Future-Proofing: As display technology advances, your 4K footage will stay relevant longer.
Zoom and Crop Freedom: 4K gives you four times the resolution of 1080p, allowing for significant cropping without losing quality.
Stabilization: More pixels mean better digital stabilization in post-production.
Versatility for Multiple Platforms: This is where things get really exciting for content creators.
4K to Shorts: A Visual Explanation
As you can see from the graphic, a single 4K shot contains enough resolution to create multiple 1080p vertical videos. This means you can shoot horizontally, capturing the full magic of Disney World, and still have plenty of options for creating engaging vertical content for platforms like YouTube Shorts and TikTok.
Practical Applications at Disney World
Imagine this scenario: You're watching the fireworks at Magic Kingdom. You shoot the entire show in 4K horizontal format. Later, you can:
Use the full width for a cinematic YouTube video.
Crop the center for a perfect vertical Short showcasing the castle.
Pan across the scene in post-production for a dynamic TikTok video.
All from one shot!
Tips for Shooting 4K at Disney
Invest in Extra Storage: 4K files are large, so bring plenty of memory cards or a portable hard drive.
Battery Life: 4K can drain batteries faster. Pack spares or a portable charger.
Stabilization: Consider a gimbal for smoother footage, especially in crowded areas.
Composition: Remember, you're shooting for multiple aspect ratios. Leave room around your main subject for cropping later.
Lighting: 4K shows everything, including low-light noise. Be mindful of your lighting conditions.
Post-Production Magic
Once you're back home with your 4K treasure trove, the real fun begins. You can:
Create a cinematic travel vlog for your main YouTube channel.
Extract vertical clips for YouTube Shorts, showcasing ride highlights or Disney snacks.
Make TikToks with dynamic pans and zooms that maintain quality.
Pull high-quality still images for Instagram or blog posts.
The Vertical Video Revolution
While platforms like YouTube Shorts and TikTok have popularized vertical video, shooting in 4K horizontal gives you the best of both worlds. You're not limiting yourself to one format, and you're capturing the full scope of your Disney experience.
Conclusion
As I pack my bags for Disney World, I'm thrilled about the possibilities that 4K shooting brings. Not only will I have stunning, high-resolution memories of my trip, but I'll also have a versatile library of footage to create content for months to come.
So, if you're planning a Disney trip (or any trip, really), consider making the leap to 4K. Your future self – and your social media followers – will thank you!
As the back-to-school season approaches, parents and students alike find themselves navigating the aisles of office supply stores, armed with lists and good intentions. But before you toss that pack of filler paper into your cart, let's talk about a little-known detail that could make a big difference in your academic year: paper size.
Yes, you read that right. We're about to dive into the thrilling world of loose-leaf paper dimensions. Buckle up, stationery enthusiasts!
The Tale of Two Sizes
In the world of filler paper, not all sheets are created equal. There are actually two common sizes vying for space in your three-ring binder:
The Short Stack: 10.5 x 8.5 inches
The Full Monty: 11 x 8.5 inches (Letter size)
At first glance, that half-inch difference might seem inconsequential. I mean, who's going to notice, right? Well, your binder certainly will, and so might your Type A classmate who color-codes their notes.
The Price of Perfection
Here's where things get interesting. That smaller size (10.5 x 8.5) often comes with a smaller price tag. It's like the fun-size candy bar of the paper world - a little less, but easier on the wallet. And let's face it, when you're buying supplies for multiple subjects (or multiple kids), those savings can add up.
But before you celebrate your savvy shopping skills, consider this: when you slide that shorter paper into a standard binder, it's going to look like it skipped leg day at the paper gym. It'll be dwarfed by your letter-sized folders, dividers, and handouts, creating a mismatched paper potpourri that would make any organization guru weep.
The Long and Short of It
So, what's a conscientious student to do? Here are a few things to consider:
Binder Compatibility: If you're using a standard binder, the letter size (11 x 8.5) will give you that seamless, put-together look.
Teacher Preferences: Some educators might have strong feelings about paper size. When in doubt, ask!
Printing Prowess: If you plan on printing notes or assignments, letter size paper will align perfectly with standard printer output.
The Aesthetics Argument: If the thought of mismatched paper sizes makes you twitch, spring for the letter size and enjoy that sweet, sweet uniformity.
Budget Balancing Act: If saving money is a priority and you can live with the size difference, the shorter option might be your best bet.
11 x 8.5 is "Standard" letter size.
The Final Verdict
In the end, the choice between 10.5 x 8.5 and 11 x 8.5 filler paper comes down to personal preference, budget constraints, and how much the idea of slightly shorter paper peeking out from your binder bothers you.
Remember, no matter which size you choose, it's what you write on that paper that truly matters. Whether you're jotting down the fundamentals of calculus or doodling in the margins during history class (we won't tell), the most important thing is that you're engaged and learning.
So this school season, as you stand in the supply aisle, weighing your options, take a moment to appreciate this small but mighty choice. And whatever you decide, hold your head high, knowing you've put more thought into filler paper than probably anyone else in the history of academia.
Happy studying, and may your papers always be the perfect fit – both in size and in scholarly ambition!
In the digital age, communication is not just about words; it’s about how you present them. Pixel Speech Bubble is a fantastic online tool that allows you to create 8-bit style animated speech bubbles, adding a touch of retro charm to your messages.
What is Pixel Speech Bubble?
Pixel Speech Bubble is a user-friendly website designed for creating pixelated speech bubbles. Whether you’re a game developer, a digital artist, or just someone who loves the nostalgic feel of 8-bit graphics, this tool can add a unique flair to your projects.
The resulting graphic can simply be dragged and dropped into Snagit to spice up your screen shot.
Website Description
Write some text and click Create to make your own pixel speech bubble.
AVIF, or AV1 Image File Format, is a relatively new kid on the block in the world of image formats. It's gaining traction due to its potential to offer superior image quality at significantly smaller file sizes compared to traditional formats like JPEG and PNG.
What Makes AVIF Special?
Compression: Based on the AV1 video codec, AVIF employs advanced compression techniques resulting in smaller file sizes without compromising image quality.
Quality: Offers better detail preservation, fewer compression artifacts, and improved color accuracy.
Versatility: Supports lossless and lossy compression, animation, transparency, and HDR.
Open Standard: Being an open-source format, AVIF is free to use and implement.
The AVIF Challenge: Limited Software Support
While AVIF holds immense promise, its adoption has been hindered by limited software support. Currently, on macOS, Pixelmator Pro stands out as one of the few native applications capable of saving images in the AVIF format. For the majority of users, this means relying on online tools to convert images to AVIF, which can be inconvenient and potentially compromise image quality.
You can only save AVIF format if you select Export. AVIF doesn't show up for "Export for Web."
The above image is in AVIF format. When I saved it as JPEG it was 61 KB, which is pretty good. When I saved it as AVIF it became 8 KB - which is amazing!
Looking Ahead
As the benefits of AVIF become more apparent, we can expect to see wider adoption and increased software support. This will likely lead to a significant shift in the image format landscape. Until then, enthusiasts and early adopters might find it advantageous to explore AVIF, even if it requires additional steps in the workflow.
Have you tried using AVIF images yet? What are your experiences with this format? Share your thoughts in the comments below.
While cleaning my office space, I stumbled upon a treasure trove of old floppy disks. Among them were two copies of eWorld version 1.0 floppies, one with a black and white label and the other with a color label. This discovery sparked a wave of nostalgia and curiosity about the history and significance of these disks.
The eWorld Experience
For those who might not be familiar, eWorld was an online service launched by Apple in 1994. It was designed to provide a user-friendly interface for accessing email, news, and other online services, much like AOL at the time. Despite its innovative approach, eWorld was short-lived, shutting down in 1996 due to limited adoption and competition from other online services.
The Mystery of the Labels
Finding two versions of the same software with different label designs got me thinking: Why did some eWorld disks have color labels while others were in black and white? Here are a few possibilities:
Marketing and Presentation:
The color labels might have been used for retail versions of the software to make them more visually appealing on store shelves. Colorful packaging often attracts more attention and can be a marketing strategy to boost sales.
Cost and Production:
Black and white labels could have been a cost-saving measure. Producing color labels is generally more expensive, so black and white labels might have been used for bulk distributions, such as those included with new hardware or given away at promotional events.
Distribution Channels:
It's possible that the black and white labeled disks were included with new Apple hardware as a bundled software package. This would make sense as a way to reduce costs while still providing users with the necessary software.
Version Differentiation:
Another possibility is that the different labels were used to differentiate between various distribution batches or regions. This could help in tracking and managing inventory more efficiently.
A Glimpse into the Past
Holding these eWorld floppy disks in my hands, I couldn't help but feel a sense of connection to a bygone era of technology. These disks are more than just pieces of plastic; they represent a time when the internet was still in its infancy, and companies like Apple were experimenting with new ways to bring people online.
If you have any old tech artifacts lying around, take a moment to appreciate their history and the stories they hold. You never know what fascinating insights you might uncover!
Welcome to cryan.com's main blog page! Here you'll find a diverse collection of informative posts covering topics ranging from technology and lifestyle to career advice. There's something here for everyone.
We are committed to delivering the highest quality content, ensuring you have access to the most current and reliable information.