White Balance
Quick Tips on setting your own White Balance.
White Balance is very importaint to maintain a quality video production. This is one way to keep colors the same between clips and cameras.
The key thing about dealing with White Balance is to adjust at the end of a project and not during the project. This is because the White Balance will add additional render time every time you make some alteration to the clip - including adding transitions.
Remember the best white balance set up is before production, not at the editing room. Make sure to learn how to set up the white balance on your camera. For most situations, the auto setting should be fine, but there may be times where you may need to make the adjustment before shooting.

Manually Adding White Balance
Here are the steps to adjust any clip to use the Final Cut Pro White Balance:
- Select the Clip
- Click on Balance Color:
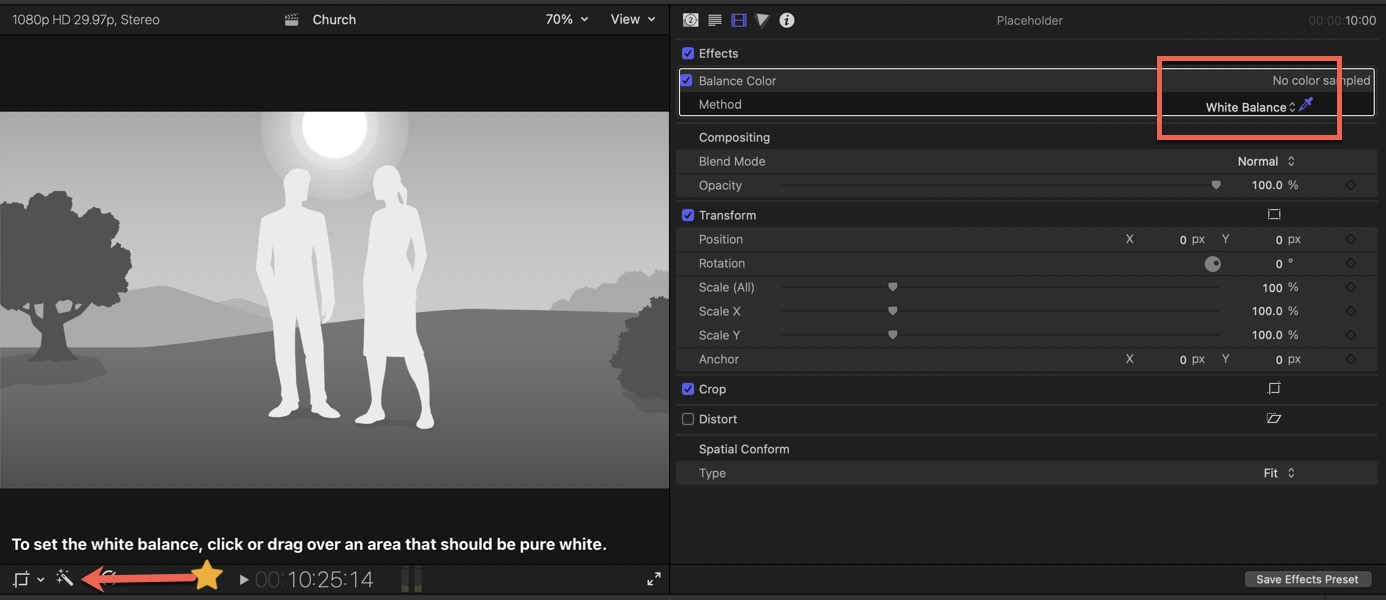
- Located under the Preview, click on the "magic wand" and select "Balance Color."
- Under the "Modify Menu" select "Balance Color"
- Use the keyboard shortcut: Option Command B
- In the clip Inspector, go to the Video Inspector (First Icon)
- Under Balance Color, you should see the Method is "Automatic." Click on Automatic and select "White Balance"
- Now in the Preview window, click on the area that should be white.
Not The Right Color?
After applying the Balance Color, you can use the Color Wheels to fix the color to what you think works best for your project.
