Personal Font Style Collection
Add Font Styles to Your Library
Amadine, the intuitive vector graphics software, offers a plethora of features for designers and illustrators. However, one feature it lacks is a "Favorite" font section?a common convenience in many applications. But don't worry, there's a clever workaround to this limitation. By adding your preferred font styles directly to your Amadine library, you can access them with ease. Here's how to do it:
Creating Your Font Library
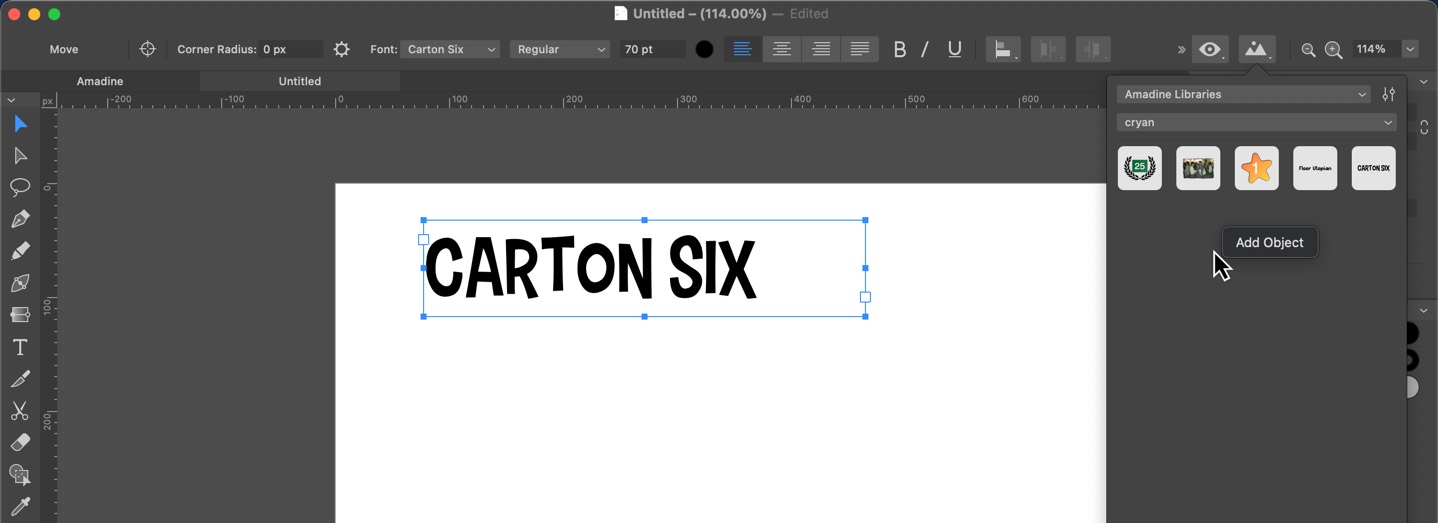
- Start by creating a new text field in your Amadine document.
- Apply your desired font and style to this text. Whether it's a bold header or an italicized sub-header, style it exactly as you would like it to appear in your projects.
- Select the styled text field and navigate to your personal Amadine Library.
- Right-click in the library window and choose "Add Object."
And that's it! You've successfully added a styled font object to your library.

Using Your Styled Fonts
Whenever you need to use your pre-styled fonts:
- Open your Amadine Library and simply click on the font object you wish to use.
- Drag and drop it into your project, and you're done!
This method is a quick and efficient way to add frequently used headers and sub-headers to your designs. It not only saves time but also ensures consistency across your various projects.
Why This Matters
In the fast-paced world of design, efficiency is key. By utilizing this simple trick, you can:
- Reduce repetitive tasks, allowing you to focus more on the creative aspects of your work.
- Maintain a consistent style throughout your designs, which is crucial for branding and professional aesthetics.
- Speed up your workflow significantly, especially when working with text-heavy designs.
So, give it a try and see how this neat trick can enhance your design process in Amadine!
