Creative Use of Custom Stamps in SnagIt to Easily Identify Screenshot Environments
Mark Your Screenshots with Environment-Specific Custom Stamps for Clarity and Efficiency
If you've ever taken screenshots of software across different environments – maybe production, staging, or testing – you probably know how easy it is to lose track of which environment the screenshot came from. This confusion can lead to costly mistakes, especially when sharing or documenting bug reports. A creative and highly effective way to solve this problem is by using custom stamps to clearly mark your screenshots.
In this post, I'm going to show you how to create and use custom stamp icons in SnagIt to visually identify the environment where the screenshot was taken. For a bonus touch, I'll share how I use color to quickly convey whether something is "good" or "bad."
What Are Custom Stamps?
Custom stamps are graphic overlays that you can add to your screenshots to communicate additional information at a glance. Think of them like a digital sticker that tells you exactly what you need to know – like the environment type – without having to dig deeper into documentation or notes. This small visual addition makes your images much more meaningful and useful, particularly for Quality Assurance (QA) or documentation purposes.

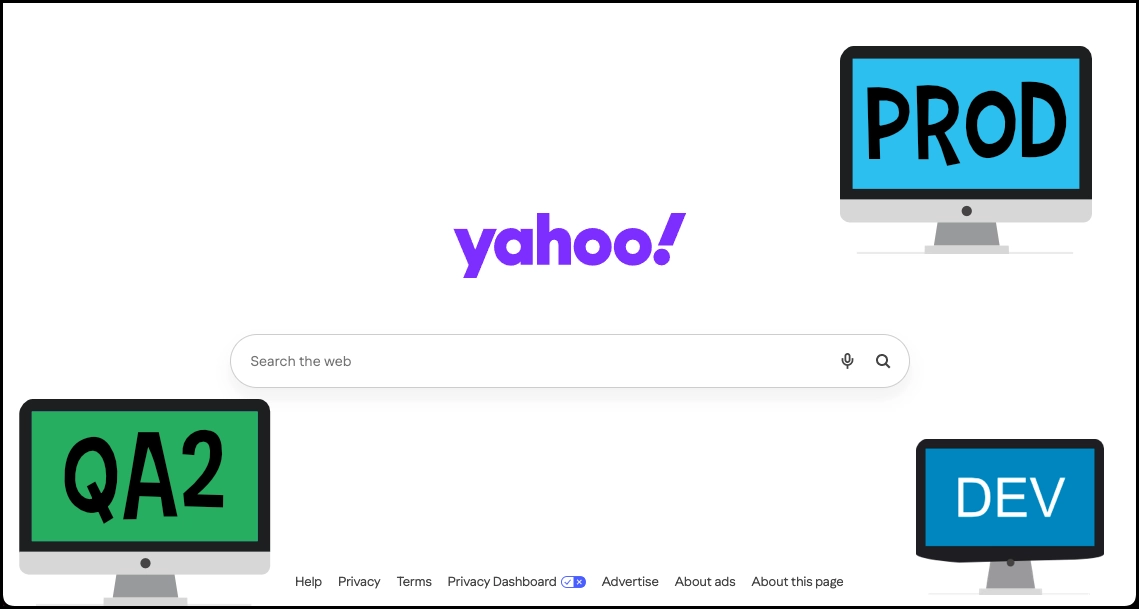
Some of the Environment stamps that I have: QA2, Prod and DEV.
My Setup for Custom Stamps
I create custom stamps using Affinity Designer, but you can use any graphic editor that allows you to create images with transparent backgrounds, including SnagIt. The stamps I use feature a monitor screen that includes the name of the environment. The beauty of this approach is that you can easily tailor the visuals to match your needs. Here's what I do:
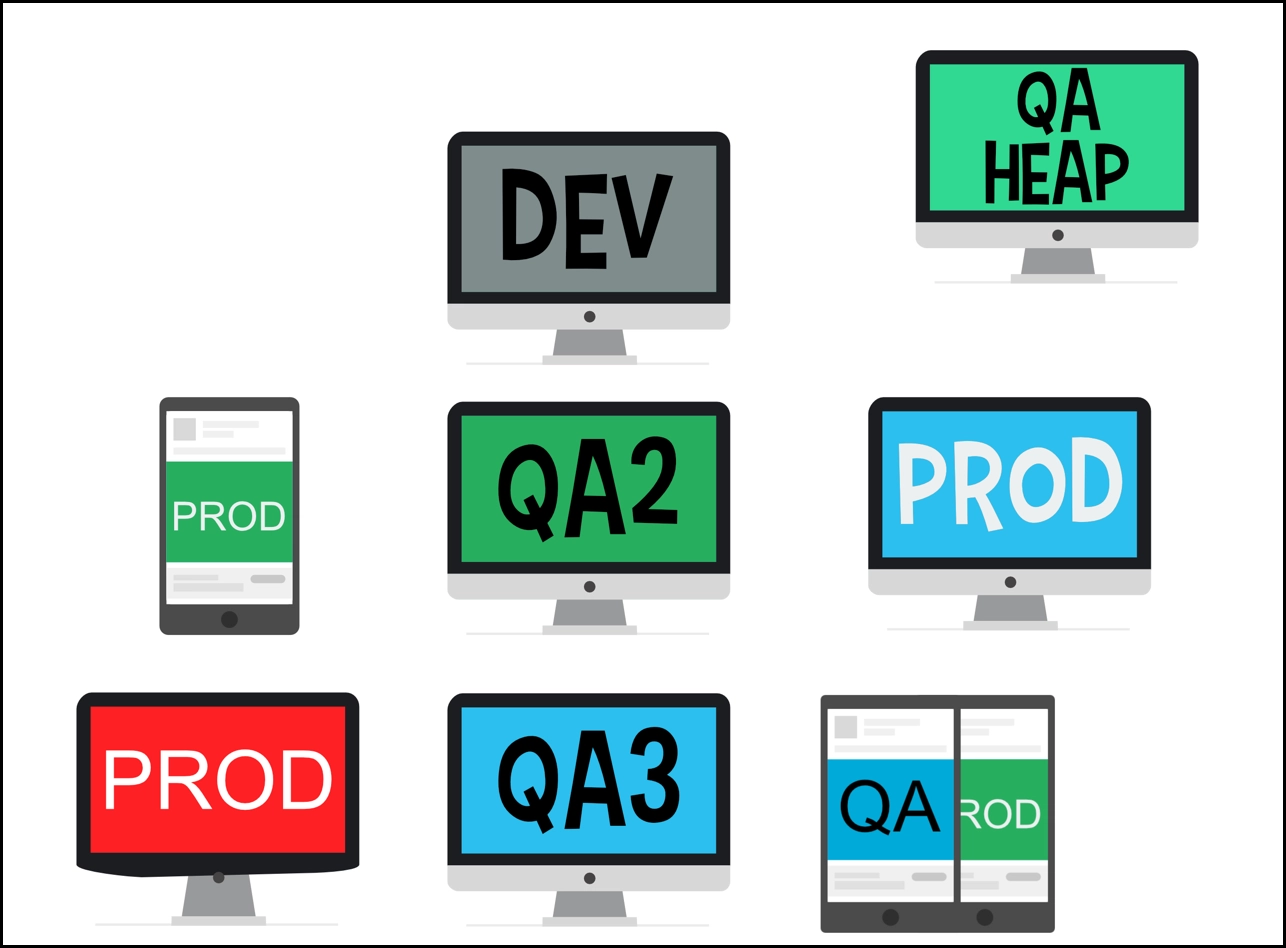
- Environment-Specific Monitors: Each stamp includes a small monitor icon, and on that monitor, the environment name is written clearly (e.g., "Production," "Staging," "Development").
- Color-Coding for Quick Reference: I use colors to convey an immediate visual signal about the environment:
- Green Screen: For safe environments, such as Staging or Testing, I use a green color to indicate that changes made here won't impact end-users.
- Red Screen: For Production, I use a red color to signal caution. This tells the viewer that any changes in this environment are critical and require extra scrutiny.
How to Create Custom Stamps
Here's a simple guide to creating your own custom stamps:
- Choose Your Tool: You can use Affinity Designer, SnagIt, or even something like Canva or GIMP. The key is to use a tool that lets you create transparent backgrounds.
- Design the Monitor Icon: Create a small graphic of a monitor screen. This monitor will serve as the base of your stamp. You can be creative here - add a bit of shadow or depth to make it look polished.
- Add Environment Labels: Label the monitor with the environment name: "Prod," "Stage," etc. Make sure the text is readable and short - like a street sign would be.
- Apply Color Coding: Use a colored screen on the monitor to indicate status: green for good environments, red for bad code, yellow for testing, etc.
- Save in Transparent Format: Save your image as a .PNG with a transparent background, which will allow it to blend seamlessly into your screenshot.
Applying Custom Stamps to Your Screenshots in SnagIt
Once you have your custom stamps ready, you can easily apply them using SnagIt. In SnagIt, you can create a stamp library where you store these custom stamps for quick access.
To add a stamp in SnagIt:
- Open your screenshot in the SnagIt Editor.
- Navigate to the Stamps Tool.
- Select your custom stamp from your library and drag it onto the screenshot.
- Position the stamp somewhere that won't obstruct key information. I usually place mine in the top-right corner for consistency.
Get Creative with Your Own Stamps
The beauty of custom stamps is that they are totally adaptable to your workflow. Want to create different icons for different users (e.g., Admin vs. Standard user)? Go for it! You could also make stamps to indicate the date the screenshot was taken or the version number of the software.
Pro Tip: If you use Affinity Designer, you can create a template where you simply modify the text or color for each new environment stamp you need. This speeds up the process and keeps your stamps consistent. (Also useful when you want to create unique stamps for big projects.)

My collection of icons in Affinity Designer
Make Your Screenshots More Informative
Custom stamps make it easy to identify crucial details about the screenshot at a glance, eliminating guesswork and potential errors. I've found it particularly useful in QA processes, where the origin environment of an issue can make all the difference in terms of impact and priority.
Have fun creating your own stamps and seeing how much easier it makes organizing your screenshots! If you create some cool stamps, feel free to share them. I'd love to see what you come up with!
