Master Pages
Tips and Tricks using Master Pages in Swift Publisher
Swift Publisher has the ability to use Master Pages - the ability to create similar functionality throughout the document.
For example, if you want the company logo to appear on the same page or have a similar background watermark.

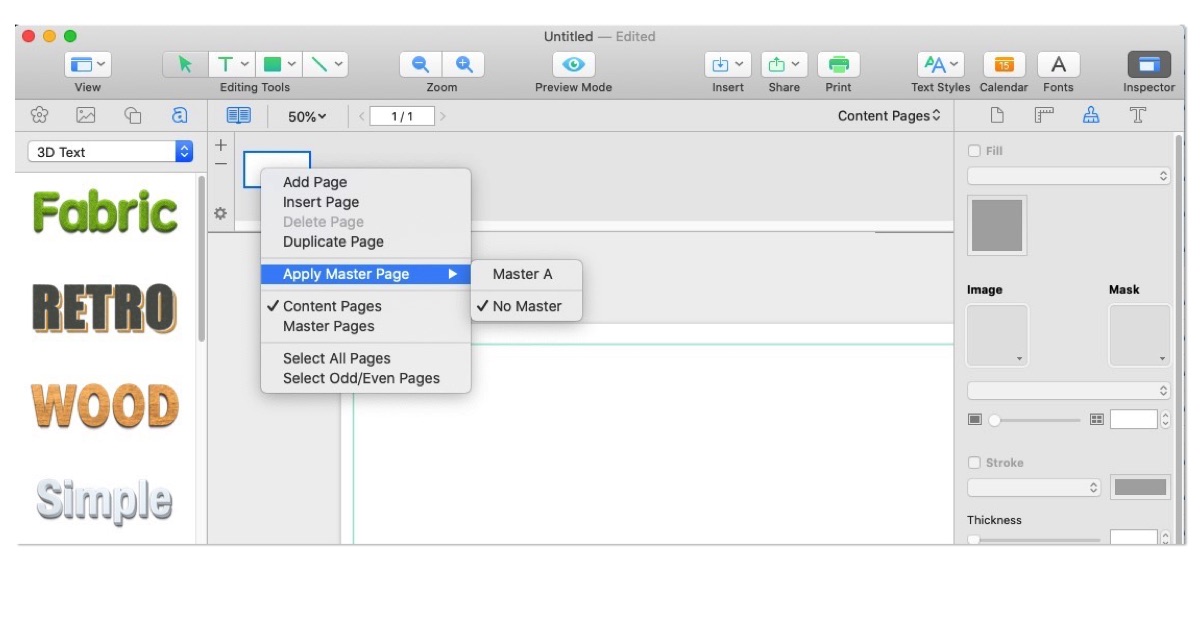
Showing how to add a Master Page to a Content Page.
Five Things I learned Using Master Pages
- When you create a new page a Master page isn't applied right away. You have to assign a Master page to your Content Page.
- To access master pages you can select "Master Pages" from the view menu. In addition, you can select Master Pages from the Page Panel Window. (Use the Option-Command-P shortcut to toggle the Pages Panel Window.)
- Each Master page is identified by the letter in the alphabet. Every time you add a page it increments to the next letter in the alphabet. If you delete a master page, the pages after it names will reset to the previous letter in the alphabet. There is no way to change the Master Page name.
- To apply a Master page design, right-click on any content page in the Page Panel window and select the "Apply Master Page" menu item, then select the Master page you want to apply. (Note: This is where custom page naming would be handy, especially if you have a lot of master pages.)
- When you apply a Master Page to a page, the name of the applied Master page will appear to the right in the Pages Panel. This makes it easy to identify which Content pages are using which Master pages.
