Create Video DVD from Disk Images
macOS Ventura

Due to the limited space on DVDs these days, I rarely burn them anymore. Instead, I backup my files using external hard drives and flash drives. This gives me more storage space and allows me to access my files from any device. Plus, it's much more convenient than burning DVDs.
Every once in a while, I am asked to create a DVD from a video.
Currently, I'm working on a video project, and I wanted to burn the video to a DVD. To accomplish that, I created a Disk Image, which I'll explain more about next week.
The creation of a Video DVD under macOS Ventura is a little tricky. Toast 19 Pro does not allow you to create a Video DVD from a disk image.

The following steps will guide you through the process of creating a playable DVD in macOS 13.5.2:
Step 1: Create a video Disk Image using Final Cut Pro or another video editor. (More Details about how to do this next week in Final Cut Pro. )
Step 3: Double Click on the Disk Image to open and mount it.
Step 4: Select the disk image in the Finder side bar.
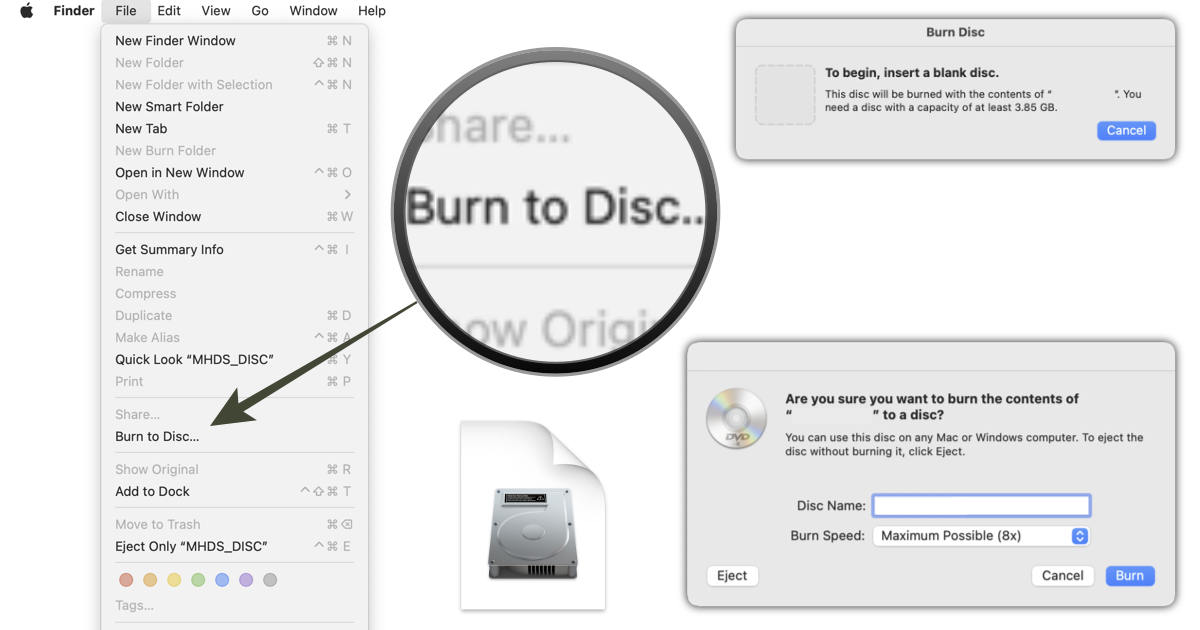
Step 5: With the window selected, go under the Finder File menu and select "Burn to Disk." (Note: If you don't see "Burn Disk" that means you don't have a DVD burner connected.)
Step 6: You will be asked in insert a disk. (Your content must fit in on the disk or the dialog box won't go away.)
Step 7: You will then be asked to confirm that you want to burn the content to the disk. Use the Maximum Possible settings as it will take a long time if you had a different setting.
That's it! The DVD will start to burn. Once completed the new disk will mount and the video will play.
