Filling Forms using Apple Preview
Don't Print Documents to Fill Them
Forms are an integral part of our digital lives, whether it's filling out a job application, completing a survey, or submitting essential documents. Thankfully, with Apple's Preview application, the process of filling out forms on your Macintosh computer becomes seamless and hassle-free. In this guide, we'll walk you through the steps of filling forms using Apple Preview, making your paperwork woes a thing of the past.
Prerequisites
Before we begin, ensure you have the latest version of macOS installed on your Macintosh computer. Preview is a pre-installed application, so there's no need to download or install anything separately.

Step 1: Open Your Form
- Locate the form you need to fill out on your Macintosh computer.
- Double-click the form file to open it in the Preview application.
Step 2: Click on the Text Tool
- In Preview, click on the toolbox icon in the toolbar, or press Shift + Command + A to activate the Markup Toolbar.
- Select the Text tool from the Markup Toolbar. It looks like a small 'T'.
Step 3: Place Text Boxes
- Hover your mouse over the area of the form where you want to enter text.
- Click to place a text box. Resize and reposition it as needed to fit the form fields perfectly.
Step 4: Enter Your Information
- Double-click inside the text box you just created.
- Enter your information. You can adjust the font style, size, and color using the formatting options in the Markup Toolbar.
Step 5: Checkboxes and Radio Buttons
- For checkboxes and radio buttons, use the Shapes tool in the Markup Toolbar.
- Click on the Shapes icon, select the appropriate shape, and place it over the checkbox or radio button. You can adjust the size to match the form's design.
Step 6: Save Your Form
- Once you've filled out the form, click File > Save to save your changes. Your form is now ready to be shared or printed.
Form Filling Toolbar
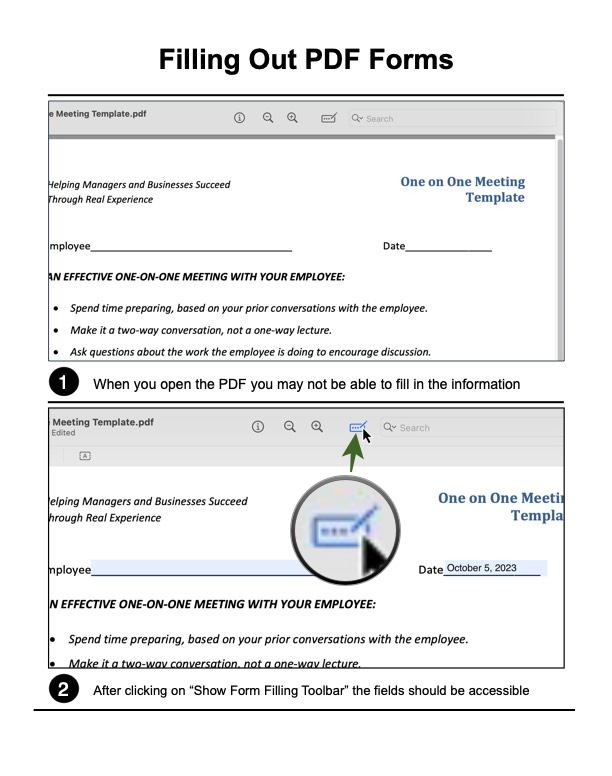
For most forms, simply clicking on the Form Filling Toolbar icon will enable the form to be editable.

