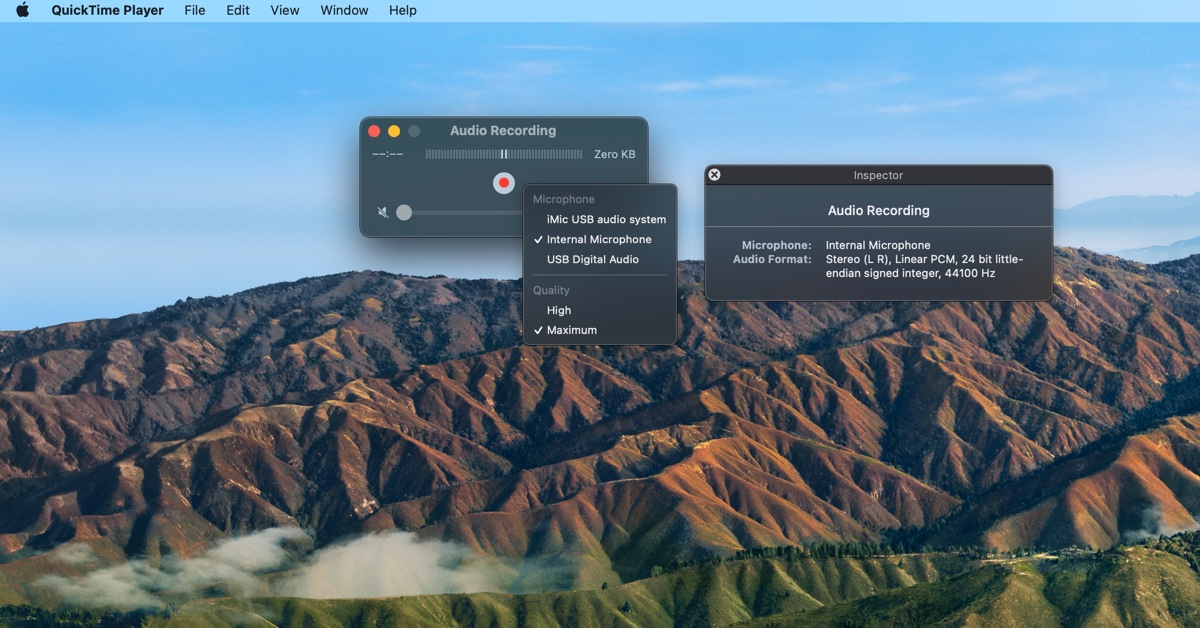
QuickTime Audio
Use Quicktime to quickly digitalize audio
Apple Quicktime has the ability to record video and audio files. This is a quick way to digitalize audio. For example, if you want to send an audio message in an email or a social media post.
There are two settings for audio:
| Setting | Description | |
|---|---|---|
| High | 44100 Hz AAC audio | |
| Maximum | 44100 Hz, uncompressed Linear PCM 24-bit AIFF-C audio |

Four Things I Learned
The output audio is off, by default. You have to adjust the volume to hear the recording.
Shortcut for creating a new audio recording is Shift Command N
The recording settings that Quicktime starts with are the same as the default sound input. This is defined in the System Preferences - select Sound.
When you have the QuickTime Inspector open, it shows you the current settings that you have set up.
Three Reasons to Use Quicktime
- Fast way to record audio. Pretty much hit record and you're on your way.
- Installed on all Macintosh computers. If the computer has Quicktime, you have the ability to record audio. (Seems like a tool that Mission's Impossible's Ethan Hunt might use to record a confession.)
- Apple Script Support! You can write Apple Script or Automator action to record audio based on an action - such as setting up a recording to listen to mystery sounds at the office at midnight.
Three Reasons Not to Use Quicktime
- Limited recording scope. You can't define recording by application. For example if you want to record audio from Safari. This can be done using Audio Hijack.
- No Menu Bar or Dock Record Option. You have to have the App open and then type the keyboard shortcut and then record. Too many steps to record something quickly. Best solution to this is Simple Recorder.
- Limited Audio Configuration - You can only record using two settings High and Maximum. Use apps like Audacity for more configuration options.
