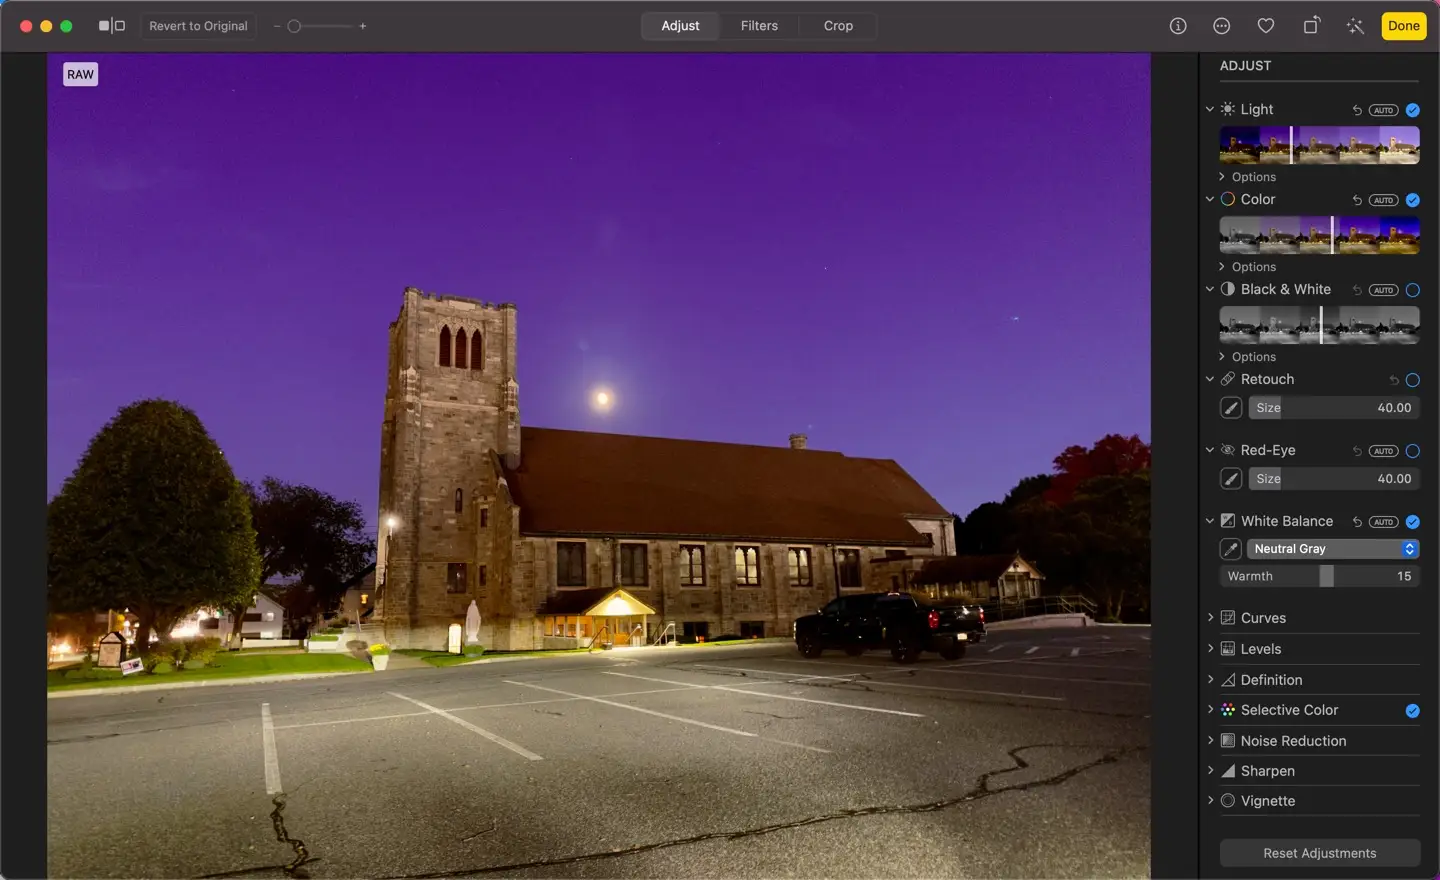
Apple Photos and Pro Raw
RAW Photo editing made easy
You might be surprised to know that the Apple Photos app allows you to edit PRO RAW photos. No need to buy an expensive app in order to edit your PRO RAW photos. (This is useful if you just got the new iPhone 14 Pro.)
There are a lot of steps involved in editing a photo but Apple makes it so easy that you don't have to take a course to learn how to do it, while still making it look amazing.
A RAW image can be adjusted in Apple Photos in thirteen different ways.

Light
In order to control the overall light in the picture, you can use the slider to adjust it as you would the sunlight.
Color
Use this option when you want to make all the colors brighter or make the photo black and white.
Black & White
When you want to transform an image into black and white, select this option. When you want your image to look better without color, this is a unique effect.
Retouch
Using this tool, you can fix up some spots on your photo such as sun glare or dust. I recommend doing this after you've adjusted your colors.
Red-Eye
Red-eye issues can easily be fixed with this quick retouch tool. Simply select the right size brush and indicate where the red-eye is located on the image.
White Balance
You can easily fix a bad color by pointing out where the white pixels need to be in the image. That is what the White Balance tool does. You simply point the picker to where the white pixels need to be in the image and it is instantly corrected.
Curves
The Curves adjustment allows you to adjust the brightness, contrast, and the look of specific colors (red, green, blue), as well as adjust settings for the black point, mid-tones, and white point.
Levels
You can adjust the levels in a photo to lighten or darken areas and adjust the contrast in the photo. You can adjust settings for the black point, shadows, mid-tones, highlights, and white point. You can also change the look of specific colors (red, green, and blue).
Definition
It is possible to adjust the definition settings of a photo to add contours, shapes, local contrast, and definition of mid-tones. I have found this has the greatest impact on the sky colors.
Selective Color
Use the color picker to select a color in the image, once selected use the Hue, Saturation, Luminance, and Range to make that color pop out.
Noise Reduction
Use noise reduction to neutralize noise if your image was taken in low light. Sometimes this works, and sometimes other settings deal with noise reduction better.
Sharpen
Using the Sharpen tool on a photo, you can make edges crisper and more defined. This helps some areas to stand out more in a photo.
Vignette
Vignettes can darken the edges of a photo and emphasize the center of the image. You can adjust the size and darkness of vignettes to create the look you want.
