EverNote's Skitch Tips and Tricks
EverNote Skitch is a great Macintosh program to add annotation to images. It makes great screenshots and the backup sync to EverNote makes it an essential tool for anyone doing software QA.
Here are some tips and tricks that I have learned using Skitch:
Creating Blank Images
You can easily create a blank image in Skitch. This is useful if you want to create an image from a quote. In the top of the Skitch window, pull down the menu and select ‘Blank.’ A new Blank image will be created. The image size will be about 80% of the current window size. You can always crop the image when you are done.
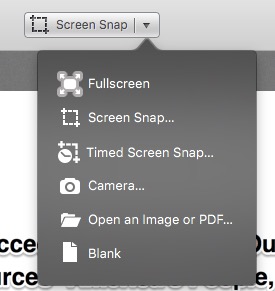
Unfortunately the blank image does function as a canvas tool, where you can combine mulitple screenshots. Pixelmator, Artboard, and OmniGraffle are some of the applications where that is possible.
Blank canvas is great when you need to create a quick image to get the message across.
Changing the Image Type
You can easily convert the image from PNG to JPG and vice versa using the image type selector on the bottom left of the dialog window.
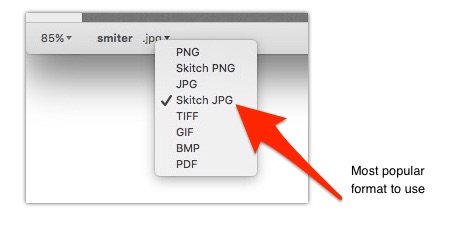
Skitch PNG and Skitch JPG are re-editable files. While in other applications, such as email and chat, they are are regular images. However when the file back in Skitch, and you can make edit to the annotations.
There is a significant file size difference when saving a file in Skitch PNG, as it pretty much doubles the file size than using the standard PNG type. Just something to keep in mind when attaching the file to Jira or emailing.
For most situations, the JPG file format is the best choice. I can't think of a reason why anyone would want to save a file in a legacy BMP format.
Different Menus Options
The Menu Bar and the Dock have different options when you select them. The top Menu Bar is missing Window Snapshot, Menu Snapshot, and Camera Snapshot. The Dock menu is missing the Timed Crosshair Snapshot. I am not exactly sure of the logic of why certain capture tools were excluded from each area.
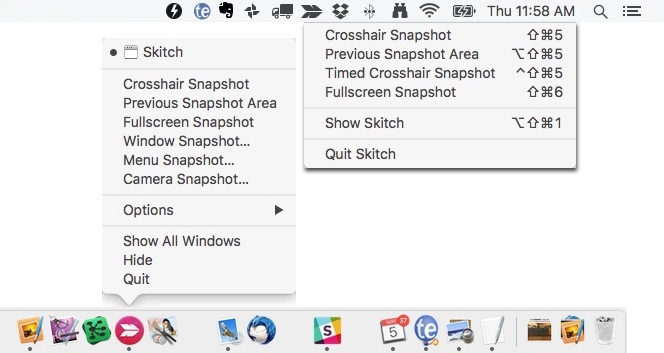
All the capture tools have a keyboard shortcut assigned to it. I would recommend spending time getting familiar with a few of them. Knowing the "Previous Snapshot" capture shortcut is handy when your doing a before and after.
Some of the keyboard combinations are a bit weird, it will take time to get use to it.
Change Text Annotation Size
The text tool is a great way to communicate a message in an image. Did you know there is a simple way to change the size of the Text Annotation in Skitch?
When you have the text selected, simply click on the blue circle and drag to adjust the text size of the text:
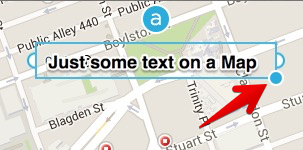
Clicking on the lowercase 'a' above the text field will toggle the text outline. This is useful when you insert text in box as in the following example:
Removing the text outline makes the text in the box a bit easier to read.
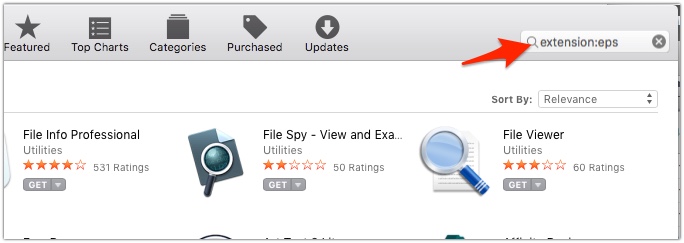
I certainly recommend using Skitch. You can download it from the Apple Store for free.

