
Crop 4k to 1080p in the Timeline
Simple technique to crop 4k so the video looks good in 1080p
So the advantage of taking footage at 4K is that you have more flexibility when you convert the video to 1080p format. You can now crop the video so that the scene fits to your production.
This is particularly useful when you use a GoPro camera and you want to focus on a particular part of the video - such as a stage or a landmark.
Crop to 1080p
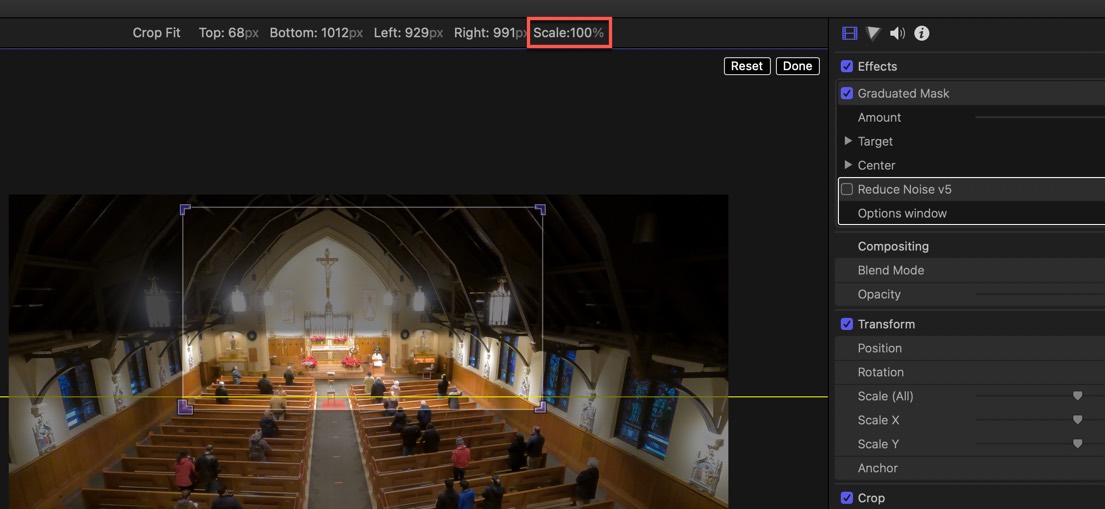
When you crop a clip make sure the Scale value is at 100%
Fun Facts
4k Image is 3840 by 2160, which is twice as big as the standard HD format of 1920 by 1080 - otherwise known as 1080p.
When you crop a video you want to make sure that the scale is at 100%. (As seen above.) This shows that you have a correct proportional crop.
If possible crop the video before putting in the timeline, this way it doesn’t downsample the video to 1080p and then crop it.
You can crop it to 100% at any place in the video - it doesn’t need to be exactly in the center.
PermalinkSplit Screen
Created My Own Split Screen Template
Check out this video that I put together. It’s a side by side comparison of the GoPro 7 and the GoPro 9.
This was done using my own template thanks to Motion and Final Cut Pro.
How This Was Done
Final Cut Pro doesn’t come with any templates or effects to split-screen. I had a choice to go out and buy one or design my own using Apple Motion.
If you want to purchase a Screen Splitter effect, check out Screen Splitter 2 by FCPeffects: Final Cut Pro Plugins.
I decided to venture on my own - using some knowledge that I learned from watching some Udemy classes. Such as the Going Further With Apple Motion 5 class.
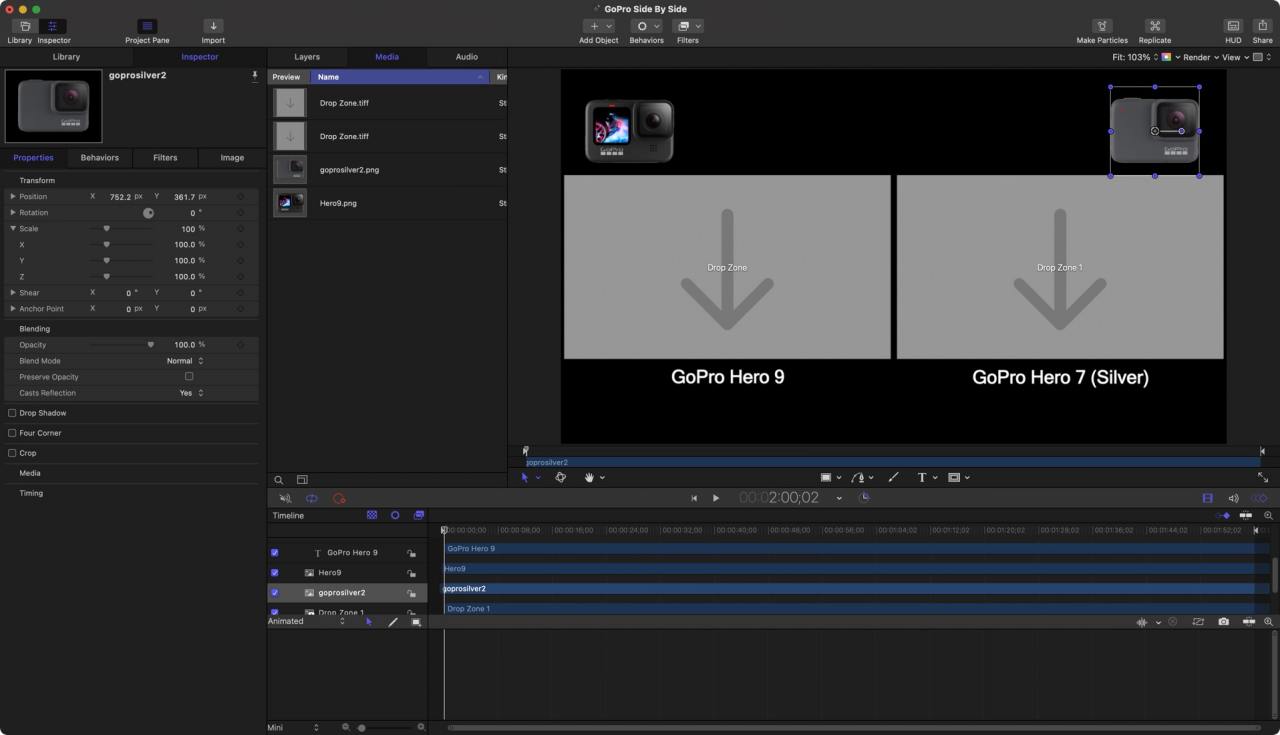
I created the design in Apple Motion and then imported it into Final Cut Pro.
Started in Apple Motion
The first thing I had to figure out was the layout. How can I properly display two videos side by side?
I figured that making the image at 48% of the original size was a good way to have them side by side with a border between the videos. The videos would be 941 x 529.
I added the top graphics and bottom text so the viewer knew what video was what.
I added the screenshot of the videos for layout purposes and converted the image to drop zones.
The video is 2-minutes long which seems a long time as there isn’t much going on in the videos. There is a way to be flexible on the duration. I just forgot about it.
Total time to get this up and running was about 20-mins.
Getting To Final Cut Pro
Once I was satisfied of the template was in good order. I had to convert the project to the Title Generator section. This is done by going under the File menu and selecting "Convert Project To" and then selected Generator.
I then gave it a name and a new location in the Generator section.
Ready to Go!
Now whenever I want to compare videos for the GoPro, I just use the template in the Generator section. Its ready to go.
The only change I would make is to fix the duration so that I can make it longer if needed.
PermalinkBest Final Cut Pro Blog Post
My Collection of the Best Final Cut Pro blog post of 2020
I learned a lot of cool things with Final Cut Pro. Here are 7 Blog post that I think are working checking again:
Best Final Cut Pro Posts
Logic Pro Effects in Final Cut Pro - (December 15) Description of each Logic Audio Effect in Final Cut Pro
Blade Tool Tricks - (November 24) Learn how to quickly cut multiple tracks
Transparent Background in PowerPoint - (October 20) How to make the background in Powerpoint transparent for Final Cut Pro. You can then use the Powerpoint movie in any Final Cut Pro project.
Trim Start and End - (October 13) Cool Shortcut to quickly cut out a clip from a certain point.
Adding Favorites Folders to Import - (September 15) Add your favorite folder to the Import dialog sidebar. This makes it easy to navigate to common folders.
Slow Motion Video - (September 8) Using the iPhone Slo-Mo videos in Final Cut Projects
Getting Live Photos - (August 18) How to get the Movies from Live Photos taken with the iPhone.
PermalinkColor Wheel
Color Wheel is an easy way to color correct a video clip
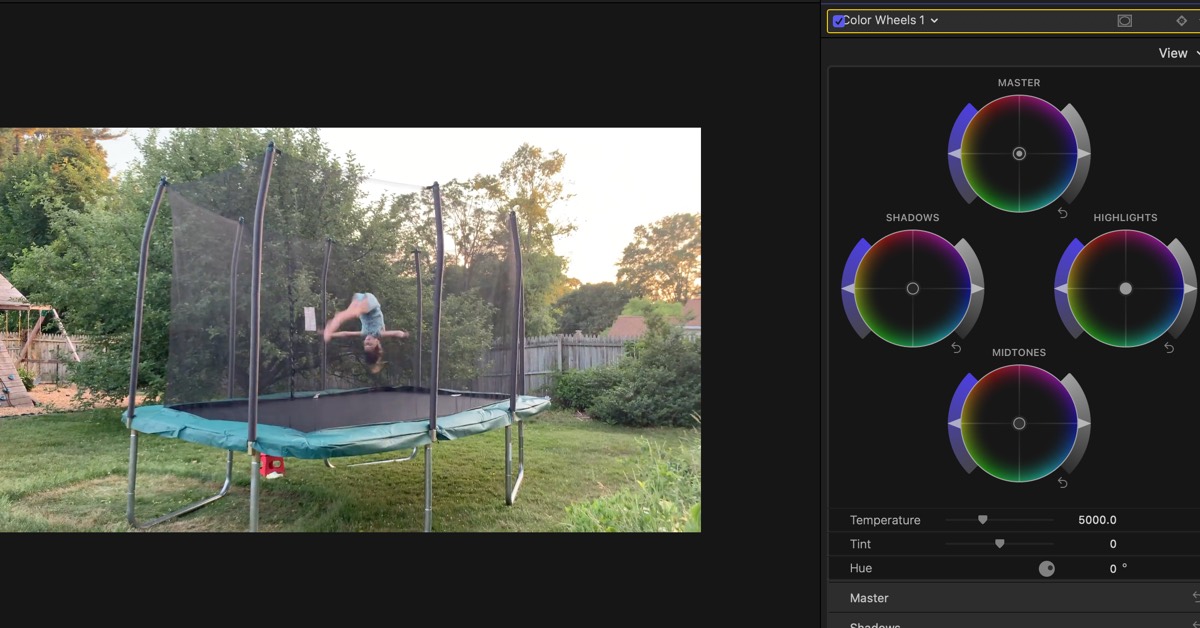
You can change easily the color of a clip by using the Color Wheel option. The color wheel helps you adjust the clip's brightness and saturation levels on each side of the four-color wheels. You get an instant live preview of the adjustment.
Five Thing I have Learned
The color wheel really helps me balance two different cameras that I use to film a church service. The cameras don’t exactly have the same white balance effect.
I find it easier to balance the colors of similar clips using the color wheel instead of the “Balance Color†feature.
There are controls on the bottom of the color wheels section that allows you to adjust for Temperature, Tint, Hue, and Mix. I really haven’t played around with these.
Usually the Master and Shadows are the only wheels I have to control. My shooting is inside and the lighting doesn’t change that much.
Using the colors wheels really help make using two cameras so much better. People really can’t tell that there are two different cameras being used.
Finding the Color Wheel
The color wheel section is located in the Color Inspector of the selected clip. Simply put the playhead on the clip that you want to be adjusted and type in Command 6.
Click on the “No Corrections†popup menu and select “+Color Wheelâ€
Start playing around with various settings to see what works best for your situation.
PermalinkLogic Pro Effects in Final Cut Pro
Description of each Logic Effect in Final Cut Pro
Final Cut Pro includes several Logic Effect tools. These tools help improve the audio in your Final Cut projects.
Which audio effect works best for you depends on your audio needs. It might be tricky to figure out which effect does what.
Logic Pro Effects Tools
Here's a description of each Logic Effects functionality from Apple.com.
Adaptive Limiter - This is a versatile tool for controlling the perceived loudness of sounds. It works by rounding and smoothing peaks in the signal, producing an effect similar to an analog amplifier being driven hard. Like an amplifier, it can slightly color the sound of the signal.
This is great when you have a video clip that has several sound peaks and you want to boost up the other audio. This is a better alternative than using the Normalize feature in Fission and Audacity.
Compressor - This emulates the sound and response of several professional-level compressors. It tightens up your audio by reducing sounds that exceed a certain threshold level, smoothing out the dynamics, and increasing the overall volume - the perceived loudness.
Enveloper - This is an unusual processor that lets you shape the attack and release phases of a signal - the signal transients, in other words.
This can be used to help highlight some of the vocal sounds in a song.
Expander - This is similar in concept to a compressor, but increases, rather than reduces, the dynamic range above the threshold level.
Gain - Gain amplifies (or reduces) the signal by a specific decibel amount.
Limiter - This reduces any peak above the threshold to the threshold level, effectively limiting the signal to this level.
Multichannel Gain - Multichannel Gain allows you to independently control the gain and phase of each channel in a surrounding mix.
Multipressor - Multipressor (an abbreviation for multiband compressor) is a versatile audio mastering tool. It splits the incoming signal into different frequency bands- up to four -and enables independent compression of each band. After compression is applied, the bands are combined into a single output signal.
Noise Gate - This is used to suppress unwanted noise that is audible when the audio signal is at a low level. This effectively removes lower-level parts of the signal, while allowing the desired parts of the audio to pass.
Spectral Gate - This is used as a tool for creative tool design.
You can use this tool to muffle music so that it sounds like it's coming through the wall, or change a regular voice to sound like it was from a telephone call.
Surround Compressor - This is specifically designed for compression of complete surround mixes. It is commonly inserted in a surround output channel strip or in audio or aux channel strips -busses- that carry multichannel audio.
PermalinkAC3 Audio in Final Cut Pro
AC3 Audio may cause problems with some features
If your shooting video with Sony or Panasonic cameras, chances are your shooting using the AVCHD Video Format. You'll see the video file end with ".mts" or ".m2ts."
There's nothing wrong with this format until you decide to synchronize video and audio files.
Problem with Synchronize Clips
One of the things I noticed when I attempted to synchronize a video clip with a separate audio file, is that it was taking Final Cut Pro a long time to generate a new file. When I decided to quit the synchronization, it would take a long time for the cancelation to complete. I would have to force quit the application.
I didn't encounter this issue with any other video source.
There's something about the mts format that is triggering some weird behavior with Final Cut Pro Synchronize engine.
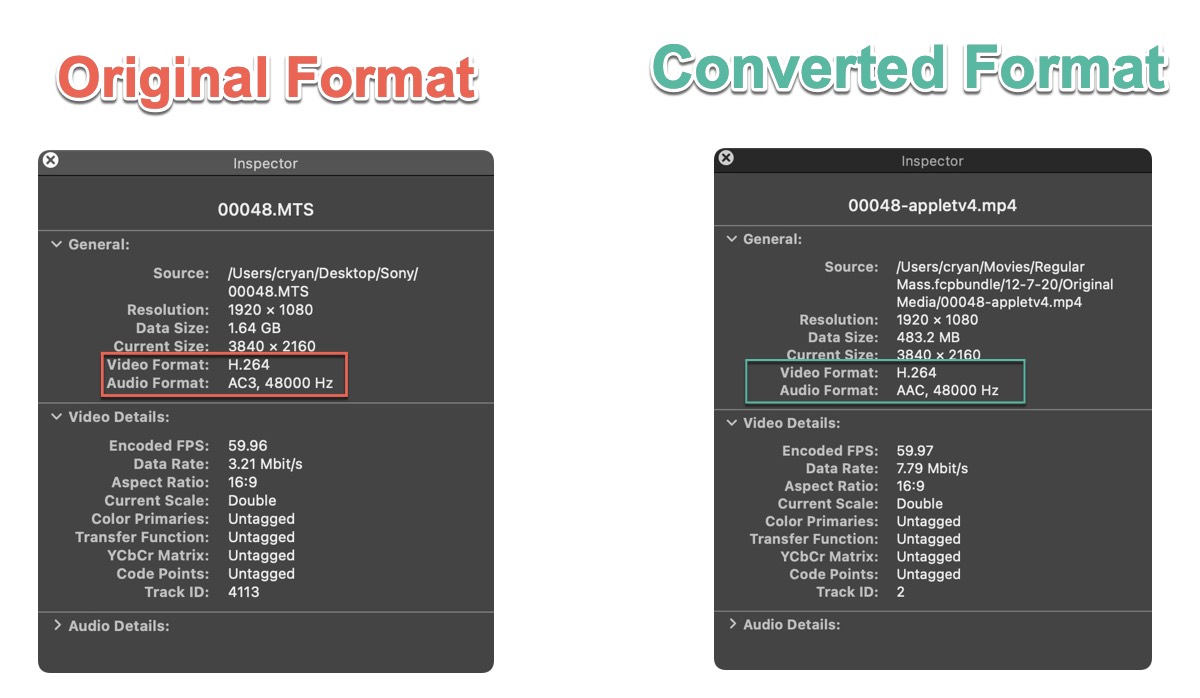
It may have something to do with the AC3 Audio format (Dolby AC-3) as seen in the difference between the two converted files.
Ah Ha, I checked out Final Cut Pro Supported formats document and I can see that AC3 Audio is not listed.
Quick Solution
My quick solution was to convert the video file using QuickTime Player or Smart Converter Pro.
In QuickTime Player, I used the "Greater Compatibility (H.264)" settings. Export the clip as 1080
In Smart Converter Pro, I used the Apple TV 4 setting.
Once I converted the Video and Audio, I had no problems using the Synchronize Clips feature.
Not Using Synchronize Clips?
If you're not using Synchronize Clips, you may encounter problems with other audio functionality. For example Audio Effects or with the Auto Enhance Audio functionality.
Find Clips that Have AC3 Format
Here's how to see the Audio format of the clips that are in your Final Cut Pro projects:
- In Final Cut Pro make sure that the Browser is displayed and in List Mode.
- Right click on any Browser column, for example, Camera Name. You should see a drop down menu. Select "Codecs"(Third from the bottom)
- The Codecs column data list Audio and Video format for each of the clips being used.
Look for clips that have the AC3 audio format. When you find one, right-click on it to reveal in Finder.
Use the "Quick Solution" that I described earlier to convert it. I know it's painful to have to convert multiple files, but this should fix issues that you may be having.
PermalinkToggle Inspector Height
How to fix the height of the Inspector Window.
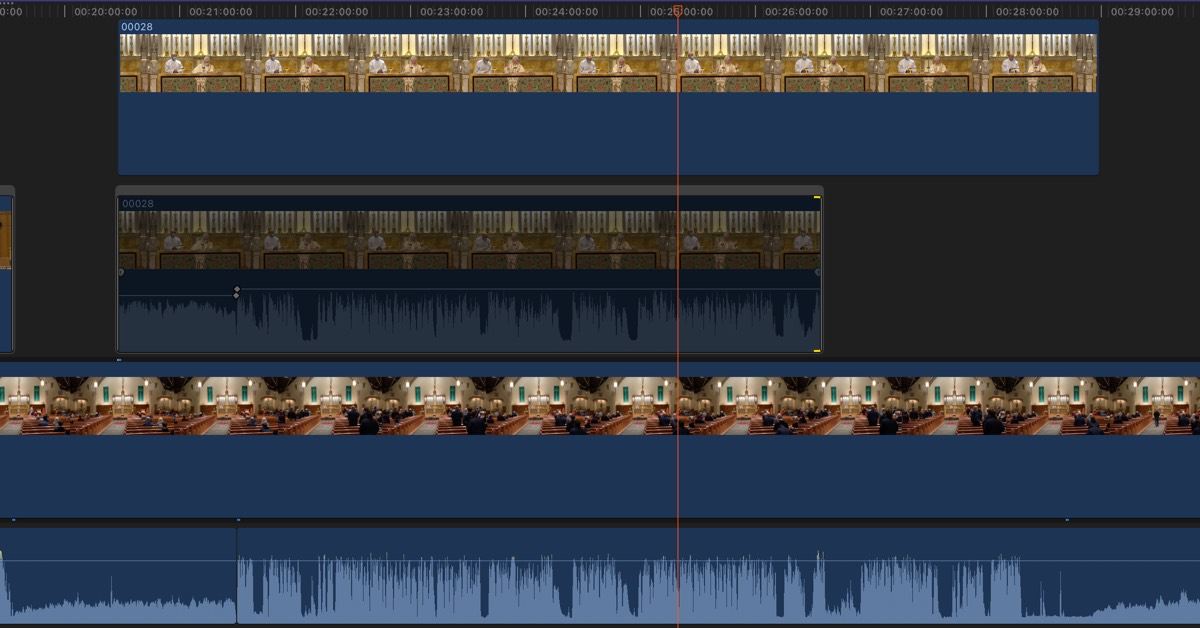
Sometimes the Inspector panel can take up too much room, here’s how to fix that.
Side-By-Side view of the Final Cut Pro window with the Inspector panel using the full left side.
If you see the Info Panel using up the complete left side of the Final Cut Pro window, and you have no idea what happens. This is because somehow you have the “Toggle Inspector Height†enabled.
You can enable/disable this feature by using the shortcut Control Command 4, or selecting the menu item under the View Menu.
This blog post came about because a few people have posted on a Facebook group about how to reduce the size of the inspector panel.
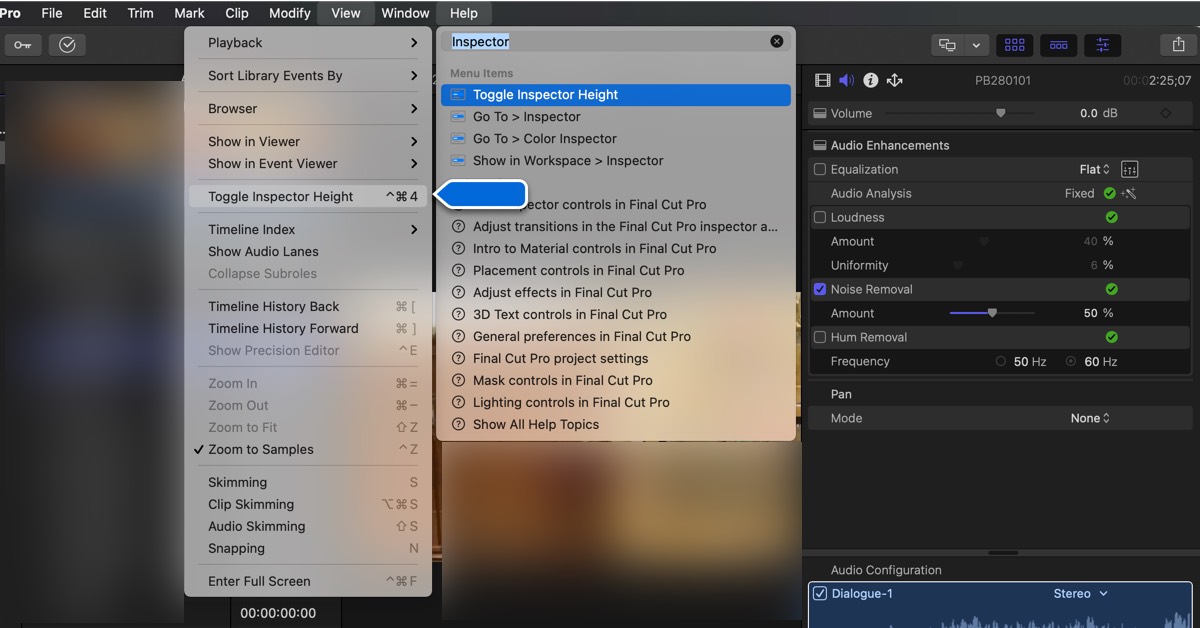
Help Can Guide the Way
Check out the above image.
If you search for "Inspector" using the help menu, and then select the "Toggle Inspector Height" the help will guide you to where to find the "Toggle Inspector Height" section.
PermalinkBlade Tool Tricks
Quickly cut multiple tracks
Sometimes when I am editing, I want to do a complete scene cut. That includes multiple videos and audio tracks. In the past, I would use the blade tool on individual clips. Wasn't the best method - it would result in a long time editing the video.
There is a better way.
Cut All Clips at the Skimmer
To do a "super" cut off all the clips at the current skimmer point. This is useful when you want to make a drastic change to that moment in time. Use the short cut: Shift-Command-B
Cut Certain Clips
It's super easy to cut specific clips at the current skimmer point. This is useful if you need a simple cut from two similar scenes. Simply select the clips or audio and then use the shortcut: Command-B to add a cut at the current skimmer point.
Useful Tips
I have been using Final Cut Pro for several months and this is the first time I hear about this shortcut.
PermalinkMultiple Displays
Using Multiple displays can make you productive in Final Cut Pro
Final Cut Pro is so much better with multiple monitors. You don't need two similar monitors, just two good ones. This is the layout that I have on my home computer:
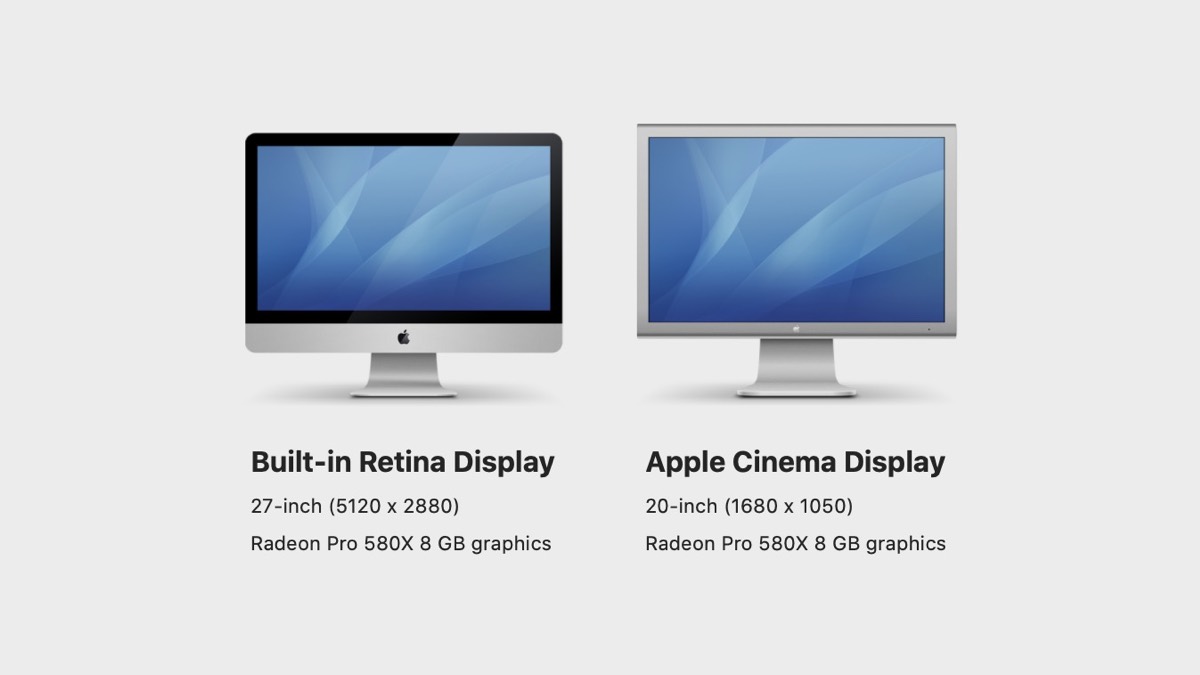
The 20-inch Apple Cinema Display is a ten-year-old monitor, and it works perfectly well for me.
Setting Up Final Cut Pro
Here's all you do to get Final Cut Pro to use two monitors:
Connect a second monitor to your computer. (That's pretty obvious.)
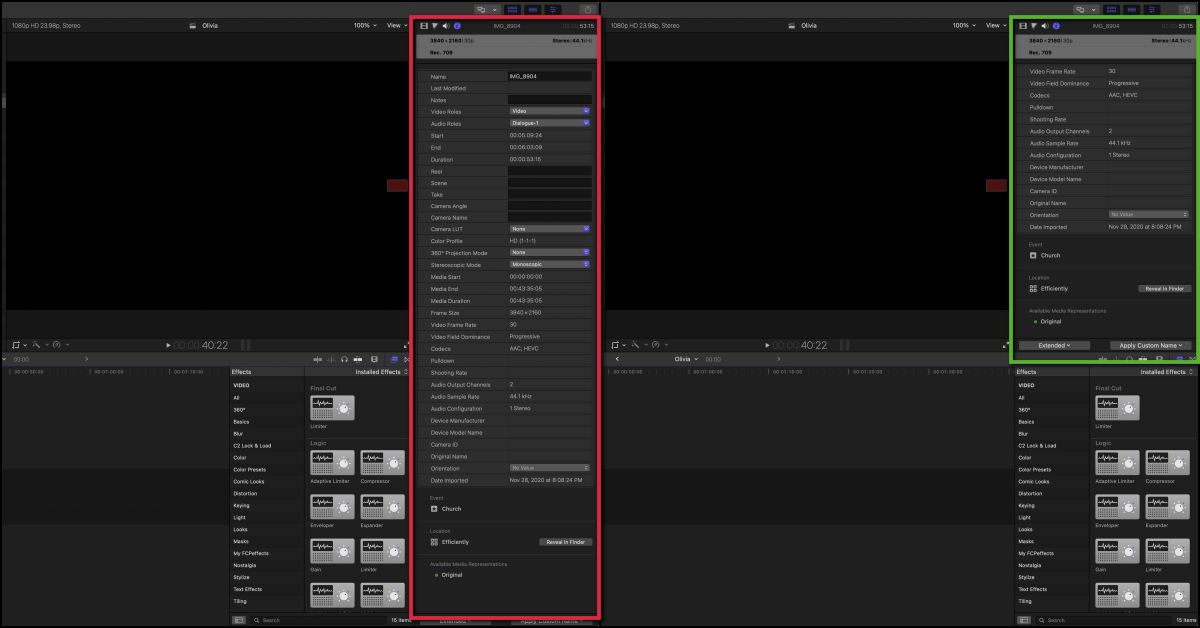
Under the 'Window' Option you'll see a "Show in Secondary Display" this is where you select the content to display on the second monitor. When you select this the item is removed from the primary display.
You have 3-options:
Browser - This is all the media files in your project. Use this option when you're starting the project and trying to figure out what clips to put in the timeline.
Viewers - This is the preview window. I usually have my second display always set to this. Having this on the second display makes navigating the timeline so much easier. This is especially true when you have multiple clip layers.
Timeline - This is the video timeline. Useful if your second display is a wide screen.
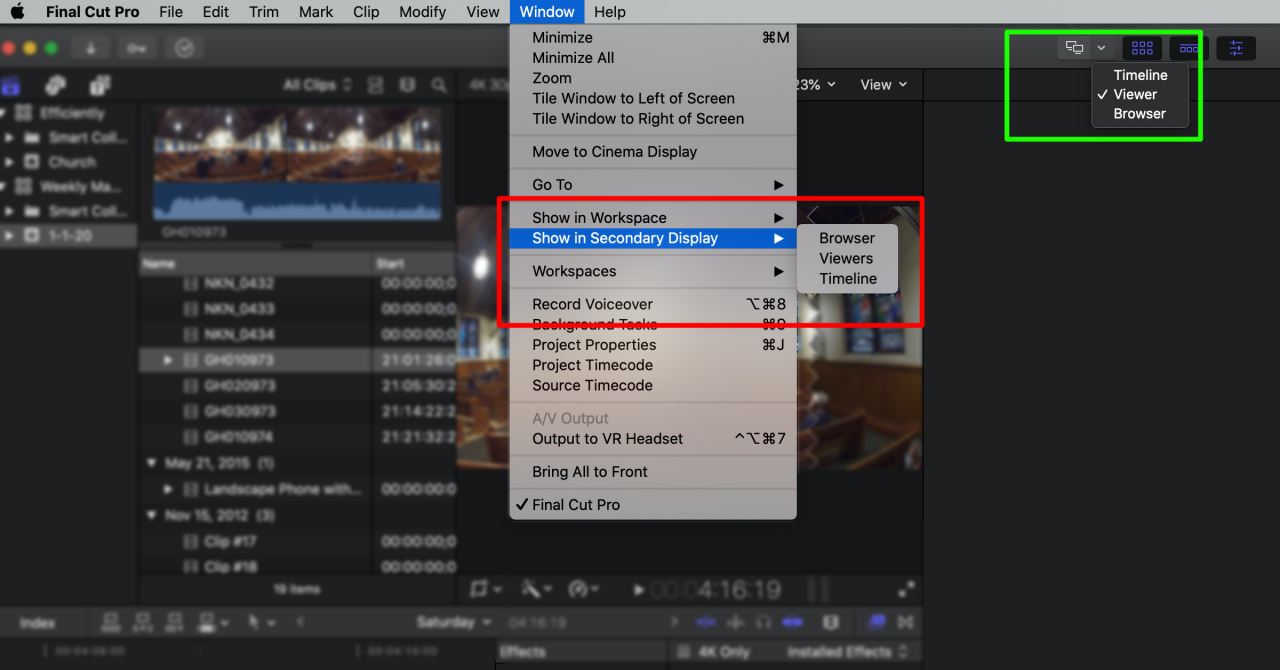
Quick Shortcut
In the top of the main window there is an icon that shows two computers. You can toggle using two displays simply by clicking on this icon. (Its the green box in the above screenshot)
I have found this to be a quick way to display Final Cut Pro to use the second monitor when I want to do something outside of Final Cut Pro, such as browse the internet or check email
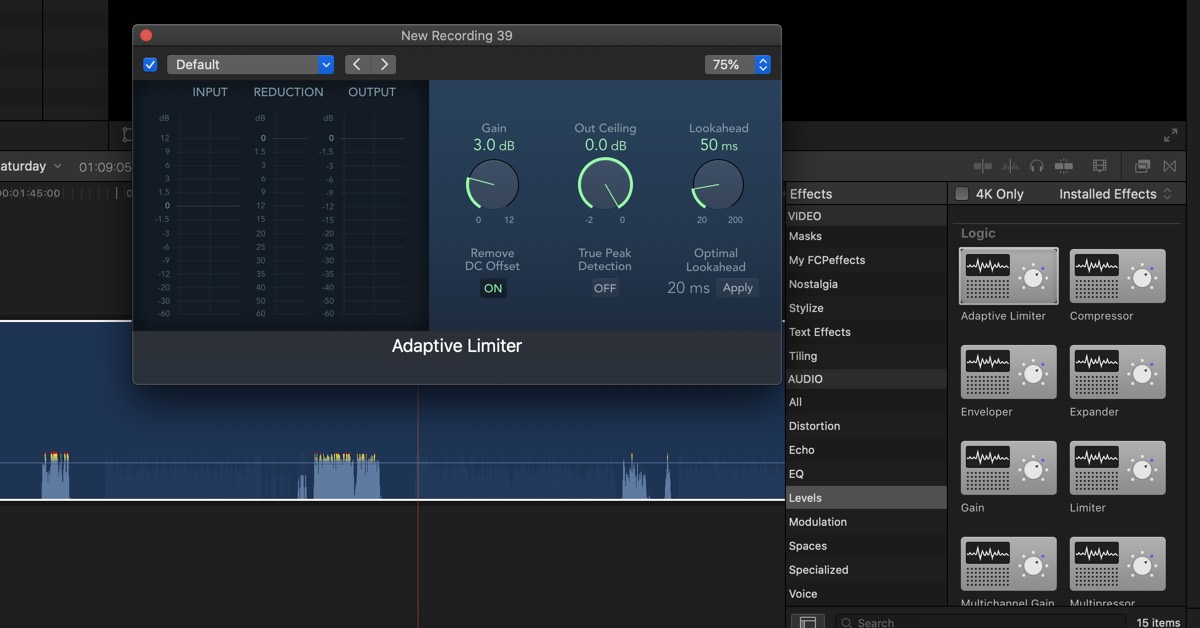
PermalinkAdaptive Limiter
Final Cut Pro has a powerful Audio clean up tool called Adaptive Limiter
One of the things I have learned is that using Normalize is not the best way to fix audio that might be too soft. Normalize is available in audio applications like Fission and Audacity.
The problem is that if your audio clip has one large pop, then Normalize won't work.
Apple's Logic has a powerful way to balance the audio and that's something called: Adaptive Limiter. Apple included the functionality in Final Cut Pro
Feature Description
Adaptive Limiter is a versatile tool for controlling the perceived loudness of sounds. It works by rounding and smoothing peaks in the signal, producing an effect similar to an analog amplifier being driven hard. Like an amplifier, it can slightly color the sound of the signal. You can use Adaptive Limiter to achieve maximum gain without introducing unwanted distortion and clipping, which can occur when the signal exceeds 0 dBFS.
Things I Learned
This can be found in the Effects section, check for Audio then Levels.
Simply drag and drop Adaptive Limiter to the audio that you wish to enhance and the audio will be enhanced.
If you want to make further Adaptive Limiter adjustments on the clip, go to the audio section of the clip, scroll down and look for Effects. You should see the Effects section.
You can make whatever adjustments you want, I would recommend maling slow adjustments and test the clip peaks and valleys.
There is an Advance Effect Editor UI for those audio pros. This is a powerful audio tool to play around with.
At the End of The Day
Using applications like Fission and Audacity is great for simple audio files. The audio functionality in Final Cut Pro is pretty powerful. There are a lot of audio effects built - 109 to be exact.
You shouldn't have to use a third party to fix audio issues. In most cases, it can be professionally cleaned in Final Cut Pro.
PermalinkAbout
This blog series will explore the many different features and tools of Final Cut Pro X. We will cover everything from basic editing techniques to more advanced topics such as color grading and motion graphics. We will also provide tips and tricks to help you get the most out of Final Cut Pro X.
Check out all the blog posts.
Blog Schedule
| Saturday | Internet Tools |
| Sunday | Open Topic |
| Monday | Media Monday |
| Tuesday | QA |
| Wednesday | Veed |
| Thursday | Business |
| Friday | Macintosh |
Other Posts
- Apple Motion Duration
- Select Clip Range
- Using Rejected Clips to Manage Your Clips Library
- Page Curl
- Color Correction Assistance for Final Cut Pro
- Upload to Different YouTube Channels
- Color Wheel
- Bright White Background Generator
- Create a crowd effect in Final Cut Pro
- How to Add Custom Sound Effects to the Sound Library
- Adding Favorites Folders to Import
- How to Remove Echo in Final Cut Pro Using Voice Isolation
- Audio Fade Shape
- Crossfade Audio
- Slow Motion Video