
SD Card iMac Speed
Is the built in SD card slot worth using?
The 27-inch iMac with Retina 5K display comes with a built-in SD Card reader. I hardly ever use it since I have a Satechi USB-C Clamp Hub that has a built-in SD Card Reader. It's so much easier to use. In the iMac solution, I have to put the card in the back and that can be tricky to do.
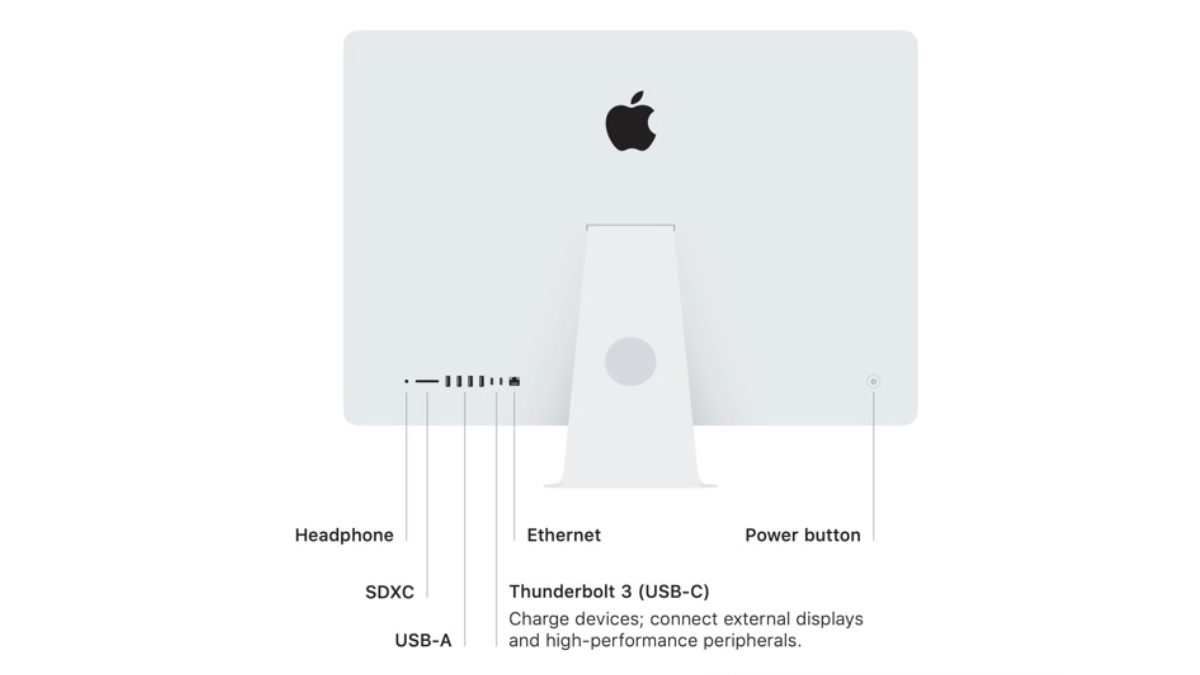
The backside of the 27-inch iMac with Retina 5K display.
I Wonder...
I was wondering, what SD card reader is faster? Should I really be using the built-in one? This is important now that I have multiple USB-C devices. I now have:
- 20-inch Cinema Display
- SanDisk External SSD Drive
- Satechi USB-C Clamp Hub
On the iMac, I only have 2 USB-C slots, and the Cinema Display and SanDisk are using both slots. When I want to use the Satechi, I have to disconnect the Display or the SanDisk.
Am I just better off using the built-in SD Card reader?
- The built in SD Card reader is using 2.5 GT/s link speed.
- The Satechi SD Card Reader is using 5 GB/s
Looks like we need to convert the GT/s to GB/s to get a better answer.
Convert GT/s to GB/s
To do the calculations, I visited the Units Converter site to get the information.
It turns out that 2.5 GT/s is the same as saying 20 GB/s.
Thanks to Units Converters!
1 Gigatransfers per Second = 64000000000 Bit per Second
1 Bit per Second = 8000000000 Gigabyte per Second (SI def.)
2.5 Gigatransfers per Second = 20 Gigabyte per Second (SI def.)
Apple Wins!
So it looks like that I am better off using the built-in SD card reader. The only way that I can match the iMac speed is to have a USB 3.2 Gen 2x2 Card Reader, which would use the Thunderbolt port.
So for now, if I need a fast way to download the files of an SD card, I am better off using the built-in card reader.
PermalinkSoundtrack Pro
Legacy Apple Sound Application was Pretty Powerful
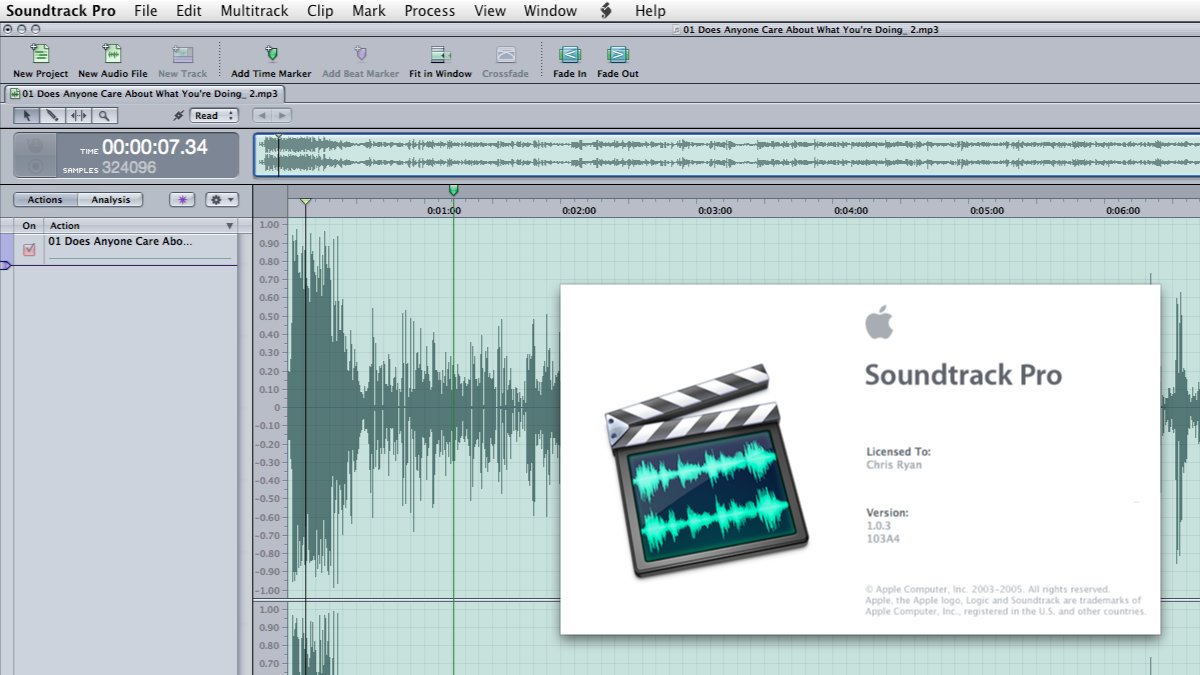
Last week I talked about Peak LE, this weeks post is about Apple's Soundtrack Pro. This is another audio application that I used to edit my audio files. This was a great application that had a lot of features that made it easy to change or enhance the audio.
SoundTrack Pro was part of the Final Cut Studio series of applications which also include LiveType.
SoundTrack Pro was discontinued in 2011 for GarageBand and Logic Pro.
Process Menu Options
In the Process are many adjustments including:
Fade In, Fade Out, Normalize, Adjust Amplitude, Silence, Invert, Reverse, Swap Channels, Time Stretch, Set Ambient Noise Print, Convert to Mono, Resample, Set Poise Print, Reduce Noise, Show Realtime Effects, Flatten Audible Actions, and Flaten all Actions
Built In Effects
Some of the Effects include with SoundTrack Pro:
Dynamics - Adaptive Limiter, Compressor, DeEsser, Expander, Limiter, Multipressor, and Noise Gate.
Distortion - Bitcrusher, Clip Distortion, Distortion, Distortion II, Exciter, Overdrive, and Phase Distortion.
EQ and Filter - AutoFilter, Channel EQ, Fat EQ, High Cut, High Pass Filter, High Shelving EQ, Linear Phase EQ, Low Cut, Low Pass Filter, Low Shelving EQ, Match EQ, Parametric EQ, and Soundtrack Pro Autofilter.
Modulation - Chorus, Ensemble, Flanger, Modulation Delay, Phaser, Scanner Vibrator, and Tremolo.
Reverb/Delay - PlatinumVerb, Soundtrack Pro Reverb, Space Designer, Stereo Delay, and Tape Delay
Miscellaneous - Denoiser, Gain, Pitch Shifter II, Ringshifter, Spectral Gate, Stereo Spread, and SubBass.
Mac OS - Bandpass, Delay, Distortion, DynamicsProcessor, Filter, GraphicEQ, HighShelfFilter, Hipass, Lowpass, LowShelfFilter, MatrixReverb, MultibandCompressor, ParametricEQ, PeakLimited, Pitch, RogerBeep, and SampleDelay
Space Designer
One of the cool hidden tools in SoundTrack was Space Designer, a powerful tool for sound design.
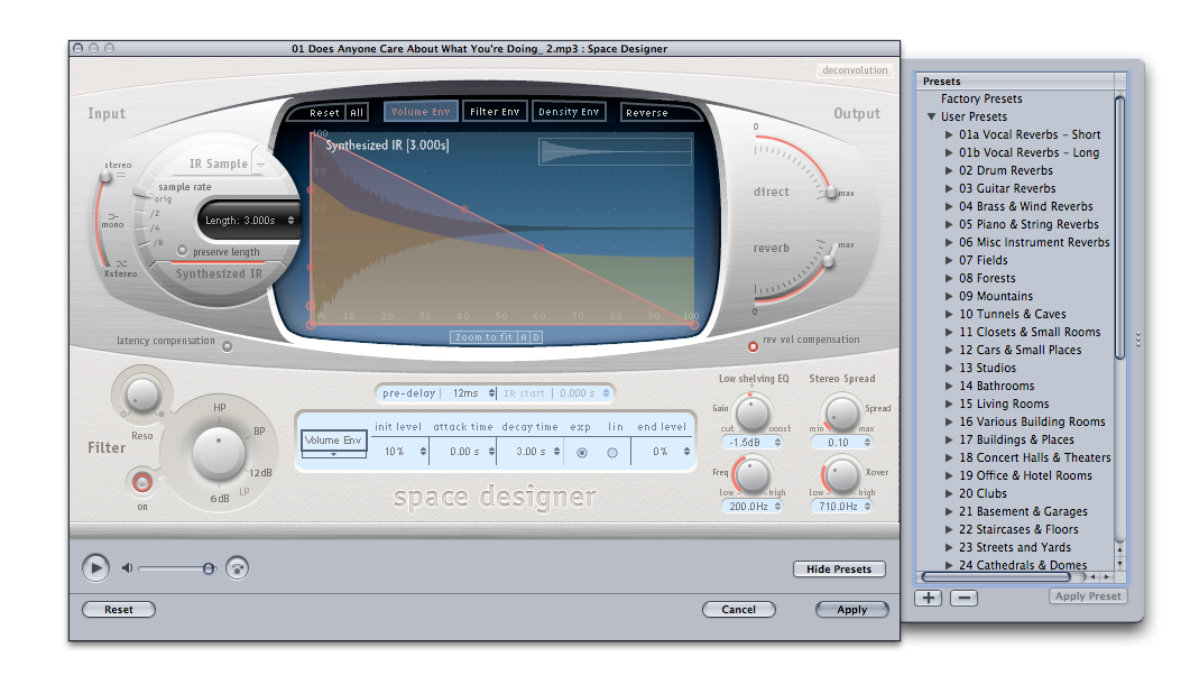
This "futuristic look" tool gives you the power to adjust the sound to any type of space environment, such as Bathrooms, Clubs Cathedrals, Concert Halls, and more.
Space Designer is now part of Logic Pro Effect collection.
PermalinkPeak 3 LE
Classic Macintosh Audio Application
This week, I was looking back at some applications that I used a long time ago. This came about when I found this folder in my collection:
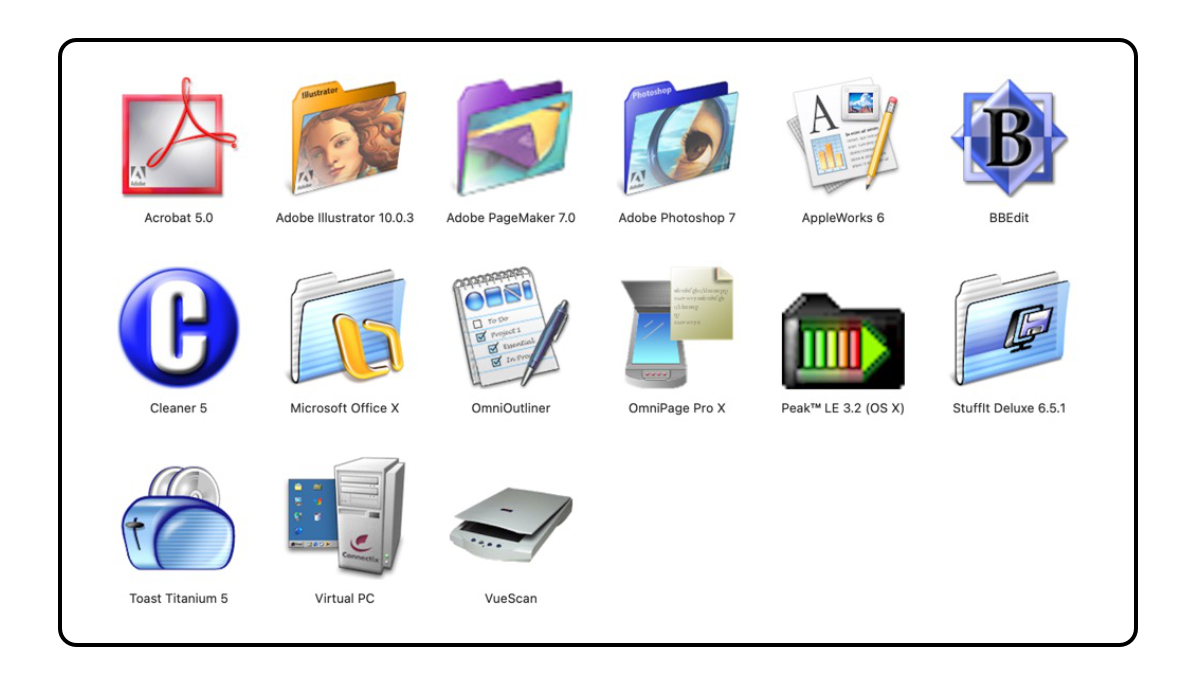
This was a folder that listed all the importaint applcations for my new Mac.
Peak LE
Peak LE was my go-to application to create/edit audio. You could record audio and play it back and make all sorts of cuts. You can send audio output to iTunes or to an audio file. In 2006, Peak LE was selling for about $129.
I remember using Peak all the time to make any audio change. I can believe that I put it there with Photoshop and Microsoft Office X.
Peak isn't supported anymore, Bias stop selling it back in 2012. They now recommend SoundSoap+ which costs $249!
Fast Forward to Today
Today my audio edits are done using Rogue Amoeba Fission. Which only cost $29 - I purchased it back in 2016 - a good investment!
I remember Peak LE being a pretty powerful application that had lots of plugs for effects. I didn't take a screenshot of the application, I'll have to boot up one of my old computers to see if I can get it.
I just discovered that it's on my old desktop G4 computer, I'll have to boot it up and see if I can still run it.
Welcome Screen
When I tried to load up the application on my Powerbook G4 this is the screen that I see:
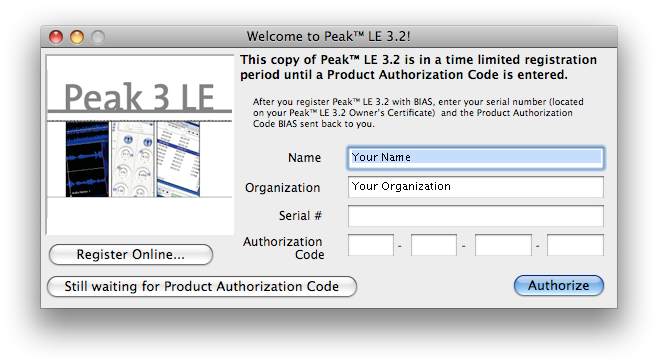
I don't have my registration and I wasn't able to find anything in my database. I know it's on my G4 Desktop, so I'll try to get that working to show the comparison of Peak vs Fission.
PermalinkHide Desktop Icons
Use Keyboard Maestro to hide a very messy desktop
Sometimes you want to hide the icons on the desktop, this could be for a variety of reasons. Maybe your demo some feature and you don't want to clean up the desktop or perhaps you use your computer as a background in Zoom videos.
There are no macOS settings available to do this. Hiding the "Finder" doesn't actually hide the icons on the desktop.
You can download software to make it easier, a couple of popular solutions include CoverDesk: Desktop Utility and HiddenMe! utilities.
However, if you have Keyboard Maestro. You can easily add a Menu action. There's no need to install any more software. You can create a Menu Macro like this:

Configure the Macro
To cause the Desktop to hide the icons, you need to do a simple hack to hide the Desktop. This is done via the UNIX command. In Keyboard Maestro, you simply use the "Execute Shell Script" action.
Here are the steps:
Hide the Desktop icons
- Open up Keyboard Maestro editor and select a group.
- Create a new Macro. (Shortcut: Command N)
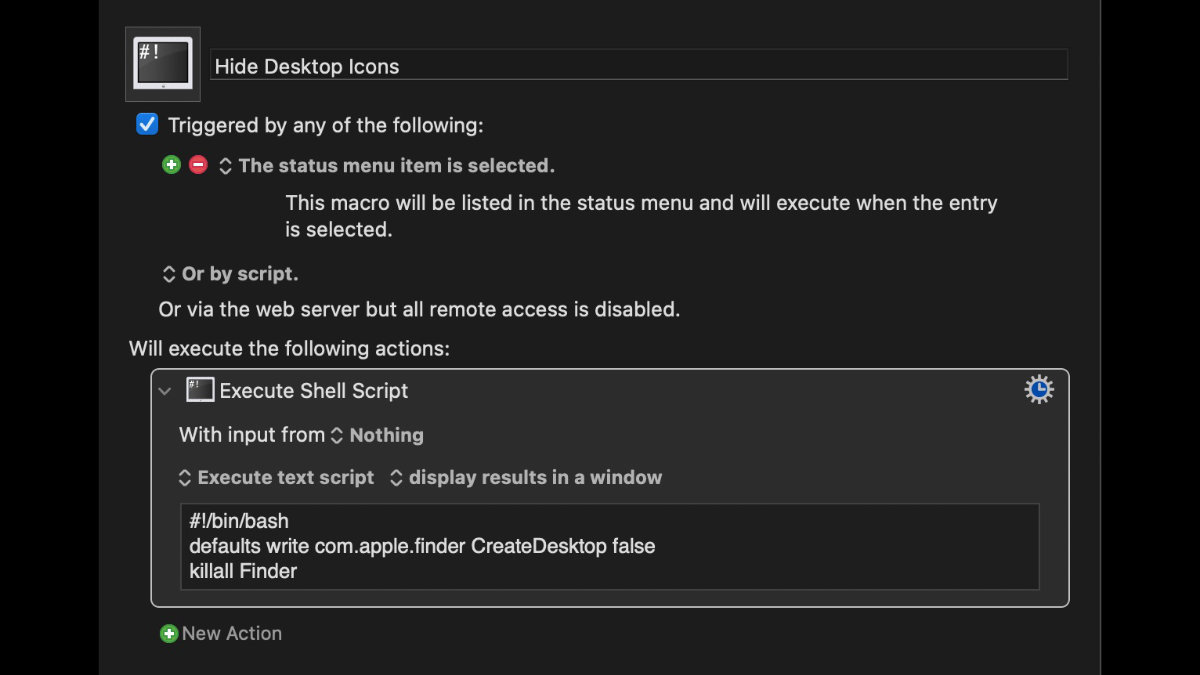
- In the Title, use "Hide Desktop Icons"
- In the Triggered by any of the following, select "The status menu item is selected."
- Now type in Command Control A and type in "Shell" then return - This is a quick way to get the Execute Shell Action.
- Paste the following:
#!/bin/bash defaults write com.apple.finder CreateDesktop false killall Finder
Show the Desktop icons:
Now create a Macro to Show the Desktop icon:
- Open up Keyboard Maestro editor and select a group.
- Create a new Macro. (Shortcut: Command N)
- In the Title, use "Show Desktop Icons"
- In the Triggered by any of the following, select "The status menu item is selected."
- Now type in Command Control A and type in "Shell" then return - This is a quick way to get the Execute Shell Action.
- Paste the following:
#!/bin/bash defaults write com.apple.finder CreateDesktop true killall Finder
Sample Entry
This is what the Hide Macro should look like:
Easy to Use
Now when you want to hide the Desktop, you select the "Hide Desktop Icons" from the Keyboard Maestro menu bar.
PermalinkFFmpeg Tips and Tricks
Some useful tips that I have been using.
In the past few weeks, I have been using FFmpeg to modify some video and audio files. I been having found a few productive tips/tricks that I thought would be good to share.
If you have anything good to share, please feel free to leave a comment below.

Loop Video
If you have a short video and would like to extend it for a long duration. For example, if you have a bokeh design that you would like to loop over and over again.
This loops a GoPro video file 4 times it's current length:
ffmpeg -stream_loop 4 -i GH010375.MP4 -c copy output.mp4
Loop Audio
Looping audio works the exact same way.
This is useful when you want to extend a background sound, such as Apple's Playful for a longer duration.
This code snippet extends the 1-minute clip to 25 minutes. This saves me time in having to duplicate the clip multiple times in Final Cut Pro.
ffmpeg -stream_loop 25 -i PLAYFUL-EndlessLoop.m4a -c copy LongPlayful25.m4a
Combine Video
This is very useful when dealing with when the camera splits a video clip because of the 4GB limit. (This is something that the GoPro does.)
In this first example, We create a reference file and then combine the video clips.
cd ~/Desktop/GoPro/ printf "file ‘%s'n" *.MP4 > clips.txt ffmpeg -f concat -i clips.txt -c copy GoPro.mp4
In this example, we call out the files on the command line, without using the reference file. Here's an example:
ffmpeg -i "concat:GX010197.MP4|GX010198.MP4" -c copy ~/Desktop/output.mp4
PhotoLemur Update
Much needed update for macOS Big Sur
Back in 2018, I blogged about Photolemur 3 and how it is a great photo touch up application. (Read the blog and checkout the before/after sample images.)
After I updated my main computer to macOS Big Sur (Version 11.2.1) Photolemur stop working properly. The image rendering would be fine, but when I went to save the document to the computer it would crash.
Other people also encountered this issue and wanted Skylum to fix this issue. Skylum Community forum has a thread of the conversations.
Obviously this prevented me from using the application. This was a known issue to the Skylum team. However, the developers were focus on the launch of their new update to Luminar.
In order to use Photolumer on some images, I ended up using another computer that I didn't upgrade to macOS 11.2.
Now Works!
Earlier this month, Photolemur was updated to version 1.1.1 (7265) which included the fix so that it would work in Big Sur (macOS 11.2.1).
The update came just in time, I was about to buy Luminar since that was working fine and did offer a lot more flexibility than Photolemur.
The one thing that I learned about this is that the application may not get that much attention for updates in the future. I should look into Luminar at some point.
Check out PhotoLemur
If you do any digital photography, be sure to checkout Photolumer. Your pictures will look much better after running them through the application.
The application works fine, don't worry about the "lack of attention." It's still a perfectly good application.
PermalinkInstall Font Suitcase on macOS
How to install legacy fonts on MacOS
Apple has slowly deprecated the support for legacy True Type Fonts suitcases. Apple has the following statement on the "How to install and remove fonts on your Mac" page:
Legacy suitcase TrueType fonts and PostScript Type 1 LWFN fonts might work but aren't recommended.
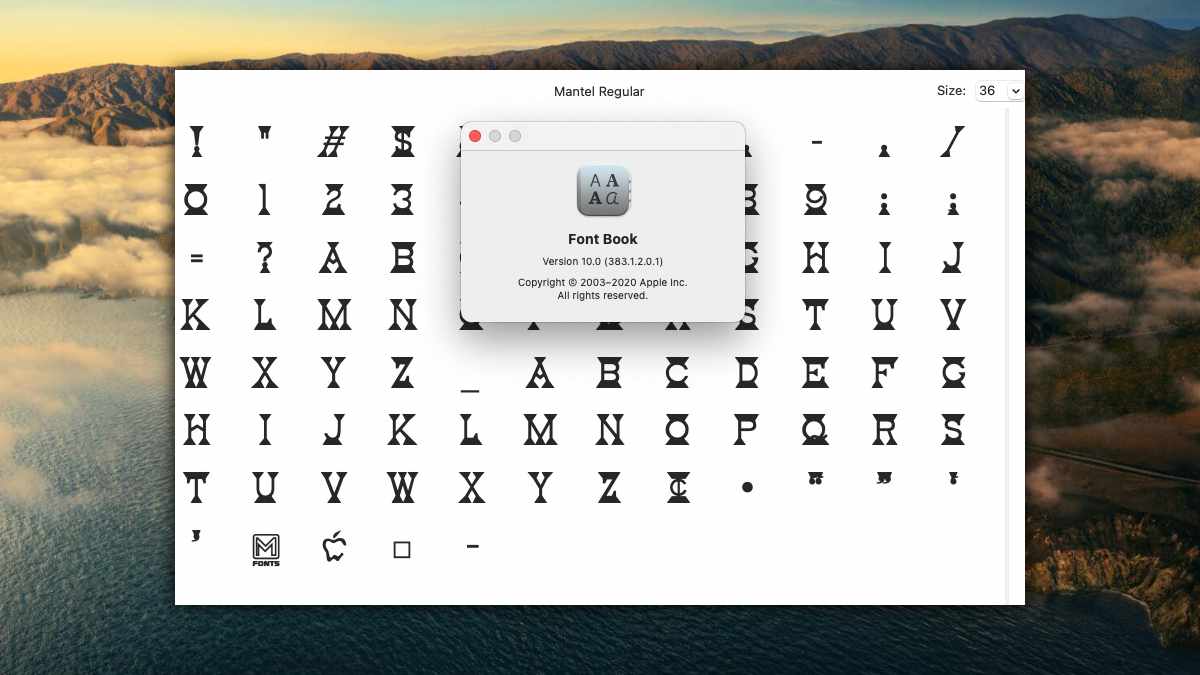
This is what happens if you double click on a "legacy" font suitcase:
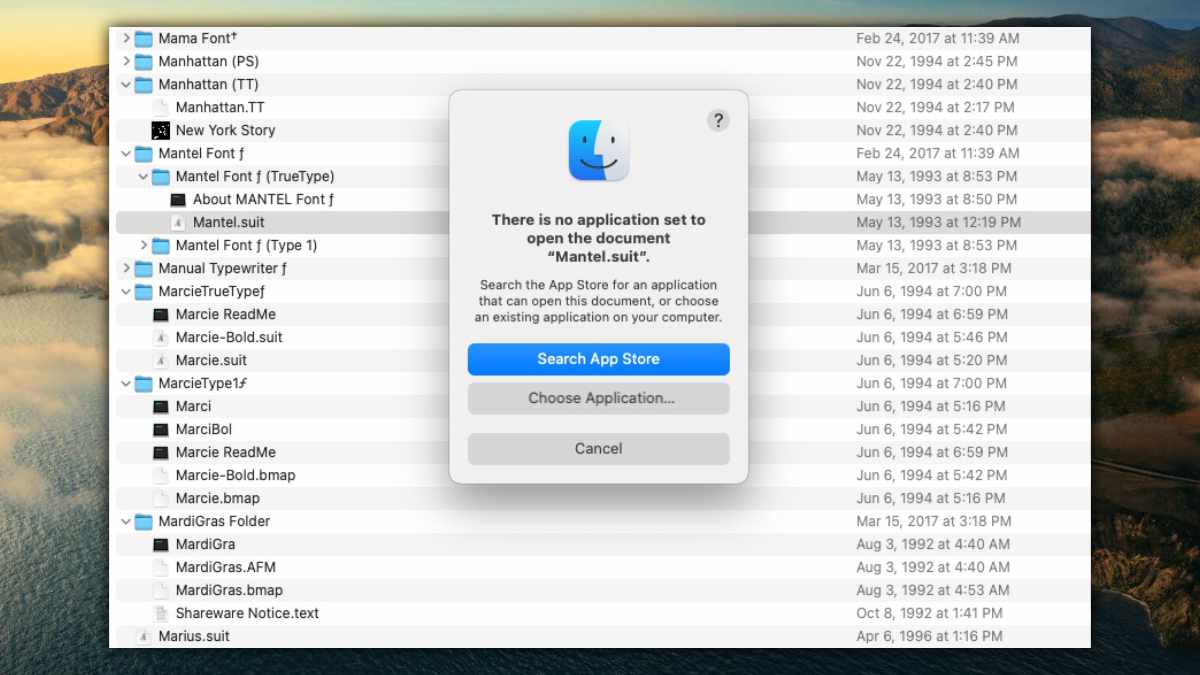
If I selected the "Choose Application..." The Font Book Application will not be selectable. It looks like that there's no way to install this font.
There is an easy work around.
How to Install Legacy Fonts
It's pretty simple to install the font. Simply open the font from the Font Book application. Here are the steps:
- Open up the Font Book Application. (Use LaunchPad to find the application.)
- Under the File menu select "Add Font..."
- Navigate to the folder that has the font that you want. Most likely it is on an external disk or the Desktop. You'll see that Font Suitcase is selectable.
- Select that font and click open.
- If the font is really old, you may get a Font Validation warning about the font. This could be because of various reasons. If the problem is minor you may be safe to use it. Note: I would be careful about using it in rendered applications such as Final Cut Pro.
Final Result
I was able to install the font in macOS Big Sur:
Editing EXIF Data
Graphic Converter allows users to add their own Meta Data to image files
Earlier this week, I was looking for a way to add additional metadata fields to an image. Usually, Metadata (or Exif) fields are used to store information about images. Camera manufacturers will store GPS, Date the Picture was taken, camera type, and more.
Some people like to store additional things such as the photographer's name and copyright information. That way if the photo appears in a paid photo collection - the author can make claims about the photo.
Looking for An Application
There is only one application, that I have installed on my computer, that can modify metadata or EXif data. That's Graphic Converter.
I checked Photoscape X, Affinity Photo, Pathfinder and Apple's Preview. All of them have the ability to view the Metadata and Exif data but they didn't offer any way to modify or add data.
Graphic Converter
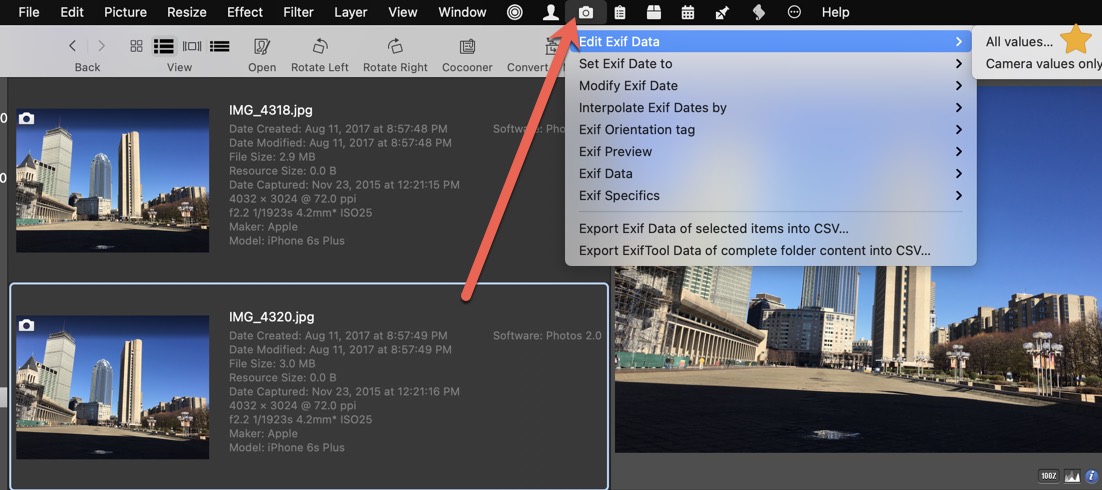
Within Graphic Converter, the only way to modify the EXIF data is to use the image browser window. Here are the steps to modify any photo:
- Open up Graphc Converter
- Go to File > Browse..
- Find the directory that has the image that you want to change and click Select
- In the browser, select the image. (You should see the Exif data appear on the right)
- In the top menu, click on the Camera icon, then select "Edit Exif Data" then select "All Values"
- Now you can make any change to the file. Don't forget to click Apply
Just remember when you click the apply button it's final, there's no going back to the original value.
PermalinkiCloud Status Icons
Handy guide to figure out what the iCloud icons mean
When using Apple's iCloud, you may see some additional icons in the Finder. Some of them make sense, but every once in a while I wonder what the icons mean.
Apple doesn't provide much help in figuring what the various icons mean. In particular, I was wondering about the arrow next to the file size. Why is it there?
I did some quick research and put together this handy guide. Feel free to download this for future reference.
Quick Reference Guide
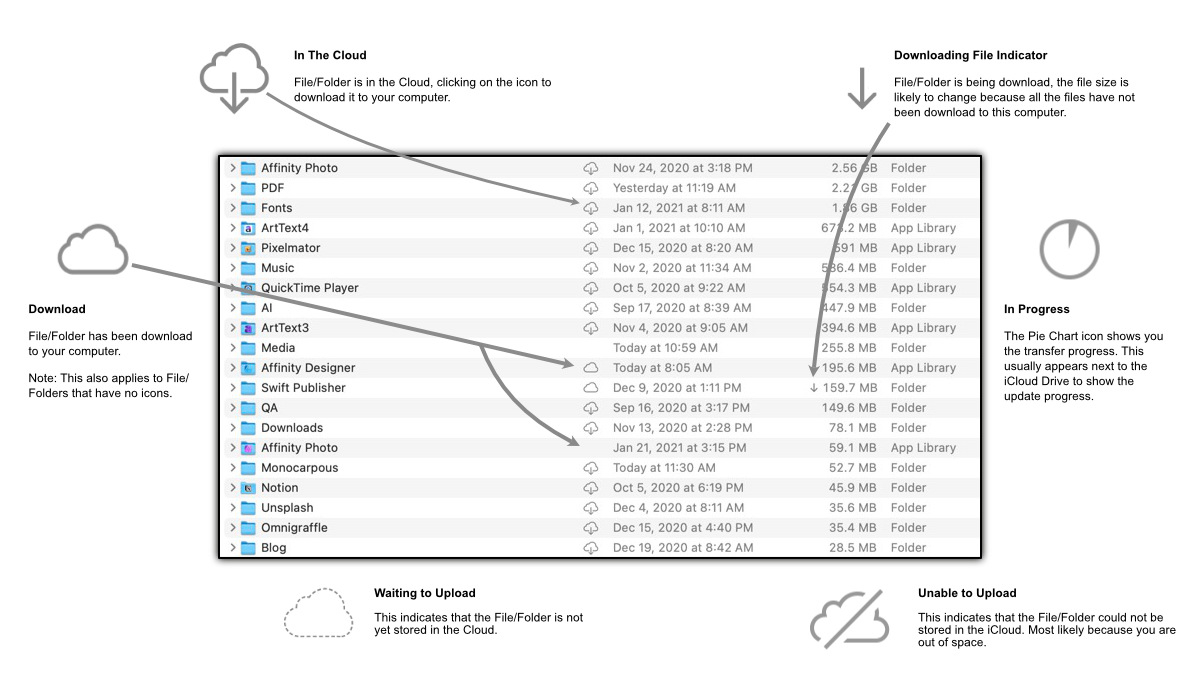 Click to Download a Larger Version.
If there are any corrections or additions that you would like to see, feel free to leave a comment below, or simply email me via the Feeback form.
PermalinkiCloud Drive
iCloud Drive is worth the cost
Over the past few months I have been using Apple’s iCloud Drive as part of my everyday backup. The family subscribed to the 2TB plan.
Here’s my review of the good/bad of using the iCloud as personal storage
Eight Things I Learned
- Very useful when you have limited space. My iMac has only 500GB on an internal SSD drive. Having the iCloud makes it easy to backup files that I don’t use frequently. I can get access to them any time.
- Not Searchable. The advantage of storing files on a personal Thumb drive is that I can put them in and search within documents. With the iCloud, I have to download the files to search inside documents.
- Available Between Computers. I used to use DropBox to quickly move files between computers. Now I just move them using iCloud. Many of my favorite applications have their own iCloud folders where I can store files.
- Instant Free Storage. When I move files from the Desktop to a folder on the iCloud I get the space back.
- Files Always Available. I store all my fonts in a folder on iCloud Drive. Anytime I need a particular font I can grab it and instantly use it. I can then remove it from the system. Did you know: Fewer fonts installed helps the computer performance.
- Remove Download. MacOS automatically manages how long to keep downloaded files from the iCloud based on the last usage. However, I and right-click on any folder and select “Remove Download†to free up space.
- Downloaded Folders. Folders that are downloaded are temporary stored in xxxxx
- Cost. The 2TB plan costs $9.99 a month. On Amazon, you can buy a standard 2 TB drive for $60. While it sounds cheaper, in the long run, to buy local storage it may not be. Apple’s storage is well protected to make sure it’s always available. If you ever lost a hard drive or a flash drive, you know the value of cloud storage.
At the End of the day...
I have thought of buying a new external drive for storage, but having used the iCloud drive for a couple of months convinced me that Apple iCloud is a better option. It's easy to manage the drive space and even easier to get files that I want.
It's nice to know that the files are protected and I don't have to worry about the hard drive crashing.
PermalinkAbout
A Mac veteran since 1989, I'm here to share my experience with tips and tricks every Friday. Witnessing the evolution of Mac software and hardware firsthand, I've gained a deep understanding of how these machines work and can help you troubleshoot any issues that may come up.
Check out all the blog posts.
Blog Schedule
| Saturday | Internet Tools |
| Sunday | Open Topic |
| Monday | Media Monday |
| Tuesday | QA |
| Wednesday | Veed |
| Thursday | Business |
| Friday | Macintosh |
Other Posts
- iCloud Drive
- Skitch
- Create your Own Blueprint pattern
- BBEdit Shortcuts
- Burning DVDs - Final Cut Pro
- Measure Tool - Epic Ruler
- Final Cut Pro for YouTube Shorts
- How to Create a Single PDF from a Bunch of Images
- End of Year Recap: Top Macintosh Friday Posts of 2024
- Save-As Dialog Boxes
- How to Scan to Evernote on a Mac
- BBEdit Stye Text
- Posterino postmark Effect
- Snappy Screen Capture Tool
- Export Photos Notification