
JPEGmini Lite
JPEGmini is a great Macintosh application to compress images.
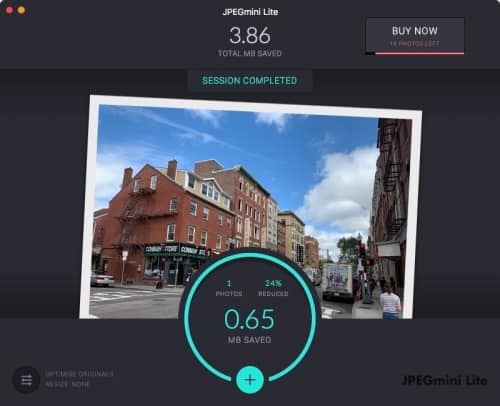
JPEGmini, by Beamer, is a good image utility to compress images without losing the quality of the image. Simple drag and drop the image, and you don't have to worry about settings or seeing if the image looks good. JPEGmini makes sure that the image looks the best as possible.
Tested Again other Mac Tools
I did a comparison with some other Macintosh tools and found that JPEGmini offered better compression without any loss of photo quality.
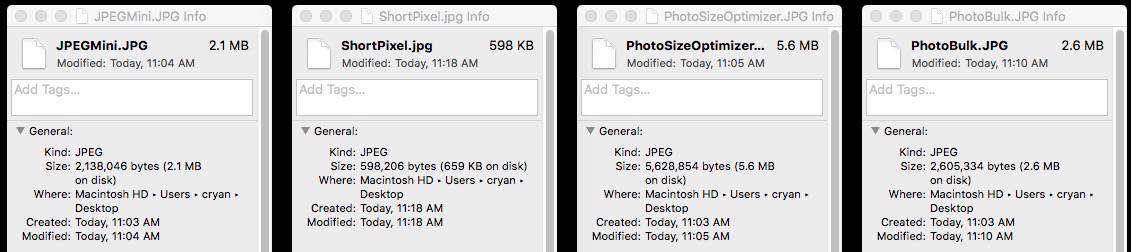
Photo comparison using a photo taken with my iPhone Xs:
| Original Image | 2.8 MB | |
| JPEGmini | 2.1 MB | 24% |
| Photo Size Optimizer | 2.8 MB | 0% |
| PhotoBulk | 2.6 MB | 8% |
JPEGmini Website
I was able to compress the same image much better on the JPEGMini website. The same image was compressed to 1.9 MB a savings of 47%
ShortPixel Did Better
ShortPixel compression was much better. ShortPixel was able to reduce the image by 90% to 598 KB.
Overall
JPEGmini is a cool Macintosh tool to compress images, but ShortPixel seems to be the better value when compressing images.
JPEGmini is available in a Lite and Regular version. The lite version lets you compress 20 images a day. The regular version is $28.99 for an unlimited number of image compression. If your looking for a computer specific version this seems to be a better option.
ShortPixel offers 100 images a month for free, or various monthly plans starting at $5.
PermalinkWondershare Filmora
Great step up application for iMovie users
When Macintosh Users first start out doing videos on a Mac chances are they use iMovie. Two Key reasons:
- Already installed on the computer
- Made by Apple - so it should be easy to use.
After a while, as more video gets made, users start to see the limits of the application.
- Limited number of Transitions
- Text functionality is very limited
Soon you start seeing the same iMovie effects all over YouTube. Wouldn't it be great if you had a more powerful application to edit videos.
Final Cut is great and powerful, but it has a high price point and a steep learning curve.
Filmora to the Rescue
Wondershare Filmora is definitely the next step up from iMovie. Its a nice application that makes it super easy to create awesome videos.
Once you start using it, you'll never open up iMovie again.
Two Things That I Like:
Title Inspector
The really cool feature of Filmora is the Title Inspector. You have a lot more flexibility in your titles than you do in iMovie, check out this side by side comparison.
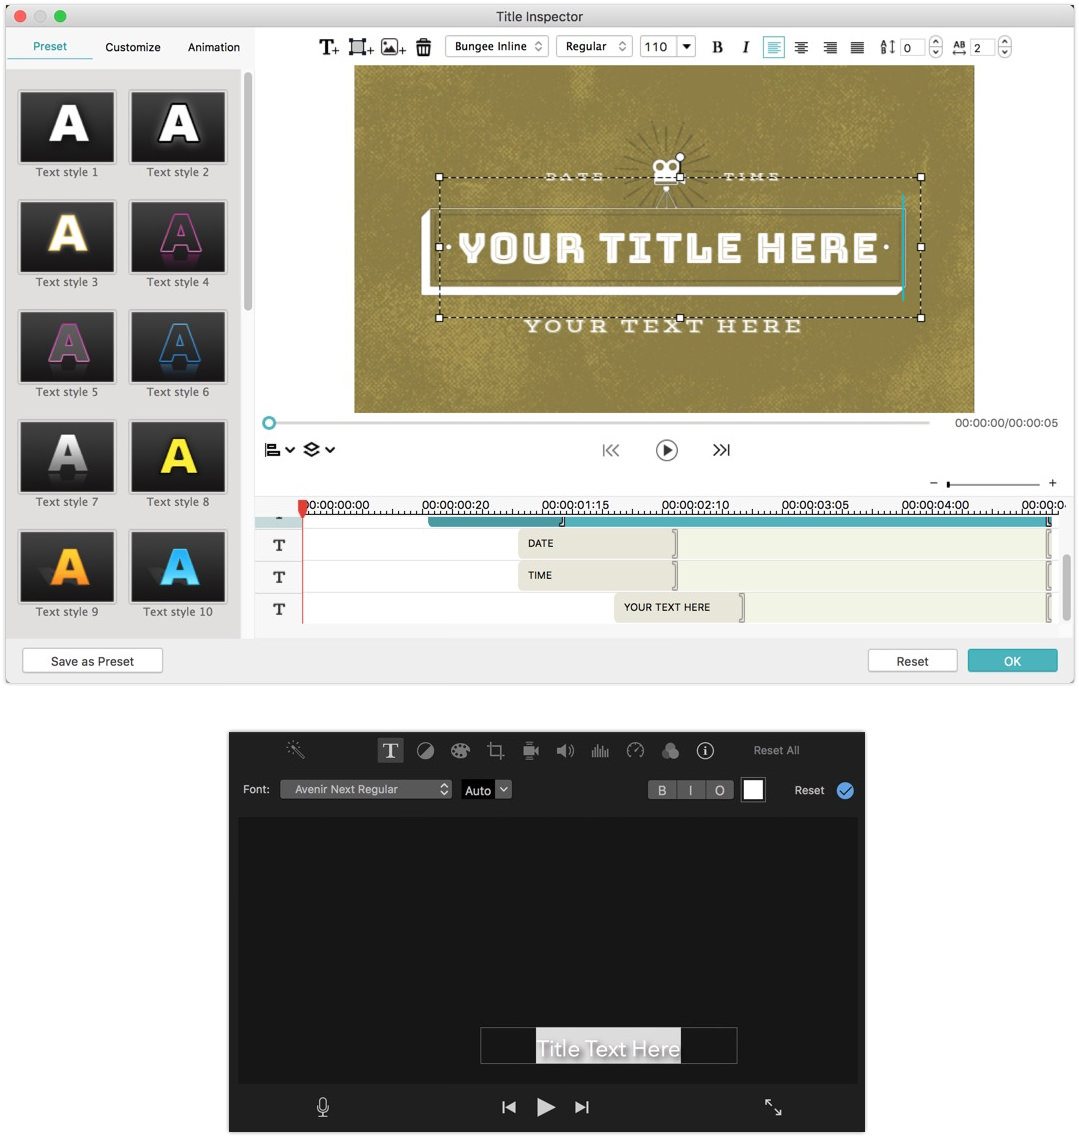
Click on image for a larger version.
Filmora Title Inspector is on the top, while iMovie Text editor is on the bottom.
In Filmora, you have a lot more options to how the text is displayed in the video. There are 23 text style presets, in addition, there are 29 animation options. Giving the producer a lot more control over how the text appears in the video.
Oh, and if you like a particular style you can save it as a favorite to use in a different project - can't do that in iMovie.
Title Design/Style Options
In Filmora there are a lot of title options, lots of good ways to add lower third text to your video clip to introduce the scene. In fact there are 42 different designs to select from. In iMovie, you have only 53 titles in the entire library (including lower thirds and Standard titles)
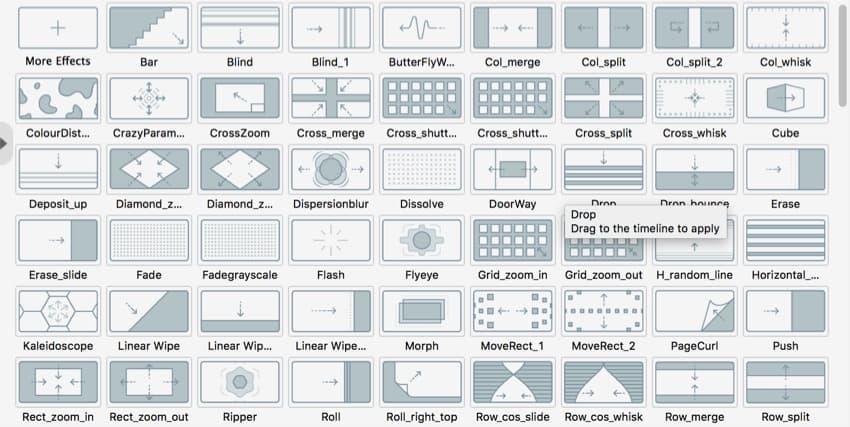
Transitions
Why settle for the boring Cross Dissolve when you transition between video clips? Filmora offers a lot more. iMovie only has 24 transitions while Filmora offers 37 just in the "Warp" category. Check out this screenshot of just a sample of the transitions in Filmora:
Overall
I have been using iMovie for years, loved it's simplified the interface and how easy it is to create videos. However, every time I make a video I get frustrated with the limitations.
Filmora does have some issues:
- I have found that it crashes more often than iMovie. Usually because of the length of the video.
- Exporting to YouTube doesn't always work from within the product, I have been saving the movie and then upload it to YouTube via Chrome.
- Takes a while to understand the text editor
- You have to pay to subscribe to download additional effects from the library. The nice thing is that its a flat rate, so your not paying per effect.
Despite these limitations, Filmora is a great product and I certainly recommend trying it out. They have a great team of support reps that show you some cool tips and tricks.
Download the Trial and see why 50,000,000 users love Filmora.
PermalinkTechSmith's Snagit Editor
Easy way to create tear like effects on a Mac.
TechSmith's Snagit Editor is a great editor to touch up screenshot images. It's popular because it has a lot of the tools you need without a steep learning curve on how to use them.
Here's a couple of feature highlights that make the Editor very cool to use:
Image Effects
One of the cool Snagit Editor effects is the Edges effect. You can quickly transform any image to look like it was torn out of a book:
Simple Steps to add a Torn Effect
- Take a screenshot, or drag drop an image into Snagit
- Click on the 'Effects' icon, located to the right above the Library bar
- Click on Edges
- Check out the quick effects for some examples.
- You can change the settings by clicking on the icon to the right of effect. Torn, Shark and Wave are the three types of edges that are available. In addition, you can change the size of the edge.
I like adding a drop shadow or a thin border to give the image a pop.
This is cool when you have a screenshot of a social media post, or an email screenshot and just want to dress it up a bit better. This is much easier than using Photoshop or Affinity Photo to touch up the image.
Grab Text
Did you know that you can grab the text in the screenshot? This is useful when you may want to include the text version of what you captured, for example, if a spec was in a PDF and you can't simply copy the text.
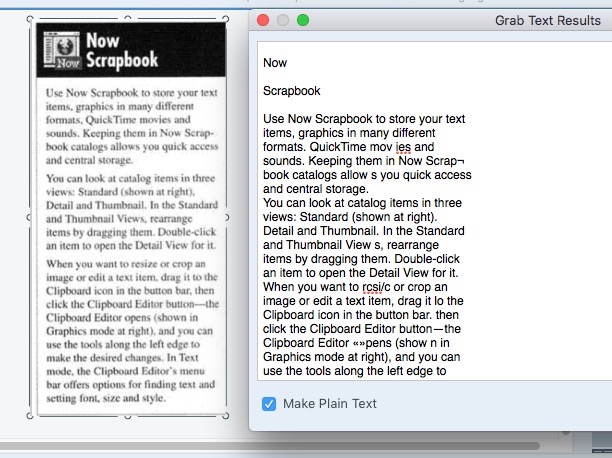
This shows how Snagit was able to grab the text from a screenshot
Simple Steps to Get the Text
- Take a screenshot, or drag drop an image into Snagit
- Under the 'Edit' menu select Grab Text, or simply remember the shortcut: Shift-Command-O
- Copy the text wherever you want!
This is useful if you want to include an ALT text in a blog posting, or if you want a description in Slack posts.
PermalinkLetters
Powerful Must Have Text Design Editor
Last week Belight Software released a new MacOS app call Letters. This is a cool free application that allows anyone to be creative.
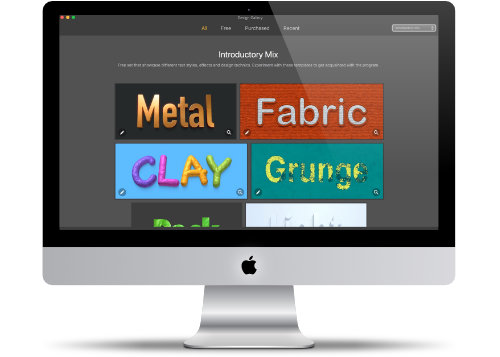
Letters is an application that transforms any letter or text into a professional looking graphic. You can choose from many styles and change the font/color and the 3D rotation. This application is great if you write blogs or want to add some creative text to your Slack Channel
 https://geo.itunes.apple.com/us/app/letters/id1233167730?mt=12&app=apps
Description from the Developer
Letters offers a multitude of text design templates easily customizable to your liking. Each text style is the result of long hours of professional design work on creating texture materials and photo objects, and carefully selecting proprietary fonts. Simply enter your text and voila! You get amazing graphics as a flattened image or a set of files with a background, a text object and various effects separated into several images.
Four Things I learned About Letters
- There are 50 Free Designs, and you can buy more designs that are categories in18 other sets where you buy individual designs or all designs in the set.
- The most expensive set is the Old School Set - which has 16 designs.
- The default size is 1100px by 512px - which is similar specs for the best size to post on Twitter (1024 x 576). There are presets for A4, US Letter, Facebook Cover, Facebook Image Post, Twitter Header, YouTube Channel Art, YouTube Thumbnail
- You can open up multiple designs and copy the text designs so that you can have different styles
Sample Designs


Download Letters
You can get Letters from the Apple Store.
PermalinkAladdin StuffIt
Stuffit the Best Compression Software for Macintosh
Aladdin StuffIt is an application that compresses files. Stuffit became popular in the mid-1990s because of the need to store large data on floppy disks and CDs.
Stuffit has changed hands over the years, and is now owned by Smith Micro.
I purchased the application in the 1990s, but never felt the need to update it. Once I was storing data onto CDs and DVDs I didn't encounter any max storage issues.
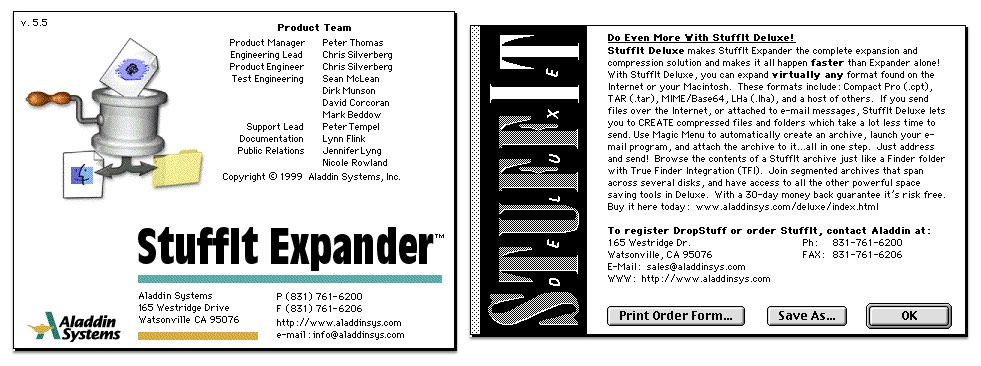
Classic description
Here's the description of Stuffit from the Educorp Catalog from 1990:
Technology Got the Better of the Application
Over the past few years the application had lost its effectiveness. Thanks to cloud services such as Dropbox and Google Drive:
- It's easier to store large documents - no longer do users have to worry about the limited space of disks, CDs or DVDs.
- Sharing files are super easy, simply upload a file to DropBox right click and get a shareable link to send in an email or in Slack.
- Cloud services allow users to encrypt files and offer monitoring services, something that Stuffit didn't provide.
- Storage has gotten cheaper. You can get a good quality 6TB USB drive for about $120. Apple Cloud goes for about $2.99 a month for 200 GB (which is about 3 DVDs)
Still Around
You can still buy Stuffit from SmithMicro for $19.95. The cool feature is the new StuffIt Destinations Toolbar, where you can drag and drop your files to various destinations.
Stuffit still is an important app because of encryption and storage space. For example, you can encrypt project folders that you don't want to end up in file search results from Spotlight or on shared space in Google Drive or Dropbox. Since Spotlight won't index the files,
Long Waiting Time
One of my all-time favorite screenshots:
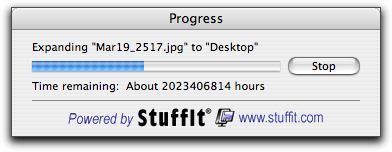
That comes to 84,308,617 days or 2,309.82 Centuries. The Mar19_2517.jpg file should definitely be worth the wait.
PermalinkClassic Macintosh: Sherlock
Remembering Sherlock
Apple introduces Sherlock with Macintosh OS 8.0 on July 26, 1997. There were several versions of Sherlock and the software was discontinued in Mac OX 10.4 in favor of Spotlight.
Sherlock was never ported as a Universal Binary. So when Apple killed off Rosetta, it meant the end of Sherlock.
What made Sherlock neat was the ability to select the source of your search query so you know where your searching. It was a simple single source to find anything you want in one dialog box.
Sherlock Screen Shots
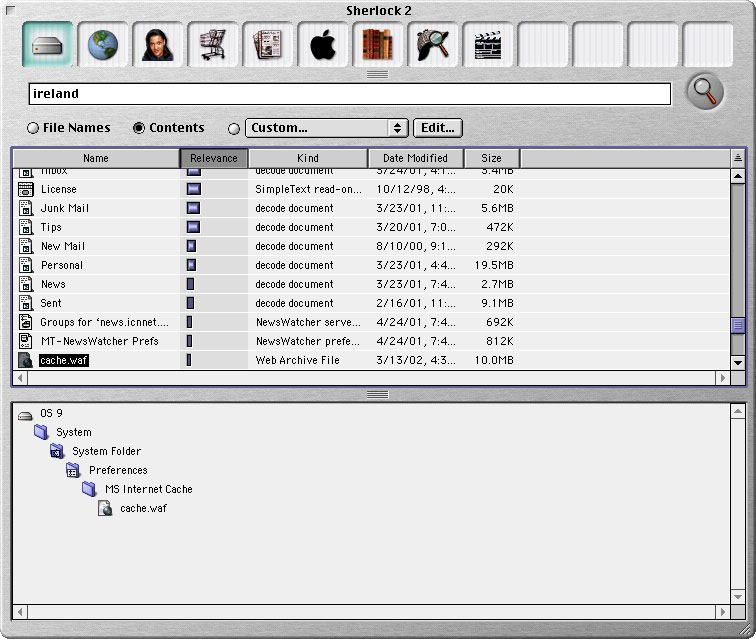

This is a great snapshot of internet search engine history. Notice that Google isn't listed? Know why? They were not a big player in 1999/2000.
Running Sherlock Today
When I tried to search for some of the internet sites, Sherlock crashed. I wasn't able to get any successful internet search.
I wasn't surprised by this, as I am sure most of the sites had removed the legacy code years ago.
PermalinkBBEdit Anchor tag Changes
A look at how BBEdit Anchor Tag has changed
I have been using BBEdit for many years. The earliest copy that I could find was BBEdit 4.3. Recently, I was looking through my applications on my Macintosh Powerbook G3 and found an old copy of BBEdit 6.0. I thought it would be interesting to see how the Anchor tag has changed over the years.
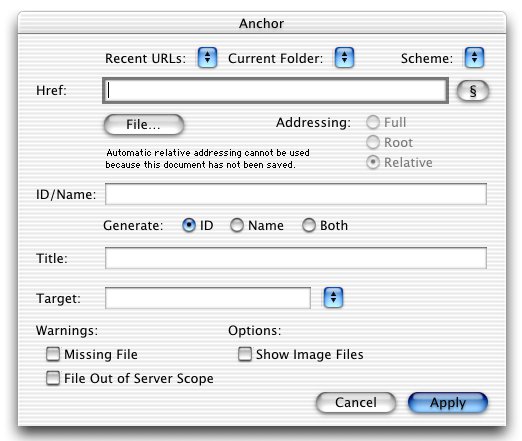
BBEdit 6.01 for OS X
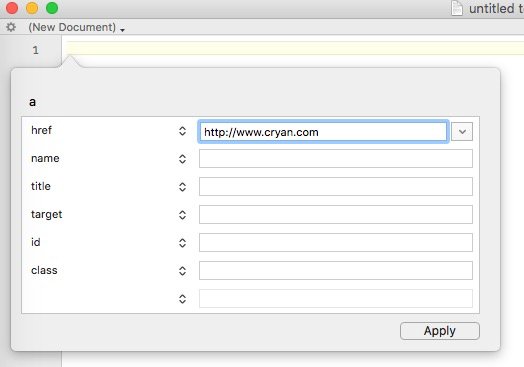
BBEdit 12.1.5 (Latest Release)
Things to Note
- The dialog box is much cleaner in BBEdit 12.1.5
- In BBEdit 6.01 the scheme include http,https,ftp,mailto,news,telnet,finger,gopher,wais and whois
- in BBEdit 10+, doesn't save recent URLs
- In BBEdit 6.01, The strange symbol next to href field is to enter the document selection in the text field
- in BBEdit 10+, you can change the anchor items to whatever you want.
If this, than That
If this, then that was a Classic OS 9 game
A classic shareware game on Macintosh OS 9, was "If this, than That" by Mike Anderson. The game was created on July 11, 1993, and distributed via shareware.
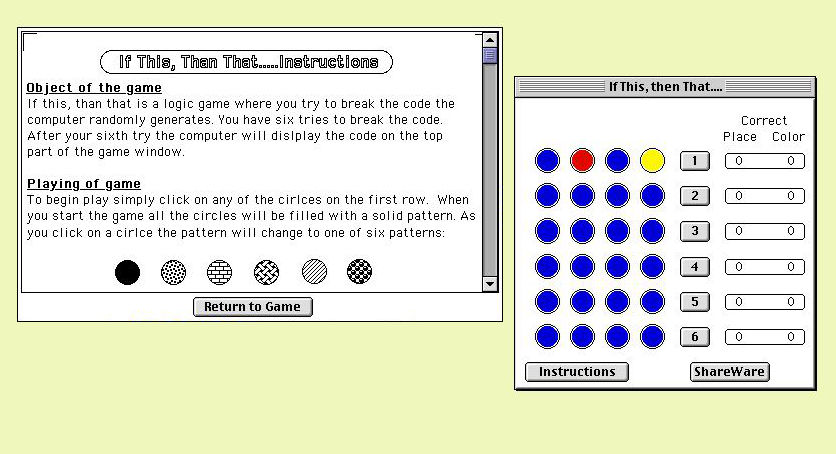
Object of the game
If this, than that, is a logic game where you try to break the code the computer randomly generates. You have six tries to break the code. After your sixth try, the computer will display the code on the top part of the game.
Playing the Game, again
It was fun playing the game on my Macintosh PowerBook G3 and figuring out the puzzle. The game is pretty hard to use at first since you need to figure out the correct pattern. You were never told which pattern was correct and where it's correct. To be successful at this game takes a lot of logic skills.
This would make a great iOS game. I checked and couldn't find one that worked the same way. If you know of one, let me know in the comments below.
PermalinkApple at the Smithsonian
See the Orginal Apple I at the Smithsonian
There are more than 200 Apple Computer items in the American History section of the Smithsonian in Washington D.C. Not all items are displayed at once. Along with all the other computer exhibited there are two iconic items are always displayed - the original Apple and the Macintosh.
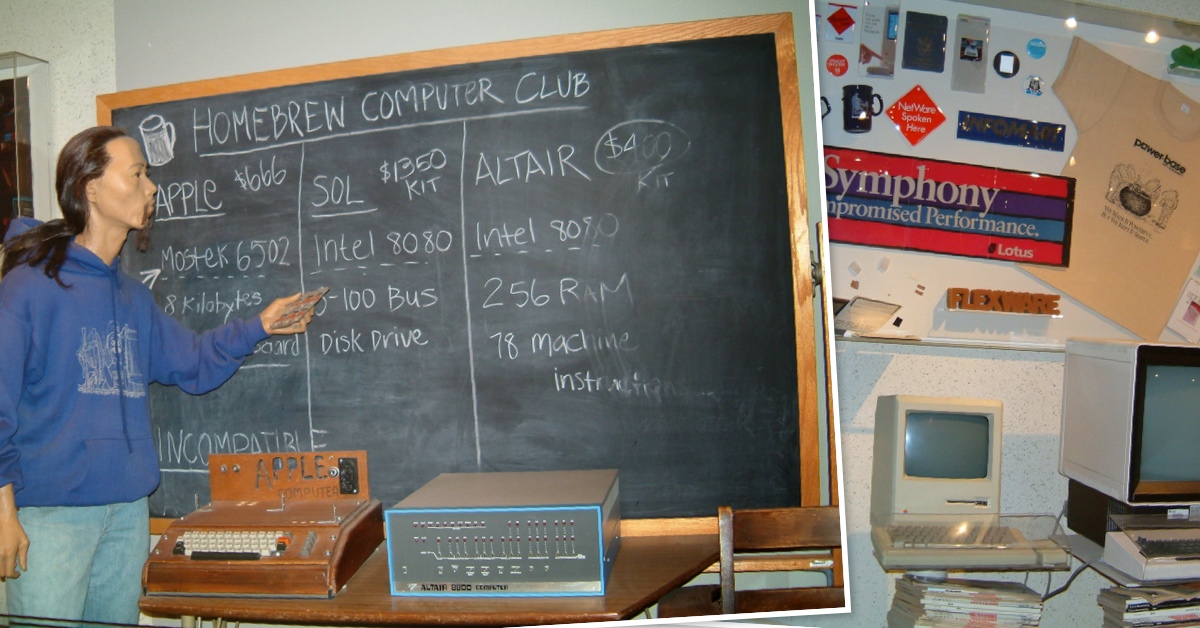
Homebrew Club Display
Right behind the original Apple Computer is a blackboard that showcases several computers that were sold at the HomeBrew Club. This club is where people would go to learn about the latest computers and buy build-your-own computers.
One of the interesting things is the price of the Apple Computer - $666. At first, I thought this was a joke someone at the Smithsonian was playing. Turns out that it was the original price of the Apple Computer at the Homebrew club. The actual price was $666.66
Wozniak reportedly chose the price for two reasons: it was a markup of a third on the parts' cost and because he "liked repeating digits"
In 2018, that $666.66 computer would be worth $2,994.49. Today, a top of the line iMac computer - Retina 5K Display 3.8GHz Processor 2TB Storage cost $2,299.0
Today anyone having one of the original wood Apple Computers has a $195,433 computer - there were 200 models sold between July 1976 and September 1977.
Finding the Apple Computer at the Smithsonian
The National Museum of American History is located on the National Mall, Constitution Avenue, N.W., between 12th and 14th Streets, Washington, D.C.
The Apple Computers are in the Transportation and Technology section on the 1st Floor, which is one floor down if you enter via the National Mall. The computers are in the "Lightning a Revolution" room.
PermalinkMagnet for MacOS
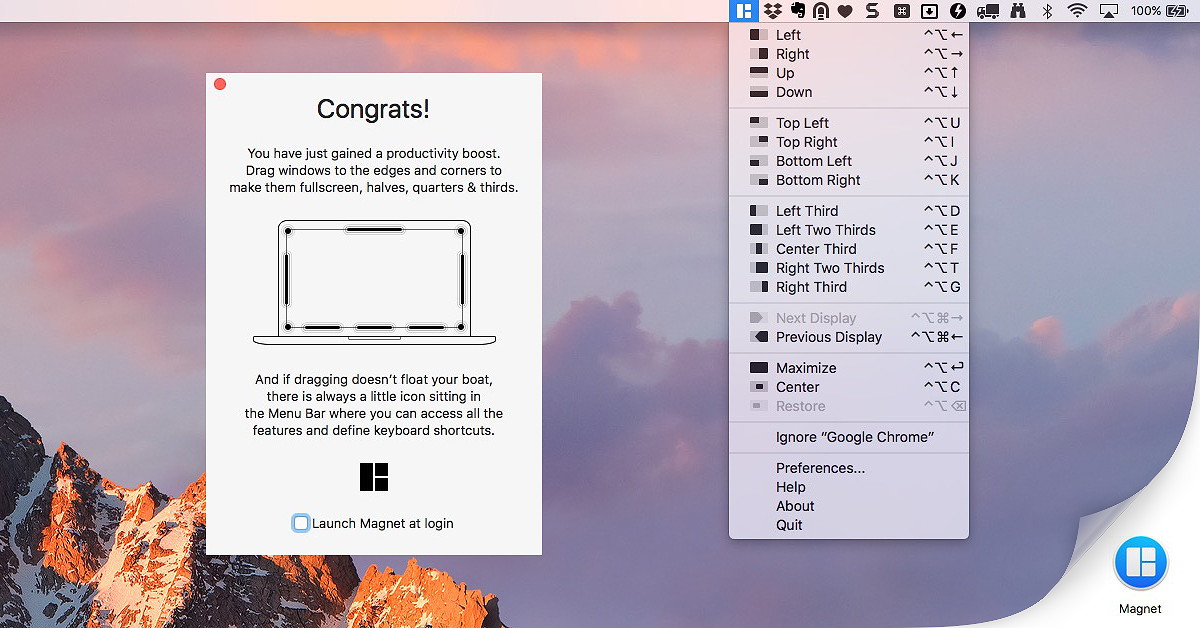
Magnet App is an awesome productivity tool for multi window management
Magnet is a cool utility that allows you to neatly organized all your application windows on your screen. This works great between multiple applications such as having Mail and Chrome open at the same time.
The application is a huge hit with MacOS users as it has a five-star rating with 12,517 reviews. Probably the highest rated app in the App Store.
Six Things I have Learned about Magnet
The application is a bit tricky to work with multiple displays. There were times when I tried to align right and the window appears on the right screen.
You can exclude the functionality from working in any application via settings
The Keyboard shortcuts are tricky to remember, but they can be changed to whatever you want.
The screen activation point for 'Maximize' is a bit too sensitive as I have accidentally triggered it. It would be nice if there was a way to disable that trigger point.
I found the left/right alignment works great with testing websites in Chrome and Firefox.
The icons in the drop-down menu in the menu bar helps me figure out what command I am looking for.
Paid Application
Magnet cost $.99 and well worth the price. If you do any type of multitasking between applications, I think you'll find Magnet useful and worth the investment.
There is no trial for this application. To download the app, visit the Apple App Store. There's additional information on their website.
PermalinkAbout
A Mac veteran since 1989, I'm here to share my experience with tips and tricks every Friday. Witnessing the evolution of Mac software and hardware firsthand, I've gained a deep understanding of how these machines work and can help you troubleshoot any issues that may come up.
Check out all the blog posts.
Blog Schedule
| Saturday | Internet Tools |
| Sunday | Open Topic |
| Monday | Media Monday |
| Tuesday | QA |
| Wednesday | Veed |
| Thursday | Business |
| Friday | Macintosh |
Other Posts
- Screen Capture with Retina Display
- Custom Snagit Template
- Reset Preview Icons
- Keyboard Maestro with Slack
- New iPhone 14 Max
- USB Drives Lifespan
- GarageBand: A Podcasting Tool Worth Exploring
- Filmora Audio Key Frame Marker
- Gif Brewery
- Apple Magic Mouse Problems
- The Grouch
- Filling Forms using Apple Preview
- PhotoScape Color Picker
- Smart Converter Pro
- How to Safely Clean Up Your Final Cut Pro Workflow