
Why the 2019 iMac 5K is Still Worth Talking About
Still my Primary Computer
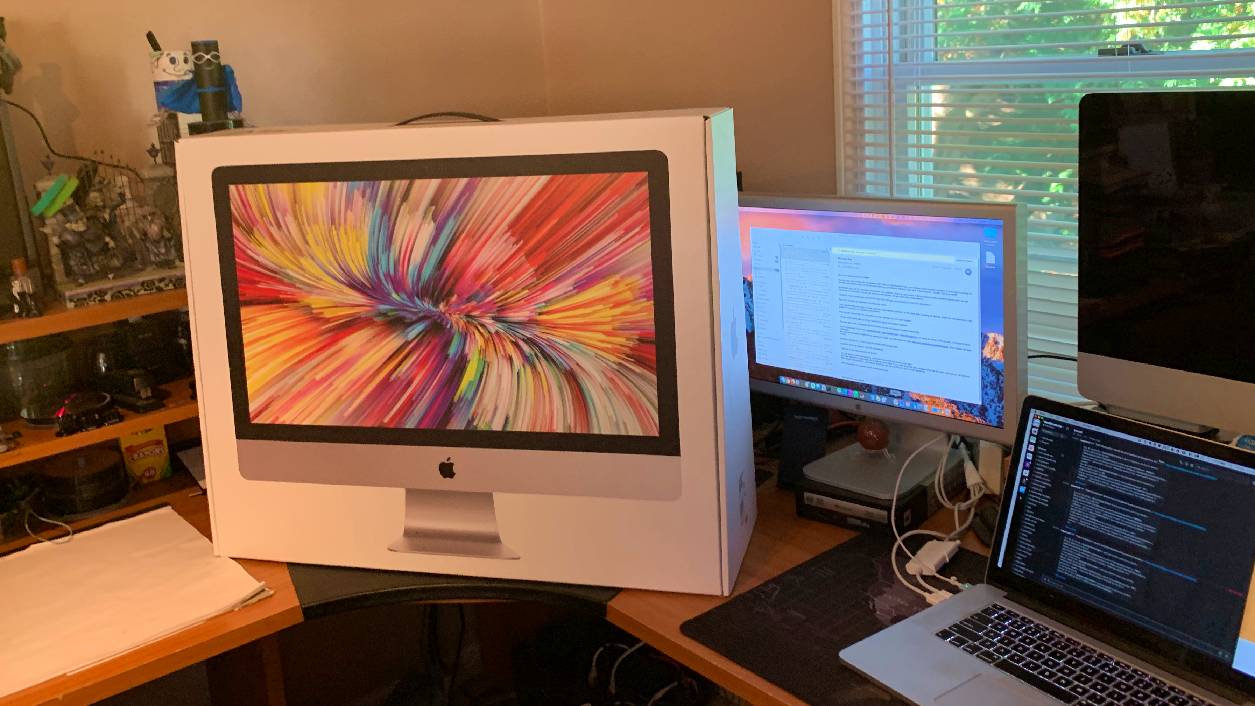
The iMac Retina 5K, 27-inch (2019) might not be Apple's latest all-in-one, but it still holds its own. It was one of the last Intel-based iMacs, and for some users, that makes it special. Let's dive into some fun facts about this powerhouse Mac!
User-Upgradeable RAM - A Dying Feature
One of the best things about the 2019 iMac is its user-accessible RAM slot. Unlike today's sealed Apple Silicon Macs, this model lets you upgrade the RAM yourself. Officially, Apple supports up to 64GB, but tech enthusiasts have successfully installed 128GB. That's a serious boost for video editors, developers, and anyone running resource-heavy tasks.
That Gorgeous 5K Display
The Retina 5K display (5120×2880 resolution) is still stunning. It supports P3 wide color gamut and True Tone, making it a favorite for designers and video editors. For years, people considered it the gold standard for built-in Mac displays. In fact, it was so good that many professionals stuck with this iMac instead of shelling out thousands for an external 5K or 6K monitor.
The iMac That Outlived the Mac Pro
When Apple discontinued the iMac Pro (2017) in 2021, many professionals looked to the 2019 iMac as a worthy replacement. It had an option for a Core i9 processor, which outperformed some base-level 2019 Mac Pro configurations in certain single-core tasks. Not bad for an all-in-one!
Boot Camp and Virtualization Still Matter
Unlike Apple Silicon Macs, this iMac still supports Boot Camp, meaning you can run Windows natively. It's also a great machine for running older versions of macOS, making it useful for developers and legacy software users.
The T2 Chip - A Blessing and a Curse
Apple's T2 security chip improved SSD encryption, microphone privacy, and camera processing. It also enabled Hey Siri without an iPhone nearby. But it came with a trade-off - it made some repairs harder and added restrictions on downgrading macOS.
Why People Still Love This iMac in 202
Some people still prefer this model over newer Macs. Why?
- It supports Intel-based apps without emulation.
- You can boot from external drives more easily.
- It's still one of the best-looking all-in-one Macs ever made.
The 2019 iMac 5K isn't just a relic of the past - it's a Mac with a lasting legacy. If you still have one, you've got a piece of Apple history that's worth holding onto!
PermalinkMaster Ocenaudio Filters: Unlock the Power of Professional Audio Editing
Explore clear and concise descriptions of Ocenaudio’s key filters to enhance your audio editing skills and simplify your workflow.
Ocenaudio offers a wide range of filters to enhance audio, but the variety can feel overwhelming. To simplify things, I’ve provided descriptions of the major filters to clarify their functionality
Here are brief descriptions for each of the Oceanaudio audio filters:
General Filters in Ocenaudio
Lowpass Filter
Use the Lowpass Filter to remove high-frequency sounds, allowing only lower frequencies to pass through. It's ideal for reducing hiss or other high-pitched noise in recordings.Highpass Filter
The Highpass Filter removes low-frequency sounds, permitting higher frequencies to pass through. It's commonly used to reduce rumble or eliminate unwanted bass noise.Bandpass Filter
The Bandpass Filter isolates a specific range of frequencies while cutting both high and low frequencies outside that range. This is useful for focusing on particular frequency bands, like vocals or instruments.Bandstop Filter
The Bandstop Filter removes a specific frequency range while allowing frequencies outside that range to pass through. It's helpful for eliminating specific noise, such as hums or feedback.Apple Bandpass Filter
Similar to the Bandpass Filter but optimized with Apple's unique algorithms, it focuses on specific frequencies for a more refined and efficient result.Apple Filter
A general-purpose filter from Apple's audio suite that allows for customizable frequency adjustments. It's versatile for enhancing or attenuating frequencies as needed.Apple Highpass Filter
Removes low-frequency noise with precision using Apple's highpass technology. Perfect for eliminating bass-heavy interference while retaining clarity in higher frequencies.Apple High Shelf Filter
Boosts or attenuates high frequencies above a certain threshold. This filter is excellent for brightening audio or reducing harshness in higher tones.Apple Lowpass Filter
Filters out high frequencies using Apple's proprietary algorithms, ideal for smoothing recordings or reducing shrill sounds.Apple Low Shelf Filter
Boosts or attenuates low frequencies below a set point, making it useful for enhancing bass or minimizing muddiness in recordings.
Equalization Filters in Ocenaudio
11-Band Graphic Equalizer
Offers control over 11 frequency bands, allowing you to adjust specific ranges to enhance or reduce particular tones. It's a simple and effective way to shape your audio for general corrections or creative effects.31-Band Graphic Equalizer
Provides precise control over 31 frequency bands, ideal for fine-tuning audio across a wide spectrum. This is perfect for detailed equalization or addressing complex audio imbalances.Apple Graphic Equalizer
A user-friendly equalizer from Apple that adjusts multiple frequency bands for overall tonal balance. Use it for quick and effective audio enhancements or corrections.Apple N-Band Equalizer
An advanced equalizer offering customizable frequency bands, giving you precise control over specific audio frequencies. It's great for tailoring audio to your exact preferences or addressing detailed sound issues.Apple Parametric Equalizer
Allows targeted adjustments to specific frequencies with control over bandwidth and gain. This filter is ideal for surgical edits, such as removing problem frequencies or enhancing specific audio elements.
Dynamics Processing Audio Filters in Ocenaudio
Compressor
Reduces the dynamic range by lowering the volume of loud sounds while keeping quieter sounds unaffected. This is useful for achieving a balanced and polished sound, especially in vocal or music tracks.Expander
Increases the dynamic range by reducing the volume of quiet sounds below a set threshold. It's ideal for enhancing clarity and reducing unwanted low-level noise.Limiter
Ensures audio does not exceed a specified volume level, preventing distortion or clipping. It's essential for mastering and creating audio with consistent loudness.Noise Gate
Silences audio below a certain threshold, effectively removing background noise or hum. This is great for cleaning up recordings with unwanted ambient sounds.Apple Dynamics Processor
A versatile tool for managing dynamics, combining compression, expansion, and limiting features. Use it for precise control over audio levels and tonal balance.Apple Peak Limiter
Prevents audio peaks from exceeding a defined limit, ensuring clean and distortion-free output. It's commonly used in mastering to control sudden loud spikes.Apple Multiband Compressor
Divides the audio into frequency bands and applies compression to each band independently. This allows for detailed dynamic control, making it ideal for complex audio mixes or mastering.
Special Audio Filters in Ocenaudio
Apply Quantization
Reduces the bit depth of audio, creating a lo-fi effect or preparing audio for specific formats. It's useful for creative sound design or adapting audio for digital applications.Add Random Noise
Introduces random noise to your audio, often for testing, masking other sounds, or creating special effects. It's helpful in simulating certain acoustic environments or adding texture.Apple Distortion
Applies distortion to the audio, creating an overdriven or gritty sound. It's commonly used in music production for creative effects or emphasizing certain frequencies.Apple Net Send
Sends the audio stream to another device or software via a network, useful for real-time processing or collaborative work. It's ideal for live setups or remote audio workflows.Apple AAC Encoder Round Trip
Simulates the compression and decompression of the AAC audio codec. This is helpful for previewing how audio will sound in AAC format without permanent conversion.Apple Roger Beep
Adds a tone (beep) at the end of a transmission, often used in radio communications. This can be applied for authenticity in simulated broadcasts or fun effects.Apple Sound Isolation
Isolates specific sounds or reduces background noise to enhance the clarity of a target audio source. It's excellent for cleaning up recordings with significant ambient interference.
Adding Custom Songs and Clips to the Apple Loop Library
Enhance Your Music Production
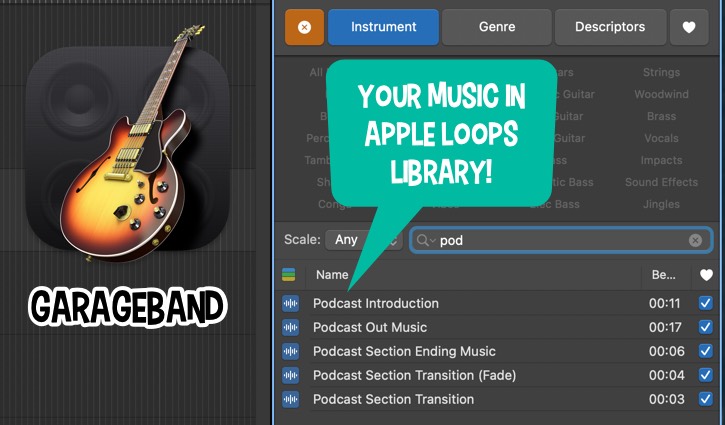
Hello, fellow Mac enthusiasts and music maestros! Welcome back to another Friday edition of Macintosh Blog, your go-to source for all things Apple and music production. Today, we're diving into a fantastic feature that can supercharge your creative workflow: Adding Your Own Songs and Clips to the Apple Loop Library in GarageBand.
Whether you're a budding producer or a seasoned pro, having a personalized loop library can make your projects more unique and streamline your creative process. Let's walk through the simple steps to enrich your Apple Loop Library with your custom creations.
Why Customize Your Apple Loop Library?
Before we get into the how, let's quickly touch on the why. Apple Loop Library is a treasure trove of pre-made loops and samples that can be seamlessly integrated into your music projects. By adding your own clips:
- Personalization: Tailor your library to match your unique sound and style.
- Efficiency: Quickly access your favorite sounds without hunting through countless files.
- Organization: Keep your workspace tidy by categorizing your loops effectively.
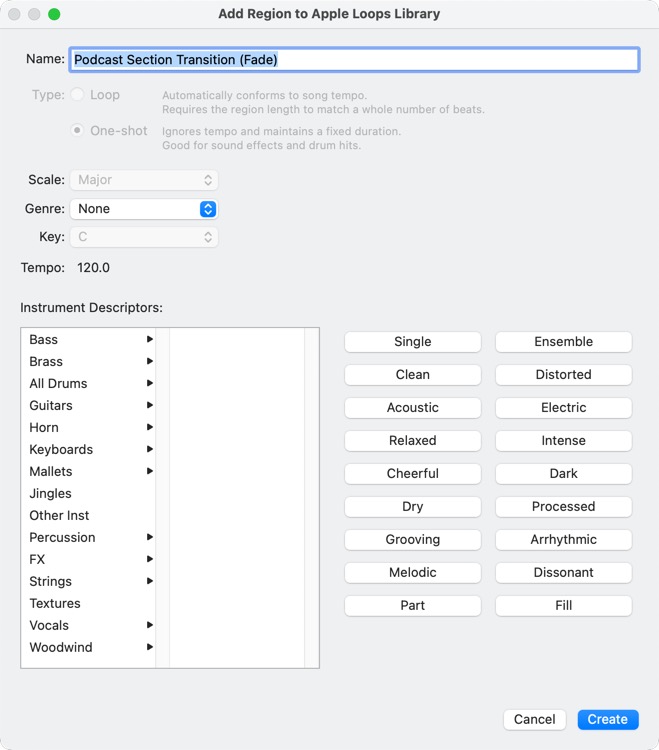
Step-by-Step Guide to Adding Clips to Apple Loop Library
1. Create or Select Your Clip
Start by opening your preferred music production software - GarageBand, Logic Pro, or any other compatible application. Create a new project or open an existing one and select the song or clip you want to add to your Apple Loop Library. Ensure that the clip is well-mixed and mastered to maintain quality across different projects.
2. Drag the Clip to the Apple Loop Section
Once your clip is ready:
- Locate the Timeline: This is where your tracks are laid out.
- Select the Clip: Click on the song or specific segment you wish to save as a loop.
- Drag and Drop: Click and drag the selected clip from the timeline directly into the Apple Loop Library section. This action initiates the process of adding your custom loop to the library.
3. Name Your Loop Effectively
Naming your loops thoughtfully is crucial for easy retrieval later. Follow these tips:
- Be Descriptive: Use names that describe the clip's mood, instrument, tempo, or key (e.g., "Sunny Acoustic Guitar - 120BPM - C Major").
- Consistency: Maintain a consistent naming convention to keep your library organized.
- Avoid Generic Names: Steer clear of vague names like "Loop1" or "Track A" which can make searching tedious.
4. Categorize Your Loop
After naming, categorize your loop to fit seamlessly within your existing library structure:
- Genre: Rock, Pop, Jazz, Electronic, etc.
- Instrument: Guitar, Drums, Synth, Vocals, etc.
- Mood/Style: Chill, Energetic, Dark, Uplifting, etc.
Proper categorization ensures that you can quickly locate the perfect loop during your creative sessions.
5. Finalize and Save
Once named and categorized:
- Review: Play back the loop to ensure it sounds as intended.
- Save: Confirm the addition to your Apple Loop Library. Your custom loop is now ready to be accessed in any of your future projects.
Tips for an Organized Apple Loop Library
- Regular Maintenance: Periodically review and update your library to remove unused loops and add new ones.
- Backup: Keep a backup of your custom loops to prevent data loss.
- Tagging: Utilize tags or keywords for even quicker searchability within your library.
- Version Control: If you frequently update a loop, consider versioning (e.g., "Bassline V1", "Bassline V2") to keep track of changes.
Conclusion
Adding your own songs and clips to the Apple Loop Library is a straightforward process that can significantly enhance your music production workflow. By following these simple steps - dragging your clip to the library, naming it thoughtfully, and categorizing effectively - you can build a personalized library that reflects your unique sound and accelerates your creative process.
Stay tuned for more tips and tricks every Friday here at Macintosh Melody. Until next time, keep creating and harmonizing with your Mac!
PermalinkHow to Save and Add Your Own Preset Templates in Pixelmator Pro
Simple Steps to make life easier
![]()
Pixelmator Pro offers a powerful feature that allows you to save your own preset templates, making it easier to start new projects with consistent settings. Whether you frequently create blog headers, social media graphics, or specific print sizes, saving presets can streamline your workflow and ensure uniformity across your designs. Here's how you can take advantage of this feature:
Saving a New Preset Template
Open Pixelmator Pro: Launch Pixelmator Pro and create a new document.
Set Your Document Parameters: Choose the image orientation, size, resolution, and color depth that you want to save as a preset. These settings should match your typical use case, such as a standard blog header size or a social media post size.
Access the Preset Menu: In the "All Templates" window, located usually when you create a new document, look for the Preset dropdown menu.
Create a New Preset: Click on the down arrow next to the Preset dropdown menu, then select the option to add a new preset ('+' symbol).
Name Your Preset: Give your preset a descriptive name that helps you identify its purpose easily, such as "Blog Header Format" or "Social Media Post Size."
Save Your Preset: After naming your preset, confirm or make any other changes you may need and click "Save" or "OK" to add it to your presets list.
Selecting a Previously Saved Preset
Open Pixelmator Pro: Launch Pixelmator Pro and create a new document.
Access Your Presets: In the "All Templates" window, locate the Preset dropdown menu.
Choose "My Templates": Click on the arrow next to the Preset dropdown menu, then select "My Templates" to view a list of all presets you've saved.
Select Your Preset: Scroll through the list of saved presets and click on the one you wish to use. Pixelmator Pro will automatically apply the saved settings to your current document.
Benefits of Using Preset Templates
- Efficiency: Save time by quickly applying predefined settings for common project types.
- Consistency: Ensure that all your designs meet specific size and resolution requirements.
- Customization: Tailor presets to your exact needs, such as specific color depths or orientations.
By utilizing Pixelmator Pro's preset templates feature, you can maintain consistency in your designs while speeding up your workflow. Whether you're a graphic designer, blogger, or social media manager, saving and using presets can significantly enhance your productivity.
PermalinkWhat is the Instruments Application in Xcode?
Should You Delete this Application?

If you've browsed through the applications on your Mac, you might have stumbled upon an app called Instruments nestled within the Xcode package. For many general Macintosh users, this tool might seem unfamiliar or even unnecessary. But before you decide to remove it, let's explore what it is, its purpose, and whether it's something you should keep.
What is Instruments?
Instruments is a robust performance analysis and testing tool included with Xcode, Apple's development environment for creating macOS, iOS, watchOS, and tvOS applications. While its primary users are software developers, the app's capabilities are impressive, even for those curious about how their Mac operates under the hood.
The tool is designed to profile apps, processes, and devices, helping developers optimize performance and identify issues like memory leaks, high CPU usage, or unclosed network connections.
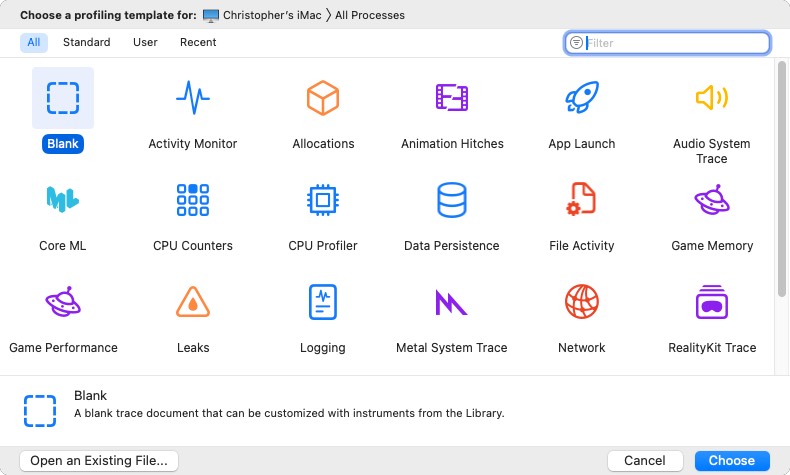
Key Features of Instruments:
- Profiling Applications: It traces the behavior of apps and gathers data over time.
- Comprehensive Analysis: Instruments provides detailed insights into memory usage, CPU activity, disk I/O, and more.
- Customizable Tools: Specialized tools, called "instruments," allow users to focus on specific areas, such as graphics rendering or network activity.
- Side-by-Side Data Comparison: Developers can view various types of data simultaneously, making it easier to identify issues caused by interactions between different components.
Is Instruments Useful for General Mac Users?
For the average Mac user, Instruments may not have an immediate use. Its focus is squarely on software development and optimization, tasks that most non-developers don't engage with. However, if you're curious about your system's performance or want to understand how resource-intensive an app is, Instruments could offer insights.
Should You Remove It?
If you're not a developer and have no plans to profile apps or processes, you might wonder whether you should delete Instruments to free up space. Here are some considerations:
- Part of Xcode: Instruments is bundled with Xcode, which itself is a large application. If you're not using Xcode, you could consider uninstalling Xcode entirely instead of just Instruments.
- Disk Space: Instruments alone doesn't consume a significant amount of space. Removing Xcode as a whole will have a more noticeable impact.
- Reinstallable: If you ever need it, you can reinstall Xcode (and Instruments) from the Mac App Store.
How to Uninstall Xcode (and Instruments)
If you decide to remove Xcode, which includes Instruments, here's how to do it:
- Via Finder:
- Navigate to the Applications folder.
- Drag Xcode to the Trash and empty it.
- Cleanup Residual Files:
Open Terminal and run:
sudo rm -rf ~/Library/Developer
sudo rm -rf /Library/Developer
These commands remove additional files associated with Xcode.
Final Thoughts
Instruments is a powerful tool for developers but holds little utility for the average user. If you're not working on app development and need extra disk space, consider removing Xcode (and with it, Instruments). However, if you're intrigued by performance analysis and want to explore what makes your Mac tick, Instruments might be worth a closer look.
For developers, incorporating Instruments early in your workflow can save time and help create smoother, more efficient apps. For everyone else, it's another reminder of the incredible depth of tools macOS offers to its users.
PermalinkEnd of Year Recap: Top Macintosh Friday Posts of 2024
Lots of Good Content this Year
As we bid farewell to another year, it's time to look back at some of the standout posts from our Friday series here at Macintosh. Here are the top five articles that caught your attention and were worth revisiting:
1. Day One - June 28, 2024
This post explored the intricacies of using Day One, one of the most beloved journaling apps for Mac users. We delved into how you can enrich your daily entries with multimedia, ensuring your memories are preserved in detail. If you're looking to start a digital journal or enhance your existing one, this post is a must-read.
2. Art Text 4: Photo Colorize - March 22, 2024
In this feature, we took a deep dive into Art Text 4's latest feature - Photo Colorize. This tool was revolutionary for creatives looking to add color to black and white photos or to enhance their designs with a touch of vintage. The tutorial included step-by-step guides to get the most out of this powerful feature.
3. How to Clean Up Your iCloud Drive - August 23, 2024
With cloud storage becoming more integral, managing your iCloud Drive effectively is crucial. This post provided practical advice on decluttering your iCloud, optimizing space, and ensuring your data is both secure and easily accessible. It's a perennial favorite for those looking to manage their digital life more efficiently.
4. Wondershare Filmora 13 - July 26, 2024
Video editing software is a playground for creativity, and Filmora 13 stood out with its user-friendly interface and robust features. Our review covered everything from basic edits to advanced techniques, helping both novices and pros to harness the full potential of their videos.
5. Xcode Simulator - April 5, 2024
For developers, the Xcode Simulator is an essential tool for testing apps across different iOS devices without needing physical hardware. This post was particularly useful for those new to iOS development, offering insights into how to use the simulator effectively for debugging and testing.
As we look forward to another year of innovation and exploration in the world of Macintosh, I thank you for being part of this journey. Here's to more insightful posts, helpful tips, and engaging tech discussions in 2025. Happy New Year, and keep your Mac running smoothly!
Feel free to revisit these posts for a touch of inspiration or to catch up on any missed gems. Let's continue to explore, learn, and grow together in the Macintosh community. Enjoy the rest of your holidays!
PermalinkGarageBand: A Podcasting Tool Worth Exploring
Things That I Learned
For years, GarageBand sat on my Mac, largely untouched. Recently, I decided to dive into it to create my podcasts, and I was pleasantly surprised by its capabilities. GarageBand has long been celebrated as an easy-to-use tool for music production, but how does it stack up for podcasting? Here are my findings.
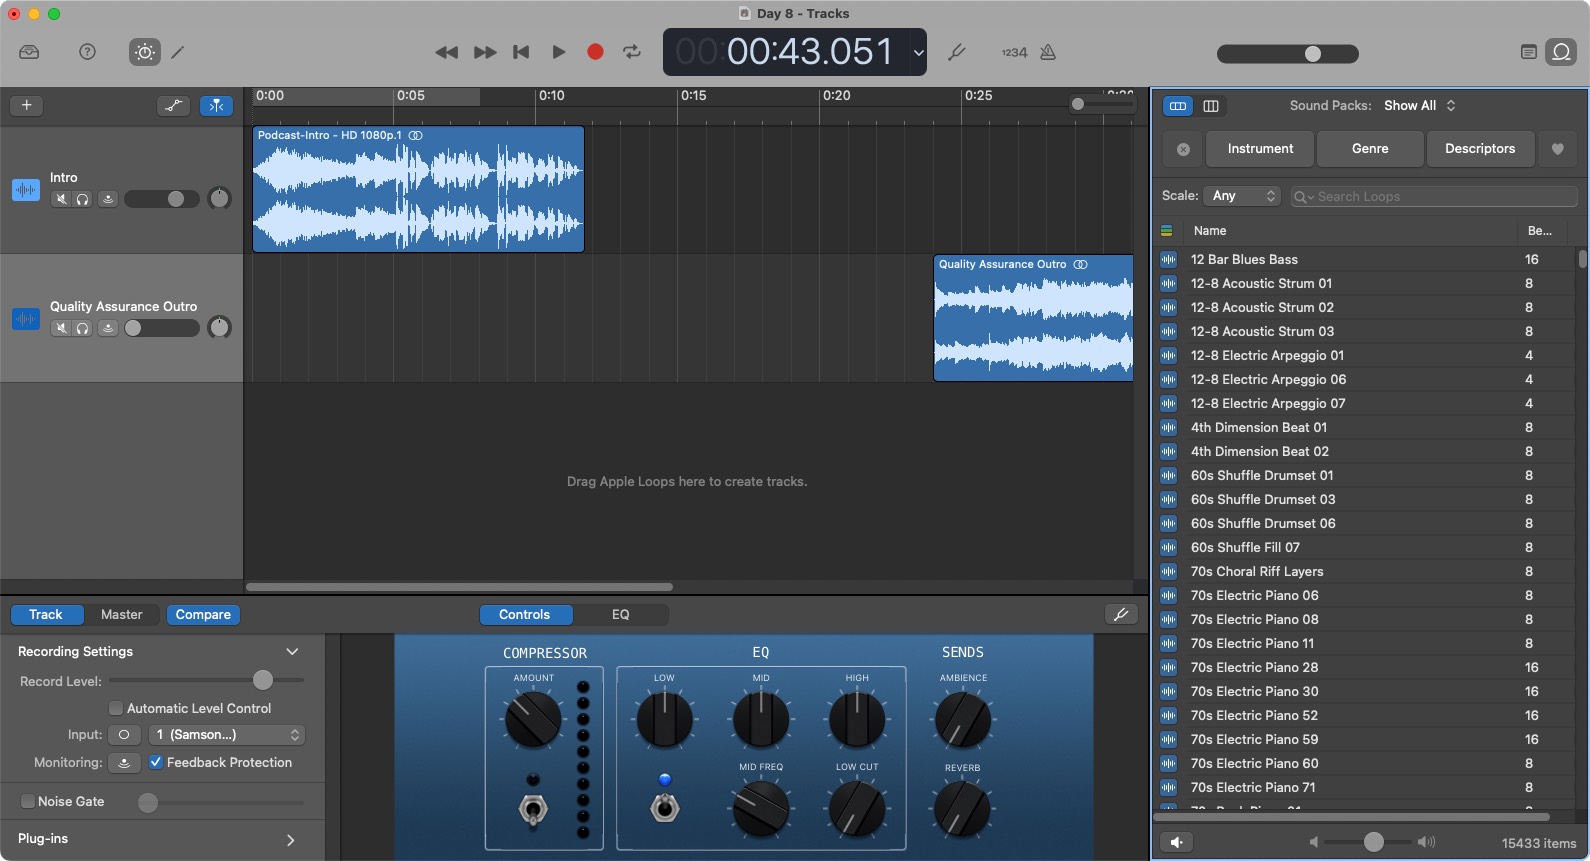
Three Features I Loved
Voice Changing Effects GarageBand offers a range of voice effects that can add personality and flair to your podcast. Whether you're creating a narrative with different characters or just want to tweak your tone for a professional edge, these tools are both fun and functional.
Loop Library The built-in Loop Library is a treasure trove of background music and sound effects. Adding the right music can significantly enhance the mood and quality of your podcast. GarageBand makes it easy to audition and integrate these elements seamlessly. There are 15,433 items - surely there's something here that I could use.
Audio Recording Control Recording audio in GarageBand is a breeze, and the level of control it offers surpasses that of tools like Audacity. You can fine-tune your recordings with precision, ensuring your podcast sounds polished and professional.
Three Features That Frustrated Me
Fading Audio A simple fade-in or fade-out requires adding keyframes manually. While this offers flexibility, it's tedious for quick edits. A dedicated fade tool would be a welcome addition.
No Linked Audio Clips Editing becomes cumbersome when you can't link audio clips. Splitting and rearranging sections often leaves gaps, forcing you to manually realign multiple tracks - a tedious process, especially with longer clips.
Limited Audio Effects Compared to Final Cut Pro's 117 audio effects, GarageBand's 25 feels limiting, especially if you're seeking creative versatility. Outside of the voice-changing features, the options are somewhat basic.
Final Thoughts
GarageBand is a solid starting point for podcast creation, offering an intuitive interface and some great features for free. The Loop Library, in particular, is a standout feature that I'll continue to use, even if I migrate my podcast production to other platforms.
That said, for those who crave more advanced editing capabilities and effects, Final Cut Pro may be a better choice. It offers greater flexibility and a broader array of tools tailored for both video and audio projects. Still, GarageBand remains a fantastic option for beginners and those who value simplicity.
PermalinkExplore GarageBand's Vocal Effects: 25 Unique Voice Options for Creative Audio Production
From 60s-inspired tones to experimental vocal transformations, discover how to enhance your tracks with GarageBand’s versatile library of vocal effects.

GarageBand's vocal effects library is a treasure trove of tools designed to take your audio production to the next level. Whether you're recreating the iconic sounds of the 60s, experimenting with futuristic tones, or simply fine-tuning your voice for narration or singing, these effects offer something for every creative vision. From classic vocal treatments like "Bright Vocal" and "Tube Vocal" to playful options like "Helium Vocal" and "Monster Vocal," the possibilities are virtually endless. Each effect adds its unique character, helping you craft a sound that resonates with your audience.
With so many options at your fingertips, the hardest part is deciding where to start. This blog breaks down GarageBand's voice options into easy-to-understand descriptions, complete with examples of how you might use them in your projects. Whether you're producing a podcast, composing a song, or experimenting with sound design, these tools empower you to bring your ideas to life with ease and creativity. Let's dive into the full range of effects and discover how they can transform your audio!
60s Vocal Chorus
Evoking the lush harmonies of the 1960s, this effect creates a warm, layered sound perfect for recreating the vibe of vintage pop tracks. Use it to add nostalgic charm to your next love ballad.
60s Vocal Flange
A swirling, modulated effect reminiscent of psychedelic rock vocals. Ideal for dreamy, experimental tracks where you want the voice to feel like it's floating through time.
60s Vocal Phaser
Adds a phased, sweeping effect that captures the trippy sound of late 60s counterculture. Perfect for psychedelic jams or adding a hypnotic touch to modern vocals.
Box Talking
This effect mimics the sound of vocals recorded inside a resonant box, delivering a quirky, hollow tone. Great for adding a playful or mysterious twist to spoken word segments.
Bright Vocal
Emphasizes clarity and brightness, making the vocals pop. Perfect for lead singers in upbeat pop or dance tracks needing a sparkly finish.
Classic Vocal
A balanced and clean vocal tone that suits a variety of genres. Use it as your go-to sound for timeless melodies or heartfelt ballads.
Compressed Vocal
Tightly processed vocals that maintain even volume throughout. Ideal for rock or hip-hop where every word needs to cut through the mix.
Dance Vocal
Polished and punchy, this effect ensures your vocals shine on the dance floor. Add it to EDM tracks to command the crowd's attention.
Edge Vocal
A sharp, gritty vocal effect that adds bite and aggression. Perfect for edgy rock anthems or rebellious lyrical delivery.
Fuzz Vocal
Raw and distorted, this effect channels a grungy vibe. Use it to create an alternative, lo-fi aesthetic in your vocal lines.
Narration Vocal
Smooth and clear, optimized for spoken word or storytelling. Ideal for podcasts, audiobooks, or dramatic voiceovers.
Natural Vocal
Unprocessed and clean, this effect delivers an authentic and organic sound. Perfect for acoustic or intimate settings where the singer's voice takes center stage.
Telephone Vocal
Mimics the tinny, midrange sound of a phone call. Use it to add a retro, distant, or industrial quality to your vocals.
Tracking Vocal
A dry, unprocessed effect designed for monitoring during recording. Great for capturing the raw performance before post-production.
Tube Vocal
Warm and rich, this effect recreates the character of vintage tube microphones. Perfect for soulful ballads or jazzy tunes needing a classic touch.
Experimental Voice Options
Change The Formant
Alters the vocal characteristics without affecting pitch, creating unique tonal shifts. Use it to make a voice sound larger or smaller, like a mystical transformation.
Change the Pitch
Quickly adjust vocal pitch up or down for playful or dramatic effects. Great for harmonizing or experimenting with alternate keys.
Deeper Vocal
Adds depth and richness, making the voice sound more resonant and powerful. Ideal for creating a commanding presence in narration or music.
Delay Vocal
Introduces a delay effect, adding an echo-like quality for rhythmic or atmospheric purposes. Perfect for dreamy or spacious compositions.
Helium Vocal
A chipmunk-like effect that raises the pitch, adding a comical, lighthearted vibe. Great for humorous skits or quirky interludes.
Megaphone Vocal
Simulates the grainy, projected sound of a megaphone. Ideal for adding urgency or a commanding tone to vocals.
Monster Vocal
Deep, guttural tones that create a monstrous, menacing voice. Use it to bring creatures to life in your horror or fantasy productions.
Robot Harmony
Creates futuristic, robotic harmonies that sound mechanical yet melodic. Ideal for sci-fi soundtracks or robotic-themed tracks.
Robot Vocal
A metallic, robotic timbre that makes the voice sound artificially synthesized. Great for android characters or tech-inspired music.
Set to Zero Pitch
Completely flattens pitch for an unsettling, emotionless vocal effect. Perfect for eerie or avant-garde productions.
Synthetic Designer Voice
A futuristic, customizable effect that turns vocals into intricate, synthetic soundscapes. Perfect for experimental electronic tracks or avant-garde pieces.
Top 6 Graphic Design Apps Every Macintosh User Should Know About
Discover the must-have Mac graphic applications I rely on daily for editing, enhancing, and creating stunning visuals with ease.
This week, someone asked me which graphic applications I use the most on my Macintosh. It was a great question and inspired me to write this blog post. Graphics are a big part of my daily workflow, whether I'm creating visuals for blog posts, enhancing photos, or designing unique layouts. Here are the six graphic applications I turn to most frequently, along with how I use them.
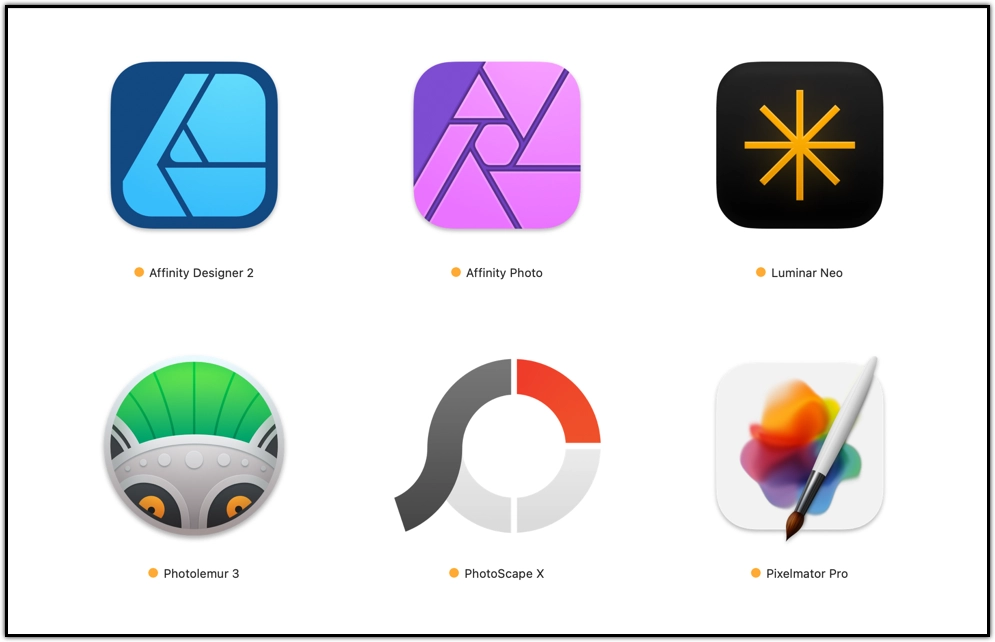
Affinity Designer 2
Affinity Designer 2 is my go-to application for creating productive daily worksheets and graphic layouts. It's a powerful vector design tool, especially handy when I work with EPS files purchased online. Whether I need precise shapes or intricate designs, this app handles it all seamlessly.
Affinity Photo
While I don't use Affinity Photo as extensively, it's my tool of choice for minor photo edits. I haven't upgraded to Affinity Photo 2 because other applications fulfill most of my needs, but it remains a reliable option for quick touch-ups.
Luminar Neo
Luminar Neo is my enhancement powerhouse. When I want to make a photo look stunning, this is the application I use. Its AI tools for sky replacement and photo enhancement give my images a professional touch, perfect for blog visuals or personal projects.
Photolemur 3
For a quick cleanup and enhancement, Photolemur 3 gets the job done. It supports HEIC files, making it an excellent tool for converting them to JPEGs with an added bonus of image enhancement. While Luminar Neo does a better job overall, Photolemur shines when speed is the priority.
PhotoScape X
PhotoScape X is incredibly versatile. I use it mainly to create collages and add special effects to images. Its user-friendly interface and diverse editing features make it a great addition to my toolkit.
Pixelmator Pro
Pixelmator Pro is a standout for creating blog images and even some light video editing. The Remove Background and Super Resolution features have been lifesavers, breathing new life into old graphic files I thought were unusable.
Each of these applications brings something unique to the table, and together they cover all my graphic design and editing needs. Whether I'm crafting a blog post image, enhancing a photo for social media, or working on a personal project, I know I can rely on these tools.
PermalinkTop 5 Macintosh Deals and AI Tools to Watch This Black Friday 2024
Upgrade Your Setup and Sharpen Your Skills with Exclusive Discounts on Software, Storage, and Career-Boosting Training Tools

Here's my annual Black Friday watch posting. Every year I post on things that I am looking for on Black Friday. This year is a bit different, as I really don't need much things.
Here's the deals that I'll be looking for on Black Friday and Cyber Monday.
Top Five Macintosh Items
Notion: This versatile application has evolved significantly, now offering features like a web clipper and enhanced collaboration tools. I'll keep an eye out for potential Black Friday discounts on their subscription plans.
Photolemur: As an AI-driven photo enhancement tool, Photolemur continues to simplify photo editing. Look for deals that bring the price below previous offers, making it an attractive addition to your software suite.
Wondershare Filmora: Known for its user-friendly video editing capabilities, Filmora often provides Black Friday promotions on its software and subscription packages. This could be an opportune time to upgrade or expand your video editing tools.
uDemy Courses: With a vast array of courses, uDemy frequently offers substantial discounts during Black Friday, sometimes as low as $9.99 per course. This is an excellent chance to acquire new skills or deepen your knowledge in areas of interest.
256 GB Flash Drive: Storage devices, such as 256 GB Extreme flash drives, often see significant price drops during Black Friday. Retailers like Amazon, Best Buy, and Target may offer competitive deals, making it a good time to enhance your storage solutions.
AI Tools and Training Discounts
Fliki: An AI tool that converts text into videos using AI voices and auto-generated clips. During Black Friday 2024, Fliki is offering 50% off annual plans, providing 7,200 minutes of video creation with over 2,000 voice options in 80+ languages.
Scalenut: An AI writing platform featuring a range of templates for blogging, copywriting, business, videos, and emails. It also offers powerful SEO optimization tools. For Black Friday, Scalenut is offering 60% off on its Max plans for a lifetime, along with 3x limits and free add-ons like Link Manager, OnPage Pro, and AI Humanizer.
Coursera: An online learning platform offering courses across various fields. During Black Friday and Cyber Monday, Coursera provides discounts on courses and subscriptions, making it an excellent opportunity to acquire new skills relevant to your job search.
Skillshare: Known for its wide range of courses, Skillshare often offers Black Friday deals, providing access to numerous classes that can enhance your professional skills.
LinkedIn Learning: Offers a vast library of professional courses. During Black Friday, they may provide discounts on their subscription plans, allowing you to learn new skills pertinent to your career advancement.
Monitoring these items and tools during the Black Friday sales can help you secure valuable additions to your Macintosh setup and enhance your skill set at favorable prices.
PermalinkAbout
A Mac veteran since 1989, I'm here to share my experience with tips and tricks every Friday. Witnessing the evolution of Mac software and hardware firsthand, I've gained a deep understanding of how these machines work and can help you troubleshoot any issues that may come up.
Check out all the blog posts.
Blog Schedule
| Tuesday | QA |
| Wednesday | Veed |
| Thursday | Business |
| Friday | Macintosh |
| Saturday | Internet Tools |
| Sunday | Open Topic |
| Monday | Media Monday |
Other Posts
- Christmas Graphic
- Affinity Easter Egg
- Best Macintosh Apps
- Create a Custom Silence Placeholder for Final Cut Pro
- BBEdit Canonize Command
- TextSoap Editor
- Biff 2.0
- Expand Your iMac 2019 USB-C Ports with a Simple Adapter Solution
- Recent Applications in the Catalina Dock
- Missing Disk in Sidebar using Big Sur
- GarageBand: A Podcasting Tool Worth Exploring
- Apple's App Store Search
- PhotoScape X Blog Tools
- Navigating the Legacy of Sorenson Video Codec
- Snag-it As a Quick Image Resize Tool