
Backup Voice Memos
Easy Way to Backup You Audio Files
This past week I was trying to update my iPad to iPadOS 17 but ran into an issue with disk space. Turns out the resource that was using the most amount of space was my Voice Memos.
I wanted to back up my Voice Memos before deleting the files. The best way that I found to do that was on my Macintosh computer.
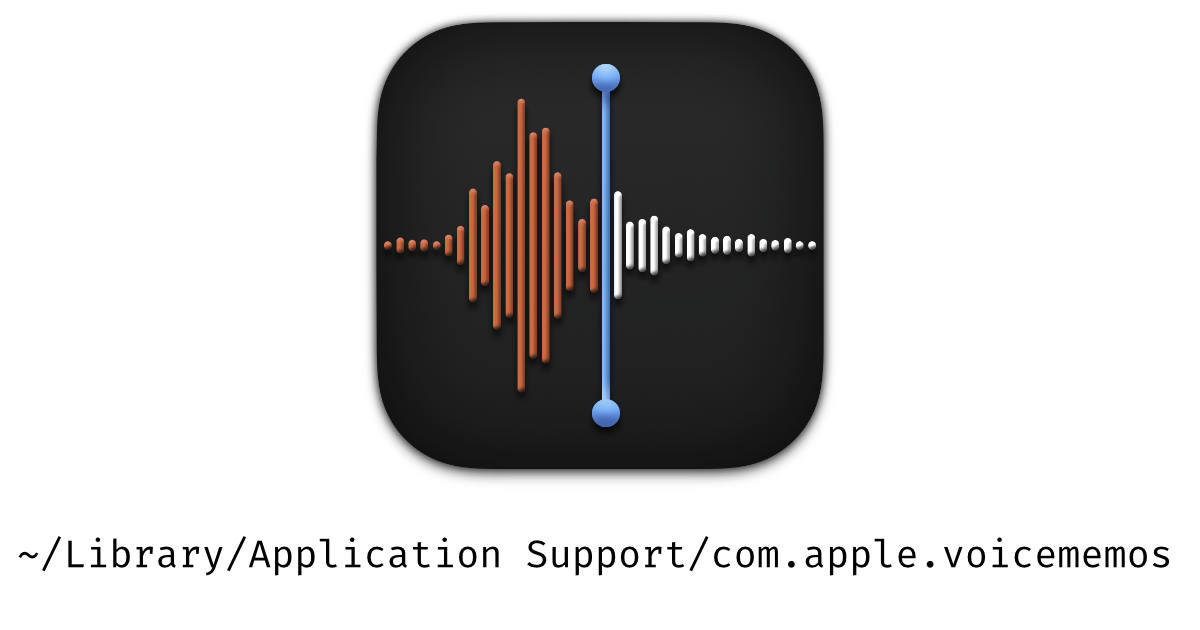
If you have Voice Memos saved to the Apple Cloud, you can find the files in the Application Support folder.
Here's the file path:
~/Library/Application Support/com.apple.voicememos
Open up the Recording folder and you should see the VoiceMemo files. If you don't chances are you are not storing voice memos in the iCloud.
To back up the files, simply drag and drop the Recording folder to an external device. Obviously, check to make sure that the files have moved over before taking any actions.
Once completed, I then went on my iPad and started deleting Voice Memos that I didn't absolutely need to have on the iPad.
I am providing this tip here because I googled "How to backup Voice Memo" and couldn't find any practical tips - many of them were 5+ years old and weren't very helpful.
PermalinkCreate Video DVD from Disk Images
macOS Ventura
Due to the limited space on DVDs these days, I rarely burn them anymore. Instead, I backup my files using external hard drives and flash drives. This gives me more storage space and allows me to access my files from any device. Plus, it's much more convenient than burning DVDs.
Every once in a while, I am asked to create a DVD from a video.
Currently, I'm working on a video project, and I wanted to burn the video to a DVD. To accomplish that, I created a Disk Image, which I'll explain more about next week.
The creation of a Video DVD under macOS Ventura is a little tricky. Toast 19 Pro does not allow you to create a Video DVD from a disk image.

The following steps will guide you through the process of creating a playable DVD in macOS 13.5.2:
Step 1: Create a video Disk Image using Final Cut Pro or another video editor. (More Details about how to do this next week in Final Cut Pro. )
Step 3: Double Click on the Disk Image to open and mount it.
Step 4: Select the disk image in the Finder side bar.
Step 5: With the window selected, go under the Finder File menu and select "Burn to Disk." (Note: If you don't see "Burn Disk" that means you don't have a DVD burner connected.)
Step 6: You will be asked in insert a disk. (Your content must fit in on the disk or the dialog box won't go away.)
Step 7: You will then be asked to confirm that you want to burn the content to the disk. Use the Maximum Possible settings as it will take a long time if you had a different setting.
That's it! The DVD will start to burn. Once completed the new disk will mount and the video will play.
PermalinkYouTube Shorts in Final Cut Pro
Simple Settings
Create a blog using markdown about the proper Project settings in Final Cut Pro for YouTube Shorts. Make sure to use the Vertical video format and 1080x1920 Resolution.
When creating YouTube Shorts using Final Cut Pro, it is important to configure the project settings correctly to ensure optimal results. To meet the requirements of YouTube Shorts, you should use the vertical video format and set the resolution to 1080x1920. This blog post will guide you through the necessary steps to achieve the proper project settings in Final Cut Pro.

Step 1: Creating a New Project
Launch Final Cut Pro and click on "File" in the menu bar.
Select "New" and then "Project" from the dropdown menu.
In the Video Properties section, set the format to "Vertical."
Enter the resolution as 1080x1920.
Adjust the frame rate according to your preference, but for YouTube Shorts, it is recommended to use 29.97 frames per second (fps).
Step 2: Saving and Importing Media
Save your project by clicking on "File" in the menu bar and selecting "Save" or pressing Command+S.
Import your media files by clicking on "File" and selecting "Import Media," or by using the shortcut Command+I.
Drag and drop your media files into the timeline to start editing your YouTube Shorts.
Step 5: Exporting the Final Video
Once you have finished editing your YouTube Shorts, click on "File" in the menu bar and select "Share."
Select the "YouTUbe & Facebook"
Click "Next" and choose the destination folder for your exported video.
Finally, click on "Save" to export your YouTube Shorts video with the proper project settings.
By following these steps, you can ensure that your YouTube Shorts videos are created with the proper project settings in Final Cut Pro. Remember to always preview your videos before uploading them to YouTube to ensure they meet the desired quality and format requirements.
PermalinkBack to Macintosh Basics
Time to Evaluate Your Computer Use
As the summer sun begins to wane and children across the country prepare to head back to the classroom, it's not just the students who can benefit from a fresh start. For Macintosh users, this is the perfect time to embrace a "Back to School" mentality and give your digital life a much-needed makeover. Just as students clean out their backpacks, sharpen their pencils, and set new goals for the school year, Mac users can do the same for their computers and digital tasks. Today, we'll explore how you can adopt a back-to-school mindset for your Mac and make the most of your digital experience.
Don't forget to take screenshots before you make changes so you can see progress.

Declutter Your Desktop
Start by cleaning up your digital workspace. Just like you wouldn't want a messy desk in the classroom, a cluttered desktop can make it difficult to find what you need on your Mac. Create folders, organize files, and delete unnecessary items. Consider setting a beautiful, inspiring desktop wallpaper to give yourself a fresh visual start.
I like to keep my desktop clean. Usually, the files/folders on the desktop are things that I am currently working on. As soon as I am done with it, I file it away off the desktop.
Update Your Software
Ensure that your Mac and all your applications are up to date. Regular updates not only bring new features but also enhance security and performance. Don't forget to check for updates in the Mac App Store as well as for third-party apps.
Apple lets you know when your apps have updates but it's the third party apps you should check.
If your app hasn't been updated in the past year, maybe it's time to step up to something better?
Backup Your Data:
Backing up your important files and data is like having a safety net. Use Time Machine or a reliable cloud backup service to safeguard your digital life. This ensures that even if something goes wrong, you won't lose precious information.
Streamline Your Apps:
Take a look at the apps you have installed. Do you use them all regularly? If not, consider uninstalling or archiving those that are just taking up space. This will not only free up storage but also make your Mac run more smoothly.
This morning I looked at the of Apps that I have in my Application folder. I was surprised to see that I had 172 apps. I think many apps can safely be removed from the main computer.
Set Digital Goals:
Just as students set academic goals for the school year, you can establish digital goals for yourself. Whether it's improving your productivity, learning a new skill, or becoming more organized, having clear objectives can help you make the most of your Mac.
Embrace Automation:
Macs come with powerful automation tools like Siri Shortcuts and Automator. Explore these features to automate repetitive tasks, save time, and increase efficiency. This is a great way to supercharge your digital productivity.
Don't forget LaunchBar and Keyboard Maestro!
Stay Secure
Digital security is paramount. Ensure your Mac is protected with strong passwords, enable two-factor authentication, and use reliable antivirus software. Being proactive about security will give you peace of mind.
Digital Detox
Just as students need breaks from studying, you need breaks from your screen. Consider scheduling regular digital detox periods where you disconnect from your Mac and enjoy some screen-free time. It's essential for maintaining a healthy work-life balance.
Learn Something New
Take advantage of the resources available on your Mac to expand your knowledge. Whether it's through online courses, tutorials, or ebooks, make learning a part of your back-to-school routine.
Reflect and Adapt
Periodically review your digital habits and make adjustments as needed. Just like students adapt their study strategies, you should adapt your digital routines to suit your evolving needs.
Final Thoughts
In conclusion, the back-to-school season isn't just for students. It's an opportunity for Macintosh users to adopt a fresh start mentality and optimize their digital experience. By decluttering your desktop, updating software, setting goals, and staying secure, you can make the most of your Mac and have a productive and enjoyable year ahead. So, get ready to hit the digital books and embrace a new beginning on your trusty Macintosh!
PermalinkStuffit Expander
Unable to Uncompress Old SIT formats
Stuffit Expander, a popular file compression and decompression application, has been widely used for many years. However, it is important to note that the application no longer supports uncompressing old SIT archives. This change has implications for users who still have a large number of files stored in this outdated format.
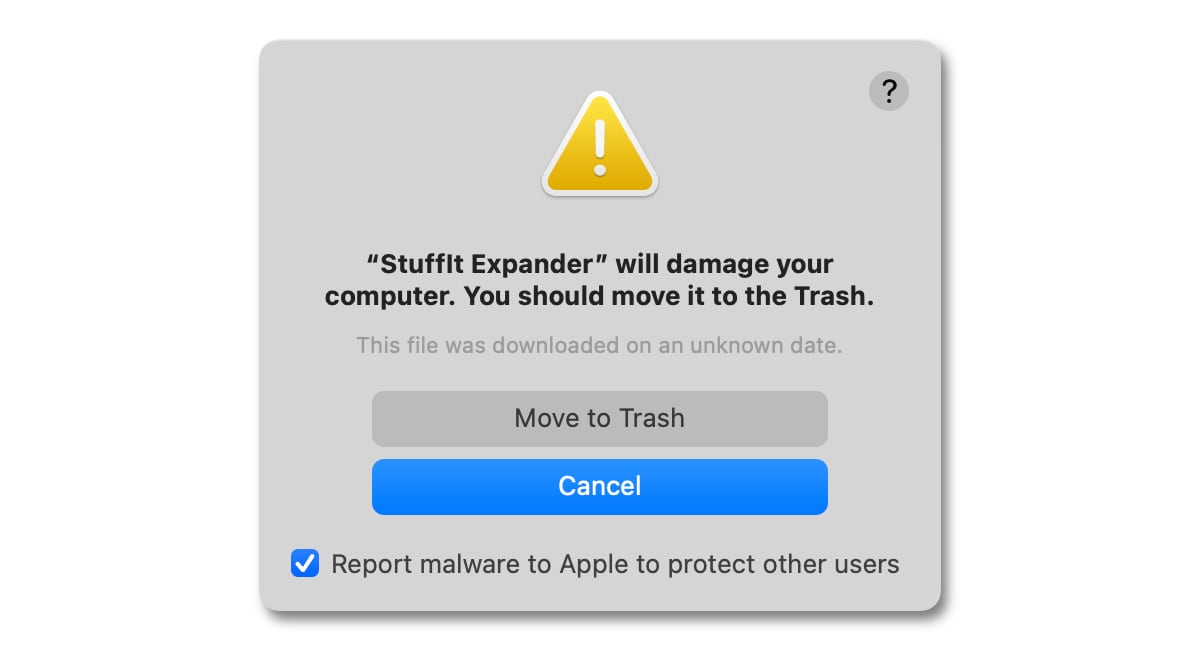
An alert when I tried to open up an old version of Stuffit Expander
SIT archives were commonly used in the past to compress files and save disk space. Stuffit Expander was the go-to tool for decompressing these archives, making it easy for users to access their files. However, as technology evolves and file formats change, certain formats become obsolete.
Unfortunately, SIT archives fall into this category. The SIT format was developed by Aladdin Systems, the creators of Stuffit Expander, but it has since been phased out due to its limited compatibility and the emergence of more efficient compression formats. As a result, Stuffit Expander has stopped supporting the uncompression of SIT archives.
Unable to Open Old Archives
This shift in support has left users who still rely on SIT archives in a predicament. They can no longer use Stuffit Expander to extract the contents of these archives, potentially rendering their files inaccessible. Therefore, it is crucial for users to be aware of this change and take appropriate actions to migrate their files to a more modern and supported file format.
Fortunately, there are alternative solutions available for users who need to access their old SIT archives. Various third-party applications and online services offer support for decompressing SIT archives, allowing users to retrieve their valuable files. These alternatives may not provide the exact same user experience as Stuffit Expander, but they do serve the purpose of accessing the contents of SIT archives.
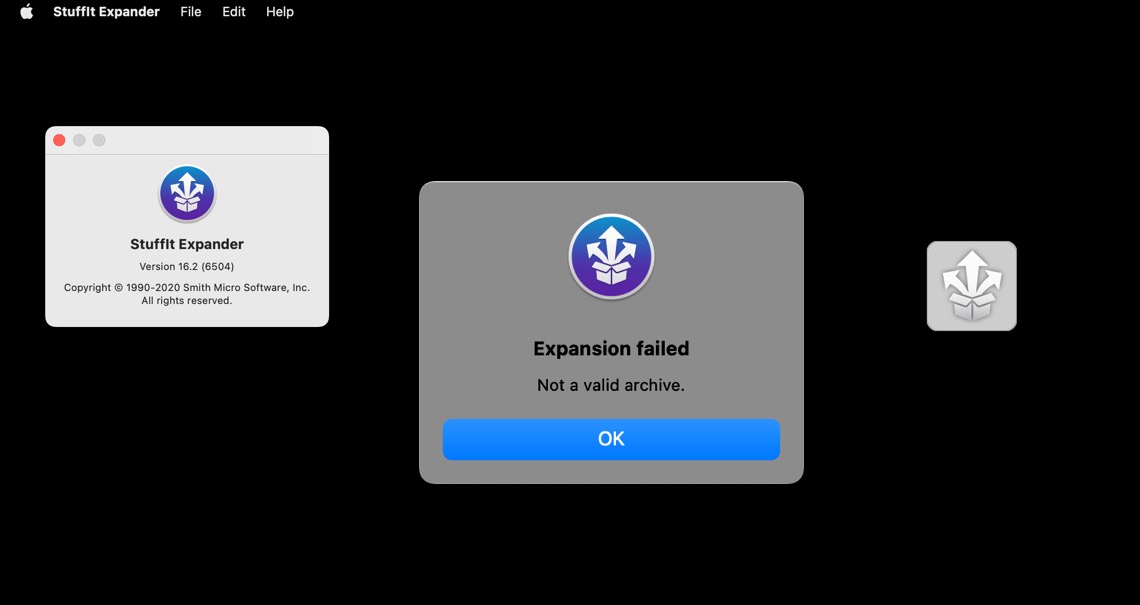
I got this error when trying to expand a split SIT archives
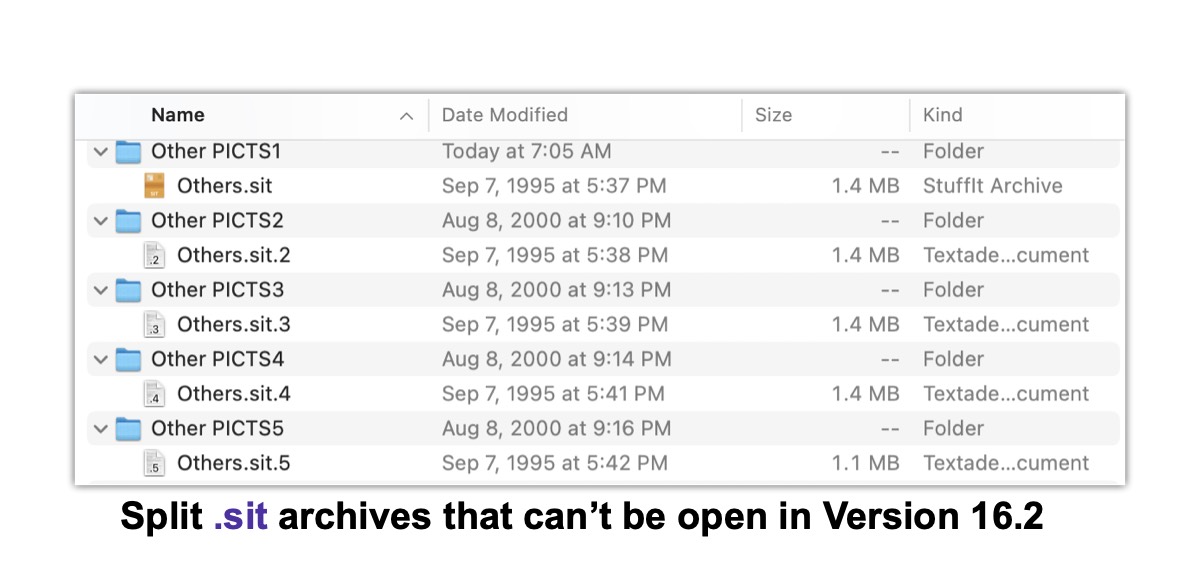
My quick solution was to unzip this using version Stuffit Expander 16.06. That version asked me for each segment of the file.
Plan for Future Changes
In addition to exploring alternative solutions, it is also recommended that users consider converting their SIT archives to a more widely supported format. By converting the archives to formats such as ZIP or RAR, users can ensure long-term accessibility and prevent any future compatibility issues. (Especially true with a split .SIT file.)
In conclusion, Stuffit Expander, a once indispensable tool for uncompressing SIT archives, no longer supports this outdated file format. Users who still have files stored in SIT archives should be aware of this change and take appropriate actions to access their files. Exploring alternative solutions and converting the archives to a more widely supported format are key steps to ensure long-term accessibility and prevent any potential loss of data.
PermalinkOcenAudio Vs Fission
Which one is better?
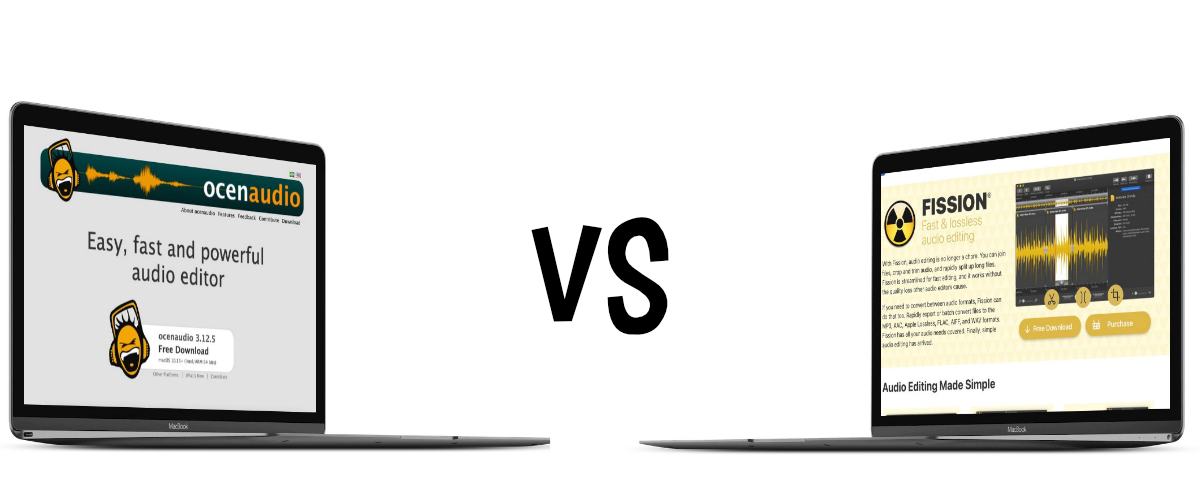
When it comes to audio editing software, there are numerous options available in the market. Ocenaudio and Rogue Amoeba Fission are two popular choices that offer a range of features for audio enthusiasts. In this blog post, we will delve into the key differences between these two software applications, allowing you to make an informed decision based on your specific needs.
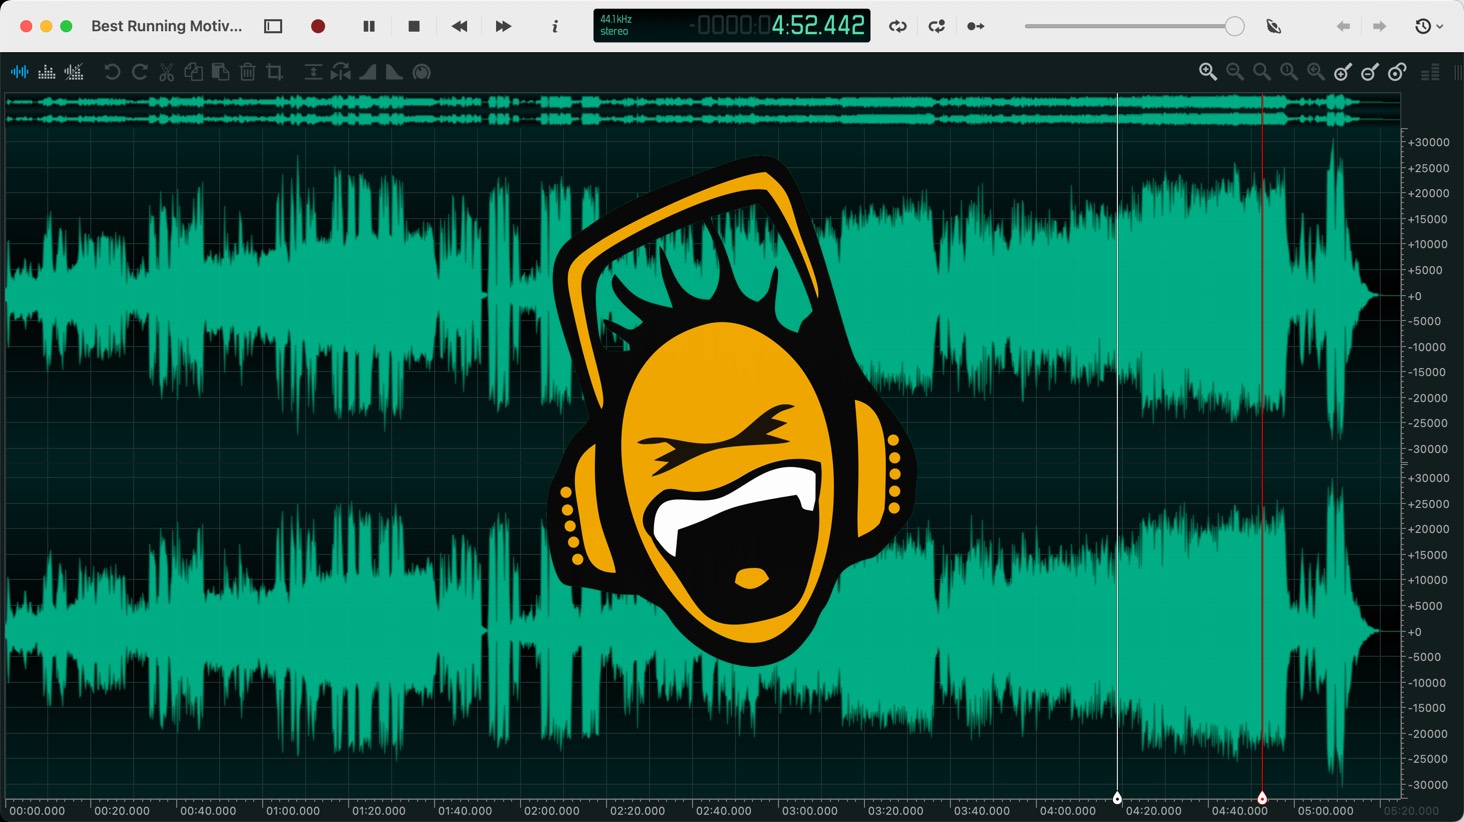
OcenAudio Editing Window
User Interface
One of the primary differences between Ocenaudio and Rogue Amoeba Fission lies in their user interfaces. Ocenaudio boasts a clean and intuitive interface that is easy to navigate, making it suitable for both beginners and experienced users. On the other hand, Rogue Amoeba Fission offers a more visually appealing interface with a modern design, which may appeal to those seeking a sleeker look.
Audio Editing Capabilities
When it comes to audio editing capabilities, both Ocenaudio and Rogue Amoeba Fission offer a wide range of features. However, there are some notable differences between the two.
Ocenaudio allows for multi-selection editing, making it easier to make changes to multiple parts of an audio file simultaneously. It also provides real-time previews of effects, allowing users to hear the changes before applying them.
Rogue Amoeba Fission, on the other hand, specializes in lossless audio editing, making it ideal for those who prioritize audio quality. It offers a range of effects and filters, allowing users to enhance their audio files with precision and control. Additionally, Fission supports batch processing, enabling users to apply changes to multiple audio files in one go.
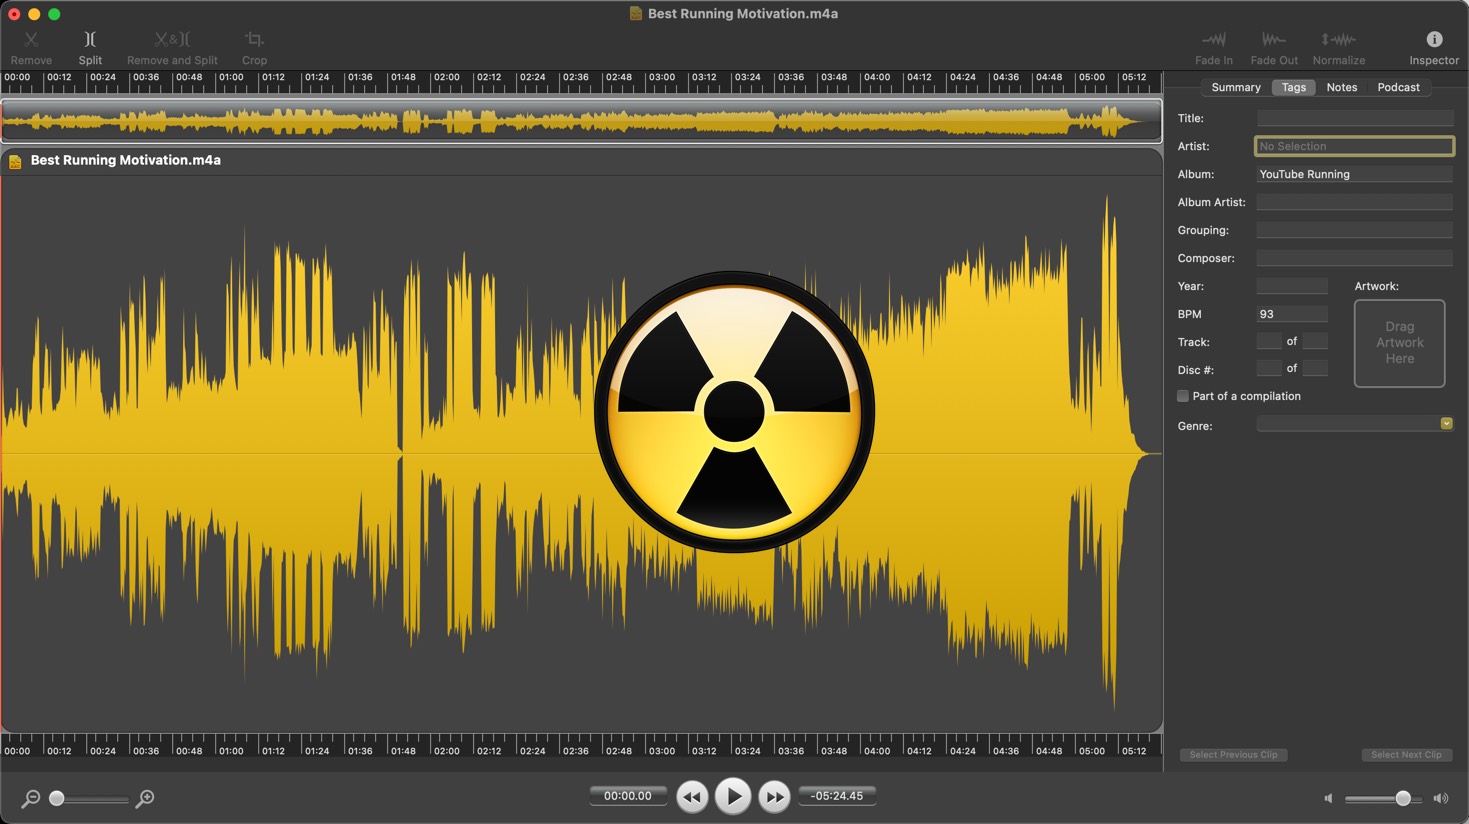
Rogue Amoeba Fission Editing Window
Compatibility
Another area where Ocenaudio and Rogue Amoeba Fission differ is compatibility. Ocenaudio is available for Windows, macOS, and Linux, making it a versatile choice for users across different operating systems. On the contrary, Rogue Amoeba Fission is exclusively available for macOS, limiting its accessibility to users on other platforms.
Price and Licensing
Considering the price and licensing options, Ocenaudio takes the lead in terms of affordability. It is available as a free software, offering a comprehensive set of features without any cost. On the other hand, Rogue Amoeba Fission is a paid software, although it does offer a trial version for users to explore its capabilities before purchasing.
Five Things I Learned
Ocenaudio has many effects including Silence, Reverse, Invert, Smooth, Remove DC, Normalize, Amplitude, Filter, Equalization, Delay, Dynamics Processing, Time and Pitch, Noise Reduction and more. Oceanaudio also supports VST plugins. Fission has Normalize
It's much easier to split audio in Fission than in Ocenaudio. In Ocenaudio, you have to set up the markers and then split at the markers. In Fission, it seems easier to split at the head.
Ocenaudio has left and right tracks visible in the Waveform view, but you cannot edit a particular track. For instance, you cannot edit so a portion of the audio only plays on the right track.
Ocenaudio allows you to record audio, while Fission only allows you to edit audio.
Ocenaudio claims to be fast. I took it to the test . I wanted to see how fast it could open a 183.8 MB MP3 file. I compaired this to other popular audio editors. The test was: How long would it take from double clicking on the sound file in the Finder to when I could actually edit the file.
- Audacity took 17.29 Seconds
- OcenAudio took 14.06 Seconds
- Microwave Express took 14.36 Seconds
- Fission took 8.25 Seconds
Conclusion
In summary, both Ocenaudio and Rogue Amoeba Fission are powerful audio editing software options. The choice between the two ultimately depends on your specific requirements. While Ocenaudio offers a user-friendly interface, multi-selection editing, and cross-platform compatibility, Rogue Amoeba Fission excels in lossless audio editing and provides a visually appealing interface. Additionally, the pricing models differ, with Ocenaudio being free and Rogue Amoeba Fission requiring a purchase. Consider your editing needs, operating system, and budget to determine which software aligns best with your goals.
If you already have Rogue Amoeba Fission, you might as well download OcenAudio and have it just in case you need the filters.
PermalinkNavigating Macos Excel Spreadsheet
How to quickly jump to different cells
Excel for Mac offers a variety of ways to navigate around your spreadsheets. In this blog post, we will discuss two of the most popular methods: using the Name Box and the Go To dialog.
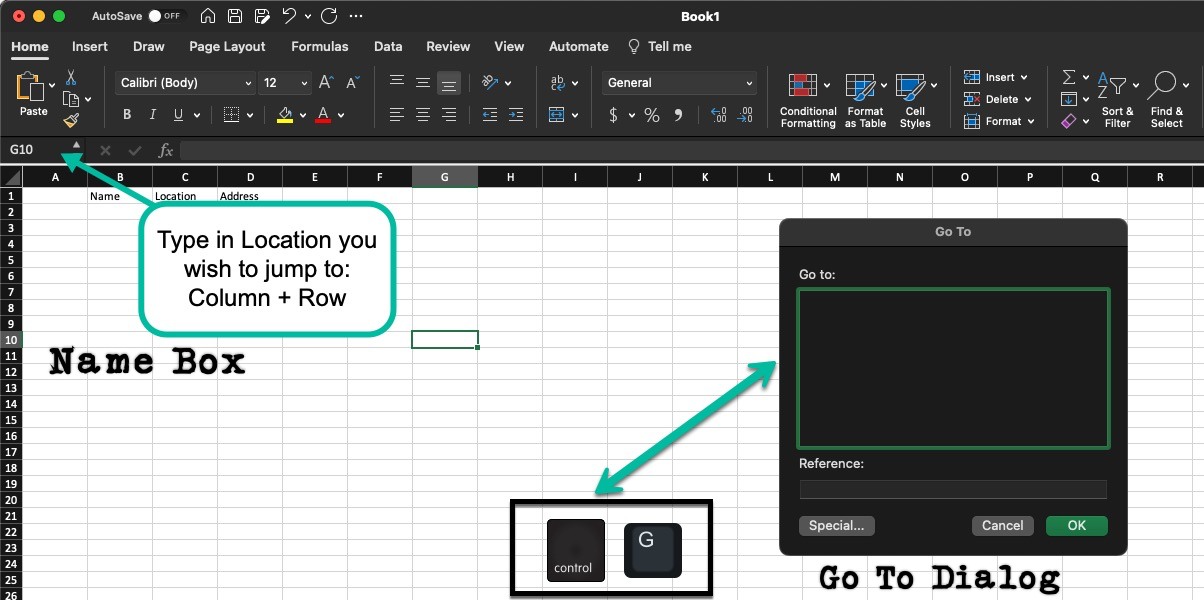
Using the Name Box
The Name Box is located at the top left corner of the Excel window. It displays the address of the active cell. You can use the Name Box to quickly navigate to any cell in your spreadsheet by typing its address. For example, to navigate to cell A1, you would type "A1" in the Name Box and press Enter.
You can also use the Name Box to create named ranges. Named ranges are a way to give a descriptive name to a group of cells. This can be helpful for making your spreadsheets easier to read and understand. To create a named range, type the name of the range in the Name Box, followed by an equal sign (=) and the address of the range. For example, to create a named range called "Sales" for the cells A1:B10, you would type "Sales=A1:B10" in the Name Box and press Enter.
Once you have created a named range, you can use it to navigate to the range by typing its name in the Name Box and pressing Enter. For example, to navigate to the Sales range, you would type "Sales" in the Name Box and press Enter.
Using the Go To Dialog
The Go To dialog is a more powerful way to navigate around your spreadsheets. It allows you to navigate to specific cells, ranges, and worksheets by name. To open the Go To dialog, press Control+G.
Type the desired cell address, range name, or worksheet name in the Go to box and press Enter.
The Go To dialog is a powerful tool that can help you quickly and easily navigate around your Excel spreadsheets. By learning how to use it, you can save time and improve your productivity.
PermalinkColorful Icons on my External Drive
Creative Way to Spice up your drive
In the last few days I have been decluttering my 2TB external hard drive. I never really organized it before and I just threw files on the drive whenever I wanted to store them.
The intention was to create a more manageable file structure, and to organize things in such a way that the information could be easily located - rather than having to rely on searching to find it.
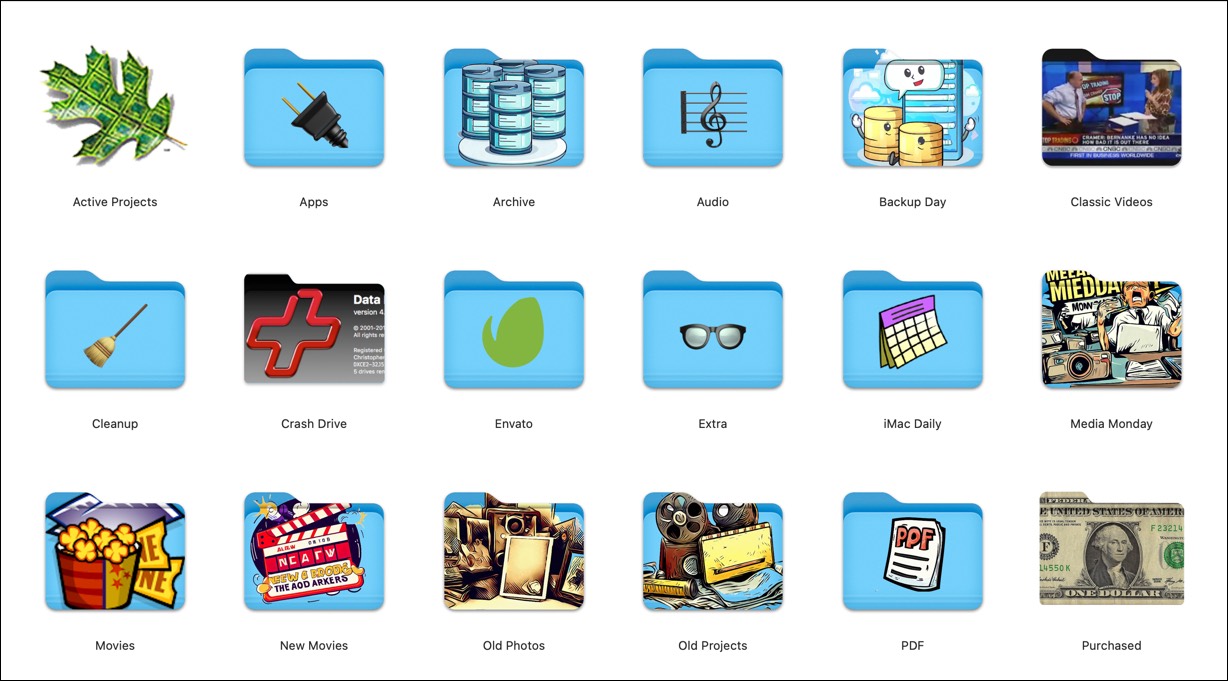
Then once I created the folders, I decided to give the listing a little more color by adding a few icons to the folders. Here is what the current layout of the drive looks like:
Icons Icons Icons
My method of creating all the icons was by using Image2Icon. Some of the icons are based on emojis, and others are based on old images that I had in my folders.
The icons created for Archive, Backup Day, Media Monday, Movies, New Movies, Old Photos & Old Projects are all made with Microsoft Image Creator powered by DALL-E. I simply typed in the prompt and then selected the image I thought best matched the contents of the folder.
DALL-E can generate 4 images at a time in response to a prompt - so I had some good ideas to pick from.
Sample Prompts:
- Old Projects as cartoon
- Old Photos as a cartoon
- Media Monday as a cartoon
- Backup of data files as a cartoon
Simple Numbers as Icons
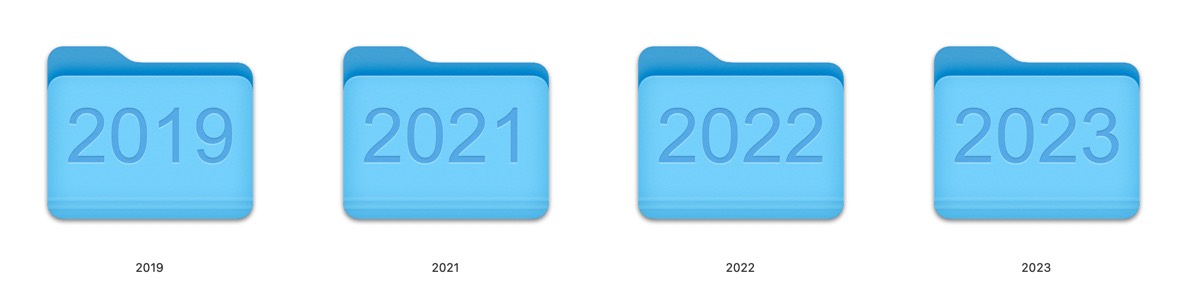
Some of the folders have years on them as well, so it is easier to find the year that I am looking for. As you can see in the image above, the year is much easier to see than the folder name.
Did You Know:The first form of document management was the filing cabinet, invented by Edwin Grenville Seibels in 1898. Seibels' invention, the vertical file system, revolutionized record keeping by creating an easily understandable system that could organize and store files.
In Conclusion
By using the create image icons, I am able to brighten up the drive. Instead of seeing borning blue icons, I can now see something useful.
As a result of using the custom icons, I am able to quickly view the main folder and navigate my way to the correct location.
This is like putting a sign on the side of a highway: instead of confusing drivers with blank white space, they are able to quickly see the sign and get to their destination without any confusion.
Best way to go full screen using Chrome
Full Screen is best on MacBook

In today's digital age, maximizing screen real estate has become increasingly important for an immersive browsing experience. Whether you're watching videos, presenting slideshows, or simply want to focus on a single website without distractions, going full screen on Chrome for MacOS can greatly enhance your browsing experience. In this blog post, we will explore the best way to go full screen on Chrome, providing you with a hassle-free method to make the most out of your browsing sessions.
Keyboard Shortcut
The simplest and quickest way to go full screen on Chrome is by using a keyboard shortcut. MacOS offers a built-in shortcut that allows you to toggle between full-screen and regular mode effortlessly. Follow these steps to go full-screen using Chrome on MacOS:
- Open Chrome on your Mac.
- Navigate to the webpage you want to view in full screen.
- Press the "Control" key, along with the "Command" key, and the "F" key simultaneously.
- Voila! Your Chrome browser will now be in full-screen mode, occupying the entire display.
Conclusion
Going full screen on Chrome for MacOS is a convenient way to optimize your browsing experience. Whether you prefer using keyboard shortcuts, the menu bar option, or the right-click context menu, Chrome offers multiple methods to suit your preferences. By following the steps outlined in this blog post, you can effortlessly transition into full-screen mode and enjoy a more immersive and focused browsing experience. So go ahead, try out these methods, and make the most of your Chrome browsing sessions on MacOS.
PermalinkSnag-it As a Quick Image Resize Tool
Easy way to quickly resize an image
In today's fast-paced digital age, image resizing has become an essential skill for anyone working with visual content. Just as you don't need a nuclear power plant to make a simple cup of coffee, you don't require complex tools for basic image resizing. Snag-it, a popular screen capture and editing software, offers simple yet effective ways to resize photos. In this blog post, we'll explore how Snag-it can be your go-to solution for resizing images without any unnecessary hassle.
The Art of Making Coffee
Before delving into image resizing, let's draw an analogy with making coffee. While there are high-tech espresso machines and intricate brewing methods available, sometimes all you need is a simple coffee filter, hot water, and your favorite ground coffee to enjoy a satisfying cup. Similarly, when it comes to image resizing, you don't always need complicated software or advanced editing techniques. Snag-it provides basic yet powerful tools to accomplish the task effortlessly.
Snag-it: Your Image Resizing Companion
Snag-it is a versatile software that offers a range of image editing features, including intuitive resizing options. Here are a few basic ways Snag-it can help you resize images effectively:
- Percentage Resizing: Snag-it allows you to resize an image by a specific percentage, maintaining its original aspect ratio. Whether you want to decrease or increase the size, simply enter the desired percentage, and Snag-it will adjust the image accordingly.
- Custom Dimensions: If you need precise control over the image size, Snag-it enables you to specify custom dimensions. This feature comes in handy when you have specific requirements for image sizing, such as resizing for website banners or social media profiles.
- Maintain Aspect Ratio: One of the crucial aspects of image resizing is preserving the original proportions. Snag-it ensures that the aspect ratio remains intact while resizing, preventing any unwanted distortion or stretching.
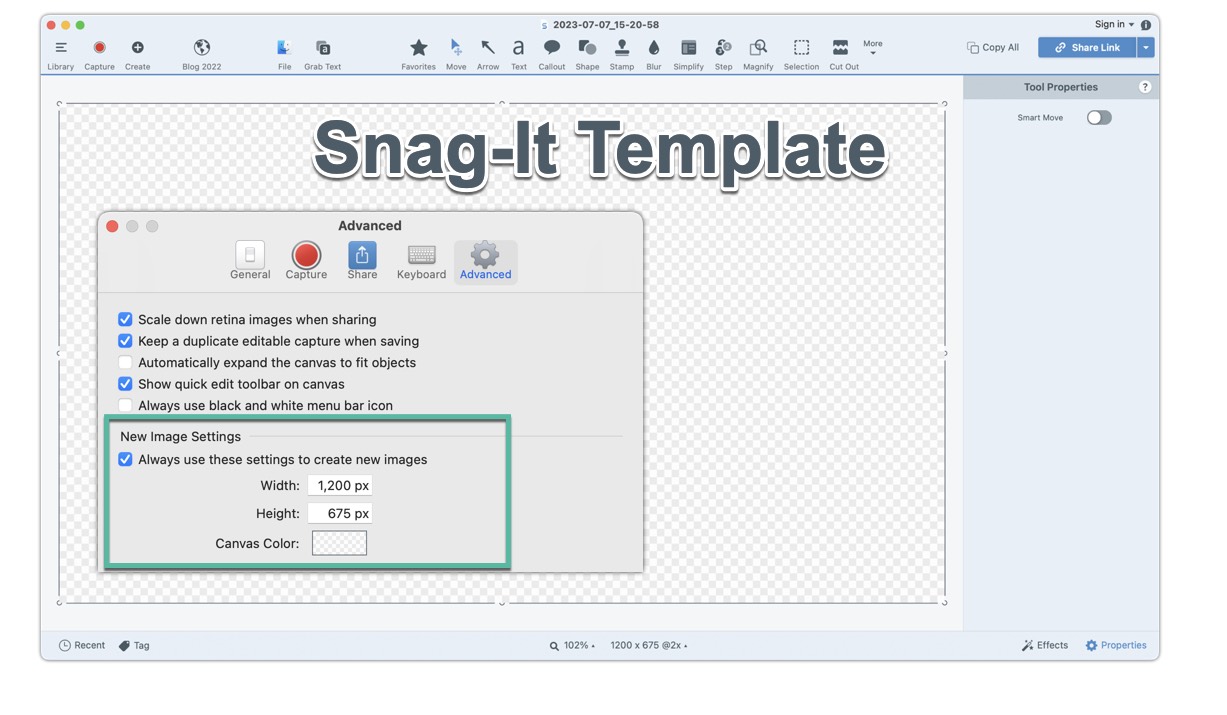
How I Use it
When I create a new image in Snag-it I have a particular width and height set up: 1200x675. I can easily "drag and drop" a photo to the blank template and if the image is too big, I can see the boundaries that I have set up. This is exactly how it works in Affinity Photo and Pixelmator Pro.
Snag-it is great because it's a one-button click to create the blank template. Using the other apps is a multi-step process as I may need to open the app and then find the template.
I can be so much more productive with Snag-it when I have a simple "Crop to Fit" task.
Simplicity and Convenience
Snag-it's user-friendly interface makes image resizing a breeze, even for those without extensive editing experience. With its intuitive controls and straightforward options, you can quickly resize images without getting caught up in a web of complex settings. Whether you're a content creator, social media manager, or simply an individual looking to resize personal photos, Snag-it offers simplicity and convenience without compromising on quality.
Conclusion
Just as you don't need a nuclear power plant to make a cup of coffee, you don't require complex software for basic image resizing. Snag-it offers a range of simple yet effective tools that enable you to resize images with ease. Its intuitive interface, percentage resizing, custom dimensions, and aspect ratio preservation make it a reliable choice for anyone seeking quick and hassle-free image editing.
PermalinkAbout
A Mac veteran since 1989, I'm here to share my experience with tips and tricks every Friday. Witnessing the evolution of Mac software and hardware firsthand, I've gained a deep understanding of how these machines work and can help you troubleshoot any issues that may come up.
Check out all the blog posts.
Blog Schedule
| Saturday | Internet Tools |
| Sunday | Open Topic |
| Monday | Media Monday |
| Tuesday | QA |
| Wednesday | Veed |
| Thursday | Business |
| Friday | Macintosh |
Other Posts
- Keyboard Maestro
- Path Finder 2021
- PhotoScape X December Update
- TabLauncher Lite
- Dealing with the Grayed out song Listing in iTunes
- Amadine
- Top 5 Macintosh Deals and AI Tools to Watch This Black Friday 2024
- FFMpeg
- AVIF Support
- Delicious Library
- Soundtrack Pro
- The Magic Mouse No-Mousepad Experience
- Christmas Graphic
- Bootstrap 4 BBEdit Tools
- Fix GoPro FishEye on a Mac